1786-001 en/2022-08
Instructions for use
High-performance ultrasonic baths
Dokument: 1786-001
Sprache: en
Version: 2022-08
Page 1: ...1786 001 en 2022 08 Instructions for use High performance ultrasonic baths Dokument 1786 001 Sprache en Version 2022 08 ...
Page 2: ...2 38 1786 001 en 2022 08 2022 1 2 GmbH Co KG Heinrichstr 3 4 12207 Berlin Germany Phone 49 30 76880 0 Fax 49 30 7734699 info bandelin com Certified in accordance with ISO 9001 and ISO 13485 ...
Page 3: ...sed 9 2 8 Disposal of sonication liquid 9 2 9 Erosion of the oscillating tank 10 2 10 Preventing damage to the ultrasound bath 11 2 11 Disturbance of wireless communication 11 2 12 Safety stickers on the ultrasound bath 11 3 Design and function 12 3 1 Structure 12 3 2 Control panel 13 3 3 Function 14 4 Preparation for operation 15 4 1 Installation site requirements 15 4 2 Fitting ball valve 15 4 3...
Page 4: ...g sonication fluid 23 5 8 Insert objects to be treated 24 5 9 Remove treated objects 25 5 10 Empty the oscillating tank 26 5 11 Troubleshooting a malfunction 27 6 Maintenance 28 6 1 Cleaning and maintaining the ultrasound bath 28 6 2 Tests 29 6 3 Performing the foil test 30 6 4 Repair 33 7 Disposal 34 8 Device information 35 8 1 Technical data 35 8 2 Ambient conditions 35 8 3 CE conformity 35 ...
Page 5: ...hese instructions for use before using the ultrasound bath Pay special attention to chapter 2 Safety If you pass this ultrasound bath on to others please enclose these instructions for use Contact your specialist dealer or BANDELIN if any of your ques tions are not answered in these instructions for use Information on service can be found in chapter 6 4 Repair Illustrations are provided as example...
Page 6: ...sed as the sonication liquid Information on the sonication liquid can be found in chapter 5 2 Sonication liquid Objects to be treated may not be placed on the bottom of the oscil lating tank They must be placed in the sonication liquid in an insert basket or another suitable container In the case of stains discolouration rust etc a deep cleaning can be performed using special detergents and indire...
Page 7: ... Only connect the ultrasound bath to a power outlet with a grounded socket If you notice a defect in the ultrasound bath disconnect the mains plug immediately Do not connect a defective ultrasound bath to the mains Repairs should only be carried out by the manufacturer See chapter 6 4 Repair Position the ultrasound bath so that it is easy to unplug the mains connection at any time and without diff...
Page 8: ...ceps Allow the sonication objects to cool before touching them Lifting from the handles can cause the hands to touch the edge of the oscillating tank which can be very hot After operation allow the ultrasound bath to cool down before lifting it for emp tying Non aqueous fluids can heat up many times faster than water A possible flashpoint can be reached or exceeded after a very short sonication ti...
Page 9: ...n over the ultra sound bath in order to avoid vapours from coming into contact with the eyes or from being inhaled Place a lid on the ultrasound bath during operation In case of dangerous vapours use a suction device Observe the information on the label and in the safety data sheet of the preparation Keep the preparations away from children and untrained per sons 2 8 Disposal of sonication liquid ...
Page 10: ...trasound bath if you notice a leak Disconnect the mains plug immediately Empty the oscillating tank You can extend the lifespan of the oscillating tank by observing the following instructions Replace sonication liquid that is visibly contaminated by parti cles Only use demineralised water DI water with an ultrasound compatible preparation Do not use chemicals that contain or release chloride ions ...
Page 11: ... Make especially sure that the heating is switched off when the oscillating tank is empty The fill level must always be at or slightly above the filling level mark 2 11 Disturbance of wireless communication The ultrasound bath may interfere with other wireless communica tion ultrasound baths in the immediate vicinity such as mobile phones WLAN devices Bluetooth devices If interference occurs with ...
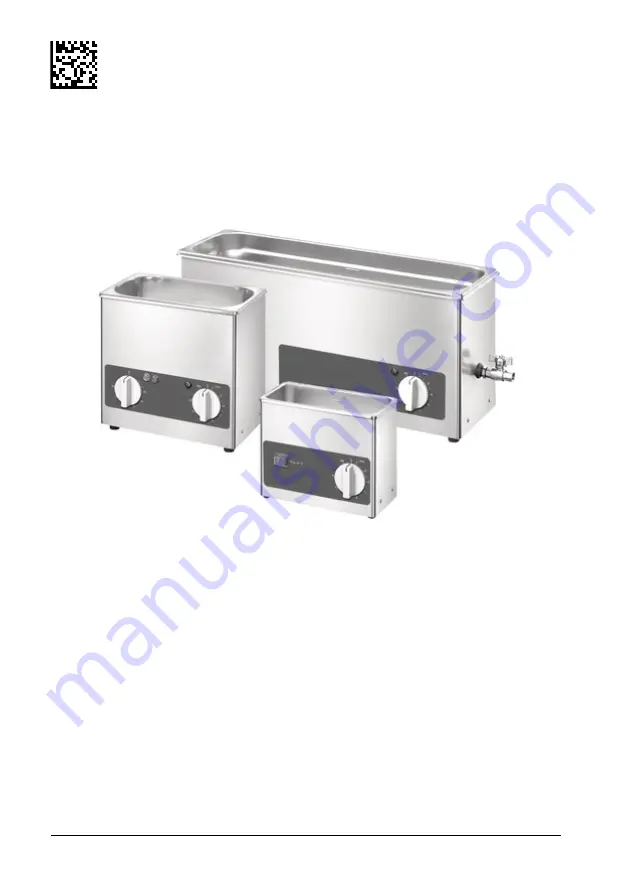
Page 12: ...unction 3 1 Structure Fig 1 Overview of the device 1 Handles depending on model 2 Oscillating tank 3 Control panel 4 Filling level mark 5 Drain with ball valve depending on model 6 Housing 7 Device feet 15 13 10 9 7 5 0 3 1 min 80 70 60 50 40 30 C 2 1 1 4 3 5 6 7 ...
Page 13: ...or light illumination on single light models means heating turned on illumination on dual light models means heating regulation active 3 Yellow indicator light illumination on dual light models means heating turned on 4 Green indicator light illumination means ultrasound turned on 5 Turning knob to set the ultrasound duration 6 Toggle switch to switch the heating on off 80 70 60 50 40 30 C 15 13 1...
Page 14: ...kly This results in strong local microcurrents on the surfaces of the objects being treated This removes dirt from the surface of the objects Dirt particles are removed and fresh sonication liquid flows in The device uses SweepTec a technology in which the ultrasonic frequency often fluctuates around the operating frequency The optimal operating frequency depends on the load filling level tem pera...
Page 15: ...ound bath with the sonication liquid Adequate ventilation must be ensured The air supply under the bottom of the unit may not be obstructed If a sound proof box is used it must also ensure sufficient ventilation A water connection should be available nearby to fill the ultra sound bath A basin must be available to drain or pour out the sonication liquid 4 2 Fitting ball valve If supplied fit the e...
Page 16: ...efly switch on the ultrasound To do this turn the knob to the right for the ultrasound duration and turn it back to 0 after 1 to 2 seconds Results A distinct sound can be heard when the ultrasound is turned on If there is no sound contact Service A foil test should be carried out before first use This serves to doc ument the effect of the ultrasound See chapter 6 3 Performing the foil test 4 4 Rin...
Page 17: ...he sonica tion liquid Indirect sonication is used in the following cases Sonication of sample liquids Use of chemically aggressive or flammable liquids Use of demineralised water without additives Removal of chemically aggressive contamination Removal of stains discolouration and rust using acidic prepara tions The objects or liquids to be sonicated are introduced in the contact liquid in an inset...
Page 18: ...able easy to dispose of gentle to materials and long lasting Observe the information on dosing provided by the ultrasound agent manufacturer You can calculate the quantities yourself analogously to the fol lowing example 10 l ready to use solution 2 5 Calculation of agent Calculation of water volume 5 3 Sonication time NOTICE Risk of damage to the goods to be treated Excessively long sonication ca...
Page 19: ...AUTION Risk of scalding Do not pour hot water into the ultrasonic oscillating tank Maximum filling temperature 50 C NOTICE Damage due to condensation in the ultrasonic bath At high humidity condensation forms inside the device if you fill it with cold water Do not pour cold water into the ultrasonic oscillating tank when humidity is high NOTICE If you use an agent in powder form do not pour it dir...
Page 20: ...alve must be closed The ultrasound and heating must be turned off Procedure 1 Fill the ultrasonic oscillating tank with water up to 1 3 2 Pour the correct quantity of agent into the ultrasonic oscillating tank 3 Fill the tank with water up to the filling level mark while avoiding foam formation When using indirect sonication take the dis placement caused by inset vessels into consideration Result ...
Page 21: ... The sound from the ultrasound can be heard The green indicator light is lit If the turning knob is not set to it will slowly move counter clockwise indicating the remaining sonication time As soon as it is set to 0 the ultrasound switches off 3 To switch off the sonication rotate the turning knob to 0 for the ultrasound duration The green indicator light goes out Information You can turn the knob...
Page 22: ...orking temperature of the sonication liquid can rise above the set value particularly if the ultrasonic oscillating tank is covered Therefore check the working temperature when process ing temperature sensitive objects Note the information on the optimum working temperature from the agent manufacturer Pre heating during the degassing of the sonication liquid is ideal See chapter 5 7 Degassing soni...
Page 23: ...low and white indicator lights will light up When the target temperature is reached the yellow indicator light goes out 5 7 Degassing sonication fluid Sonication fluid that has been freshly filled or left in the ultrasonic oscillating tank must be degassed before use Degassing the soni cation fluid increases the effect of the ultrasound Cover the ultrasonic oscillating tank with the lid if availab...
Page 24: ... Distribute objects around the container Do not stack them Make sure that delicate objects do not touch other objects The ultrasound must be switched off while inserting objects Check the fill level Make sure the liquid completely covers all objects undergoing sonication Inset beakers for indirect sonica tion must be immersed in the contact liquid to a depth of at least 2 cm Remove air bubbles fro...
Page 25: ...es such as the lid Do not reach into the sonication fluid Allow the sonication objects to cool before touching them Switch off the ultrasound before removing the sonication objects Do not remove sonication objects by hand Carefully remove e g the insert basket with the sonication objects and place it on a level surface Rinse sonication objects with clean water Do not leave sonication objects in th...
Page 26: ...cillating tank if the soni cation fluid is visibly contaminated Also observe the specifications of the manufacturer of the prepa ration regarding the service life of the sonication fluid Replace used sonication fluid completely Do not freshen the fluid by topping it up Procedure 1 Switch off the ultrasound If present switch off the heating If you need to move the ultrasound bath to empty it discon...
Page 27: ...bjects to be treated Uneven noises wobbling Inadequate fill level in the oscillating tank Slightly change the fill level of the sonication fluid in the oscillating tank In doing so observe the minimum fill level and correct dosing of the preparation Reposition the objects to be treated Heating is not work ing The heater has switched off due to overtemperature The heating is defective Disconnect th...
Page 28: ...an lead to corrosion and reduce the ultrasound effect Therefore please observe the following instructions Rinse the oscillating tank thoroughly with water after each use Wipe dry with a soft cloth Clean edges and remove residues with a stainless steel care product without abrasive additives Do not use steel wool scrapers or shavers to clean the oscillat ing tank Metal parts and rust particles in t...
Page 29: ... heating using the toggle switch The indicator light in the toggle switch will remain lit as long as the heating is switched on Heating on single light models Switch on the heating briefly with the turning knob set to above 30 C The white indicator light will remain lit as long as the heating is switched on Heating on dual light models Switch on the heating briefly with the turning knob set to abo...
Page 30: ...Degassing time Frame positioning Foil type brand thickness Sonication time Type and concentration of the ultrasound preparation liquid for the foil test In order to obtain a sufficiently strong cavitation effect the foil test also requires the surface tension of the water used to be reduced using surfactant preparations We recommend the following ultrasound preparations TICKOPUR R 33 TICKOPUR R 30...
Page 31: ...Degassing sonication fluid 3 Stretch aluminium foil house hold foil 10 μm to 25 μm thick over the foil test frame Depending on the tank size it is possible that the frame will pro trude outside the tank Covering the part of the foil test frame that is covered by the sonication liquid will be enough 4 Place the covered foil test frame diagonally in the centre of the oscillating tank Fasten it if ne...
Page 32: ... checked by the Service department at BAN DELIN electronic GmbH Co KG See chapter 6 4 Repair 8 Archive the foil with the test date and serial number of the ultrasonic bath The foil test document template can also be completed and archived 9 Rinse the oscillating tank thoroughly to remove any detached foil particles ...
Page 33: ...ns Before sending the device back to us for inspection repair the device and accessories must be cleaned pursuant to current laws and regulations and if necessary must also be disinfected with a surface disinfection agent listed by the VAH Alliance for Applied Hygiene Please understand that we cannot start work until this Certificate is completed in full and submitted Download the Certificate of D...
Page 34: ...rly as elec tronic waste if it can no longer be used Do not dis pose of the ultrasonic bath with household waste Observe the locally applicable regulations for the disposal of electronic waste The vibrating elements contain sintered ceramics made of lead titanium zirconium oxide EC No 235 727 4 CAS No 12626 81 2 This use is authorised in accordance with RoHS Directive 2011 65 EU Annex III exceptio...
Page 35: ...14 30 EU EMC Guideline 2011 65 EU RoHS Directive A declaration of conformity can be requested from the manufac turer by providing the serial number Mains supply 230 V 10 50 60 Hz Protection class I Degree of protection IP 32 Ultrasonic frequency 35 kHz Overvoltage category II Degree of contamination 2 Permissible ambient temperature 5 40 C Permissible relative humidity up to 31 C 80 non condensing...
Page 36: ...8 Device information 36 38 1786 001 en 2022 08 ...
Page 37: ...1786 001 en 2022 08 37 38 ...
Page 38: ...1786 001 en 2022 08 1 2 GmbH Co KG Heinrichstr 3 4 12207 Berlin Germany Phone 49 30 76880 0 Fax 49 30 7734699 info bandelin com www bandelin com ...