


Standard stirrups
Fig. 4
Stirrup fixing on
big pillars
Gate
Stirrup
Fig. 2
Fig. 3
9
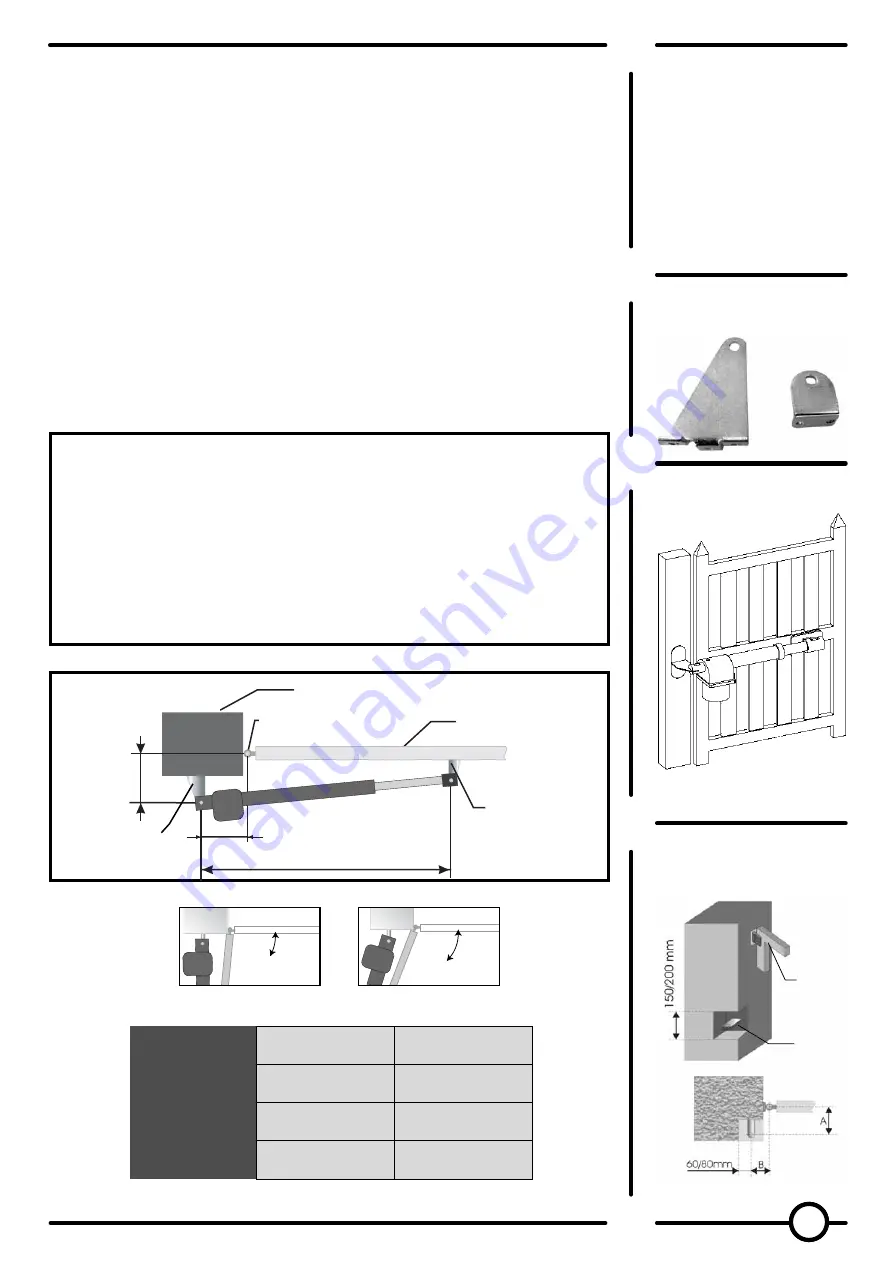
Installing the motoreducer
For the dimensions of the motoreducer see the figure in page 4.
You must pay attention to the position of the motoreducer with reference
to hinges of the swing:
- fix the exact opening angle of the swings (95
°
or 120
°
) as shown in fig. 5;
- respecting the measures on fig. 6, fix the exact fixing points of the
stirrups which will sustain the motor;
- set the stirrups (fig. 2) on the pillars and gate, modifying them if needed;
- in case of big pillars it’s necessary to make a notch on the pillar to insert
the stirrups and respect the quotes A and B (fig. 4).
Once the installation of the stirrups is done correctly, install the motors to
the stirrups with the screws supplied, check the electrical wirings and
verify that the motors are working smoothly, first by hand and then with
the control board (to program the motors check the manual supplied with
the electronic control board).
Fig. 6
Stirrups fixing measures (with closed gate)
Max
opening
Quote
A
Quote
B
Quote
C
95
°
145 mm
165 mm
1
0
30 mm
120
°
110 mm
190 mm
1
0
30 mm
NB: For a correct working of the motoreducer check as follow:
• With the open gate, the quote C must be included between
730-740 mm.
• The tube of the motoreducer does not arrive at the end of the run
(min. 10 mm run both during the opening and the closing).
• For swings with length more than 3 mt we suggest to install an
electric lock with a swing lock.
• Always install stops for the end of the run both for the opening and
the closing.
A
B
C
Pillar
Swing
Swing hinge
Front
stirrup
Rear
stirrup
Fig. 5
120
°
95
°
Rear stirrup
Front stirrup


