17 / 36
0006081544_201408
ENGLISH
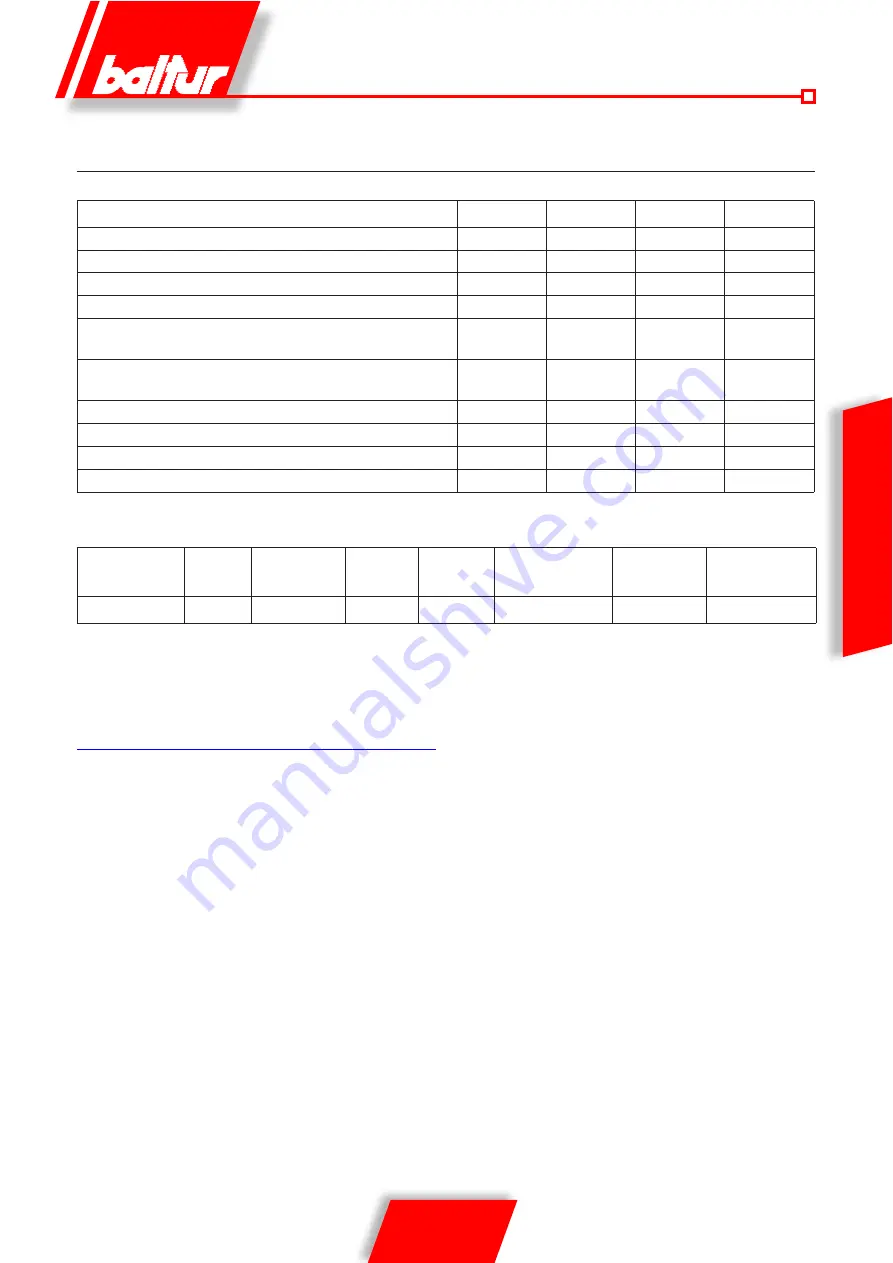
PME7... PROGRAM MODULE FOR LME7...WITH PROGRAM SEQUENCES OIL OR GAS BURNERS FOR
LME7...BASIC UNIT REFER TO BASIC DOCUMENTATION P7105
Type reference
PME73.810A2 PME73.820A2 PME73.830A2 PME73.840A2
For operation with LME73.000A...
x
x
x
x
Gas program forced draft burner
x
x
x
x
1-stage / 2-stage or 1-stage modulating
x
x
x
x
Pilot burner intermittent / interrupt
---
---
x
x
Modulating via actuator (MCeumatically, mechanical gas-air ratio
control
x
x
x
x
Actuator control via analog signal / 3-position step signal for actuator
with potentiometer
x
---
x
---
3-position step signal for actuator without potentiometer
---
x
---
x
Control sequence programmable time
x
x
x
x
POC
x
x
x
x
Valve proving
x
x
x
x
Equipment or
programmer
Safety time Pre-ventilation
time
Pre-ignition Post-ignition
Time between open-
ing of 1
st
flame valve
and 2
nd
flame valve
Air gate opening
stroke time
Air gate closing
stroke time
LME 73....
3
30
2
2
11
30
30
DESCRIPTION OF OPERATION
WITH LIQUID FUEL
FURTHER INSTRUCTIONS TO START A MIXED BURNER
It is advisable to perform the first ignition with liquid fuel because in
this case delivery is conditioned by the available nozzle, whereas
the delivery of methane can be varied as you like by adjusting its
flow-rate regulator.
It is not advisable to oversize the burner with respect to the boiler
for heating and hot water production purposes as the burner may
work for long periods with a single flame, making the boiler work at
lower outputs than the required ones; as a result, the combustion
products (fumes) emerge at too low a temperature (at about 180°
C in the case of fuel oil and 130° C with diesel oil), causing soot
to build up at the chimney outlet. Furthermore, when the boiler
operates at a capacity lower than what is indicated in the technical
data, it is very probable that acid condensate and soot will form in
the boiler, causing its rapid clogging and corrosion. When the two-
flame burner is installed on a boiler for the production of hot water
for heating, it must be connected in such a way as to work normally
with both flames completely stopping, without changing to the first
flame, when the pre-set temperature has been reached. To obtain
this particular operation, do not install the second flame thermostat
and make a direct connection between the terminals of the 4-pole
plug (jumper). In this way, only the burner’s capacity will be used for
ignition at a reduced flow rate for a soft start, which is an essential
condition for boilers with a (pressurized) combustion chamber, but
also very useful for normal boilers (vacuum combustion chamber).
The burner’s command (on or off) is connected to the normal
operating or safety thermostats.
By switching off switch 1, if the thermostats are closed, the
voltage reaches the command and control equipment (switching
on Led 2) which starts it working. The fan motor (LED 3)
and the ignition transformer (LED 4) are then switched on.
The motor turns the fan that carries out an air wash of the combustion
chamber and, at the same time, the fuel pumps that cause circulation
in the ducts expel any gas bubbles through the return valve. This pre-
wash stage ends with the opening of the safety solenoid valves and
the first flame (LED 5), which allows the fuel at a pressure of 12 bar
to get to the first flame’s nozzle and from this to enter the combustion
chamber finely atomised. As soon as the atomized fuel exits the
nozzle, it is set on fire by the spark present between the electrodes
since the start of the motor. During first flame ignition, the air gate is
held in the position set on the special air/gas adjustment servomotor
cam. If the flame appears regularly after the safety time foreseen
by the electrical device, it starts the air/gas adjustment servomotor
that moves to the second flame position. During passage from the
first to the second flame, the servomotor activates the electrovalve
(normally closed) for the second flame (LED 6). The opening of the
Summary of Contents for TBML 80 MC
Page 2: ......
Page 35: ...33 36 0006081544_201408 ITALIANO SCHEMA ELETTRICO...
Page 36: ...34 36 0006081544_201408 ITALIANO...
Page 37: ...35 36 0006081544_201408 ITALIANO...
Page 71: ...33 36 0006081544_201408 ENGLISH WIRING DIAGRAM...
Page 72: ...34 36 0006081544_201408 ENGLISH...
Page 73: ...35 36 0006081544_201408 ENGLISH...
Page 75: ......


