8
GETTING STARTED - INITIAL SET UP
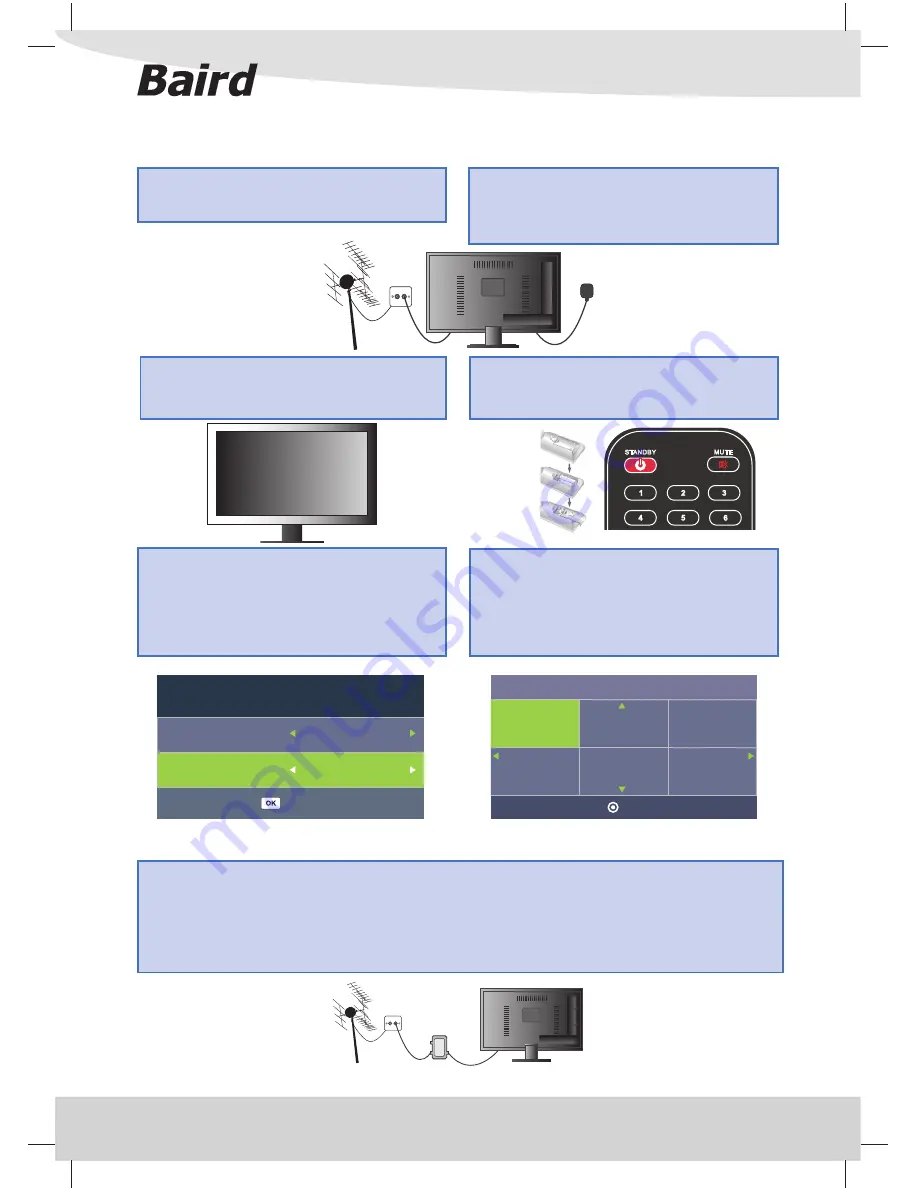
1) Using the RF cable supplied, connect the TV to
the TV Aerial wall socket (Fig A)
2) Connect the power cable to the Mains Adaptor
and the Mains Plug to the wall socket. Ensuring the
wall socket is OFF, connect the DC Output of the
Adaptor to the TV “DC IN” connector.(Fig B)
5) You will now be welcomed with the initial set-up
screen. If it does not appear, on the remote control,
please press [MENU] then 8-8-8-8 and the menu
will appear. Press OK to confi rm OSD LANGUAGE
and again to confi rm the Country as UK. Then press
OK again and the auto tuning will start.
3) Switch on the switch on the wall socket.
Tip: If the TV fi nds some, but not all, of the Digital channels, the TV is functioning correctly but the signal being
received is not strong enough. (The signal strength needs to be above 85% - you can see the signal strength
the TV is receiving when you change channels/ programmes) you will need to increase the signal reception
in order to receive all of the channels available. The most economical way to do this is by purchasing and
connecting a ‘signal booster’ in between the TV and the TV aerial socket. If this does not solve the problem,
you will need to upgrade the TV aerial to a digital hi-gain compatible aerial
Fig A
Fig B
Getting Started - Initial Set Up
Signal Booster
Conne
c
t between TV
and TV aerial so
ck
et
4) Insert the batteries supplied into the Remote
control and press the Standby button to power on
the TV. Take care to observe correct polarity.
6) After tuning the following screen will appear.
Press OK to confi rm Country Code, again to
confi rm Primary region and twice more to
confi rm Secondary and Tertiary Regions. Your fi rst
Programme should now appear.
Please select an OSD Language
English
Español
OK
Italiano
Deutsch
Français
Nederalnds
First Time Installation
OSD Language
English
UK
Country
Auto Tuning


