Bai cells EG7035 User Manual Download Page 9


Interface and Button 

1.5

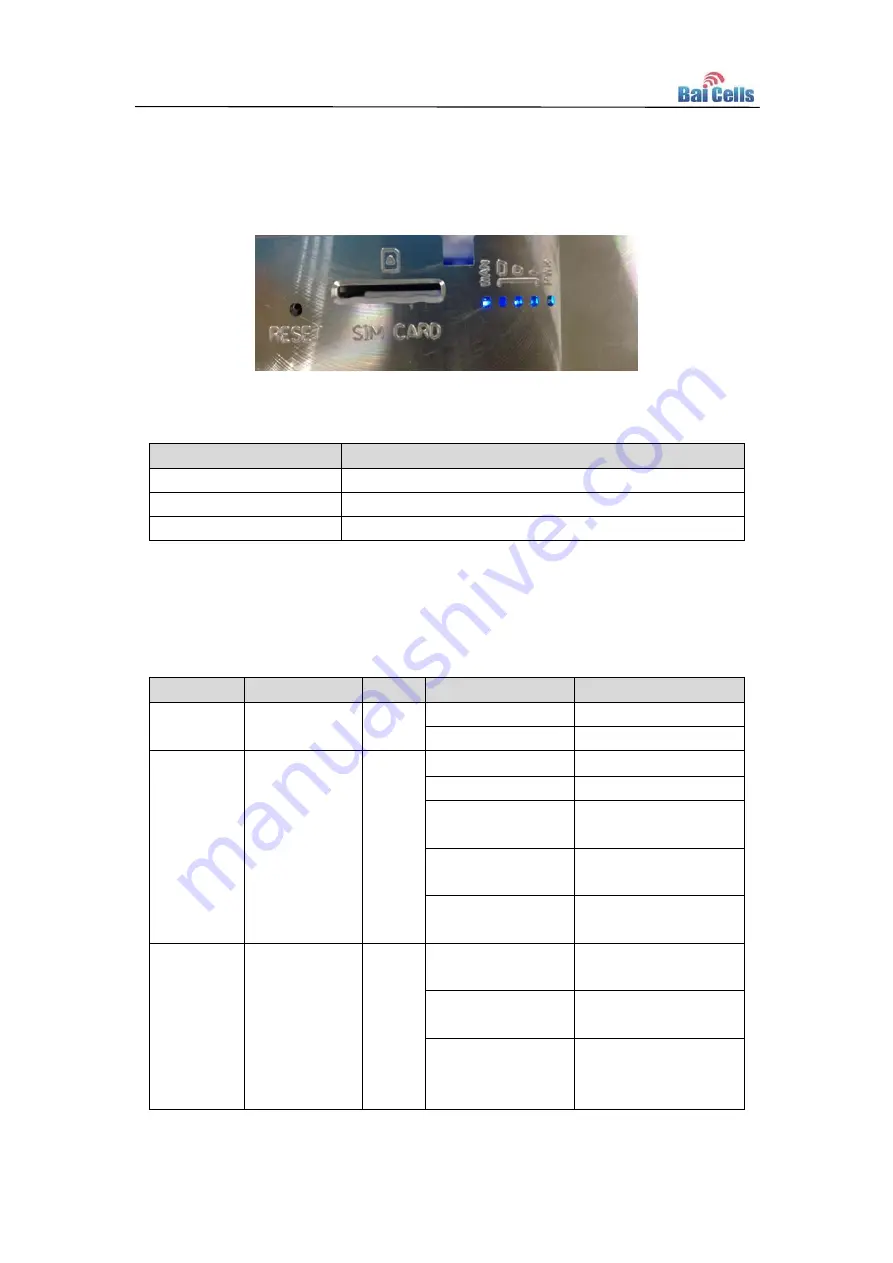
The interface of EG7035 is shown in Figure 1-2, and is described in Table 1-3. 

Figure 1-2 Interface and Button of EG7035 


Table 1-3 Description of EG7035 Interface and Button 

Connectors 

Description 

ETH RJ45   

One LAN 

USIM Slot   

Support 1.8V/3.0V USIM   

Restore Button 

Long press over 10s to restore the factory settings 


LED Indicators 

1.6

Table 1-4 LED Indicators 

LED Name  Description 

Color 

LED Behavior 

Status Indicator 

PWR 

Power 
Indicator 

Green  OFF 

No Power Supply 

Steady On 

Power On 

LTE Signal 

3 LTEs, 
Indicate 
connection 
state and 
signal 
strength 

Green  All OFF 

No Connected 

ALL blanking 

Connecting 

One LED Steady 
On 

Connected, the 
signal is weak 

Two LED Steady 
On 

Connected, the 
signal is medium 

Three LED Steady 
On 

Connected, the 
signal is strong 

LAN 

Eth Indication  Green  OFF 

Ethernet connection 
is not established 

Steady On 

Ethernet connection 
is normal 

Blanking 

Ethernet interface 
data being 
transmitted 

Summary of Contents for EG7035

Page 1: ...All rights reserved BaiCells Technologies Co Ltd BaiCells EG7035 User Manual V1 0...

Page 2: ...s without the prior written consent of BaiCells Disclaimer This specification is preliminary and is subject to change at any time without notice BaiCells assumes no responsibility for any errors conta...

Page 3: ...2 SW Specification 4 2 3 Device Management 5 2 4 Environment Specification 5 2 5 Regulatory Compliance 6 2 6 3 Product Installation 8 1 1 Installation Steps 8 4 CPE Configuration 9 Log in 9 4 1 Basic...

Page 4: ...on 14 A 2 Fails to Login to the web management page 14 A 3 The CPE fails to search for the wireless network 14 A 4 The power adapter of the CPE is overheated 14 A 5 The parameters are restored to defa...

Page 5: ...f EG7035 3 Figure 3 1 Install the Sample 8 Figure 3 2 Connection Diagram 8 Figure 4 1 Login Page 9 Figure 4 2 Setup Network Mod 10 Figure 4 3 LTE Setting 10 Figure 4 4 Setup Connect Method 11 Figure 4...

Page 6: ...EG7035 Appearance Index 2 Table 1 3 Description of EG7035 Interface and Button 3 Table 1 4 LED Indicators 3 Table 2 1 Basic Specification 4 Table 2 2 RF Specification 4 Table 2 3 SW Specification 4 T...

Page 7: ...ss access performance and comprehensive routing capabilities which have the abilities to bring the end users WBB services Features 1 2 EG7035 is designed according to the simplicity principle which ca...

Page 8: ...1 1 EG7035 Product Description Product Description EG7035 3 65G LTE Customer Premise Equipment Appearance 1 4 The appearance of EG7035 is shown in Figure 1 1 and is described in Table 1 2 Figure 1 1 E...

Page 9: ...1 4 LED Indicators LED Name Description Color LED Behavior Status Indicator PWR Power Indicator Green OFF No Power Supply Steady On Power On LTE Signal 3 LTEs Indicate connection state and signal str...

Page 10: ...2FF USIM None Restore Button Tact Button Long press over 10s to restore the factory settings Power Supply Input Universal range 100 240V AC Output 12V 1A None RF Specification 2 2 Table 2 2 RF Specifi...

Page 11: ...PnP Statistics LAN Link Status Transmit Receive traffic Running Time Device Management 2 4 Table 2 4 Device Management Item Description Maintenance Date Time setting Reset Restore factory settings Res...

Page 12: ...ted and found to comply with the limits for a Class B digital device pursuant to part 15 of the FCC Rules These limits are designed to provide reasonable protection against harmful interference in a r...

Page 13: ...ccept any interference including inter ference that may cause undesired operation of the device Le pr sent appareil est conforme aux CNR d Industrie Canada applicables aux ap pareils radio exempts de...

Page 14: ...in Figure 3 1 2 Open the waterproof cover and according to the instructions on the SIM card 3 Connected to the adapter Pay attention to the adapter interface identify Figure 3 1 Install the Sample 4 M...

Page 15: ...3 Enter the user name and password click Login button After password authentication you can log on to the web management page The default user name password admin admin In order to more secure your d...

Page 16: ...following steps 1 Choose Network Setting LTE Setting 2 In the LTE Setting area you can configure the LTE network 3 In the LTE Setting area you can also view the network information such as frequency D...

Page 17: ...otherwise you should choose Manual 4 Click Submit Figure 4 4 Setup Connect Method Manual Connect Network 4 2 4 To manual connect the network perform the following steps 1 Choose Network Setting LTE S...

Page 18: ...3 You can choose full Band PCI Lock or a band the CPE supported Figure 4 5 Setup Scan Mode Setting Frequency Earfcn 4 2 6 To set the frequency perform the following steps 1 Choose Network Setting LTE...

Page 19: ...nt 3 In the APN Management area you can set the APN 4 Choose an APN number which you want to set 5 In the APN Setting area you can set the APN parameters such as enable or disable the APN APN name use...

Page 20: ...tructions such as concrete or wooden walls Check that the CPE is placed far away from household electrical appliances that generate strong electromagnetic field such as microwave ovens refrigerators a...

Page 21: ...15 Product List Appendix B Index Content Picture Amount 1 EG7035 CPE 1 2 12V 1A adapter 1 3 PoE Combiner 1 4 Mounting bracket 1 5 User Manual n a 1...

Page 22: ...BaiCells EG7035 Bracket Installation Guide V1 0 All rights reserved BaiCells Technologies Co Ltd...

Page 23: ...bracket and screw on do not tighten the screws 2 4 Install ground wire and lock the screw Tighten four screws using allen hexagon wrench Screw on four bacaket srews Put U shape screw on bracket of loc...

Page 24: ...Install on Pole Install on Pole 1 2 3 4 Loop U shape screw on pole and put on pole bracket Tighten U shape screw nut using wrench Tighten four screws Adjust CPE to a suitble position...

Reviews: