

3
Contents
1. Assembly Instructions
2. Pre-Cooking Precautions
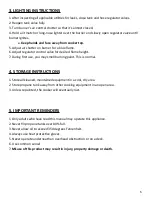
3. Lighting Instructions
4. Storage Instructions
5. Important Reminders
1. ASSEMBLY INSTRUCTIONS
You will need:
1. An adjustable wrench
2. A Phillips head screwdriver
1.
Remove all components from the box and individual packaging.
2.
Turn base frame upside down.
3. Burner crossbar
mounting:
a.
Align the crossbar holes with the corresponding frame holes.
b.
Attach bolts, washers and nuts.
c.
Tighten with wrench.
4.
Burner and Heat Shield Attachment:
a.
Remove nuts and washers from burner’s bottom.
b.
Align burner’s long end above the U-shape in the frame if applicable to your unit.
c.
Align the burner’s bolt to the center hole in the crossbar.
d.
Insert the burner’s bolt into the crossbar.
e.
Attach washer and nut.
f.
Tighten with wrench.
5.
Hose to Burner Attachment:
a.
If the air shutter is not already attached to the burner with screws, align the air
control disc over the end of the burner.
b.
Burner’s screws may need tightening; be careful not to over-tighten.
c.
Insert brass hose connector into burner.
d.
Turn hose connector clockwise with wrench until snug; be careful not to
over-tighten.
6.
Return base frame upright.
Summary of Contents for 554BPSQ16
Page 2: ......