background image


5

  o

f


12


Step 3:


Place the Seat and Back Cushions (K & J) on the assembled chair. See Figure 3 and Figure 4. Repeat 
Steps 1 to 3 for the second chair.


Figure 3                                                                                        Figure 4


Note: Please see our video for additional assembly assistance:


https://insideout.store/video-assembly-instructions/


Summary of Contents for CAL-5PC-SG

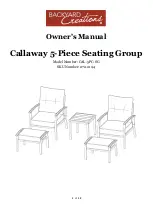
Page 1: ...1 of 12 Owner s Manual Callaway 5 Piece Seating Group Model Number CAL 5PC SG SKU Number 272 2194...

Page 2: ...er Illustration Description Qty Letter Illustration Description Qty A Left Arm 2 G M6 Steel Washer 16 B Right Arm 2 H M6 Bolt Cap 16 C Back 2 I Allen Wrench 1 D Seat 2 J Back Cushion 2 E M6 x 40mm Bol...

Page 3: ...t s and identify all parts packed in the carton are present Note If any part is missing or damaged do not attempt to assemble Contact InSide Out Customer Support See page 12 Assemble product on a soft...

Page 4: ...4 of 12 Step 2 Attach the Back C to the Right Arm B using Bolts F and Washers G Repeat for Left Arm A Tighten All Bolts Attach Bolt Caps H to Bolts E F See Figure 2 Figure 2...

Page 5: ...ack Cushions K J on the assembled chair See Figure 3 and Figure 4 Repeat Steps 1 to 3 for the second chair Figure 3 Figure 4 Note Please see our video for additional assembly assistance https insideou...

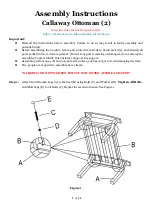
Page 6: ...arts List Callaway Ottoman 2 Letter Illustration Description Qty Letter Illustration Description Qty A Ottoman Leg 4 E M6 Bolt Cap 8 B Seat 2 F Allen Wrench 1 C M6 x 40mm Bolt 8 G Cushion 2 D M6 Steel...

Page 7: ...d identify all parts packed in the carton are present Note If any part is missing or damaged do not attempt to assemble Contact InSide Out Customer Support See page 12 Assemble product on a soft and n...

Page 8: ...ttoman to upright position and place the Cushion G on the Ottoman See Figure 2 and Figure 3 Figure 2 Figure 3 Note Please see our video for additional assembly assistance https insideout store video a...

Page 9: ...Side Table Letter Illustration Description Qty Letter Illustration Description Qty A Tabletop 1 E M6 x 20mm Bolt 4 B Table Support Frame 1 F M6 Steel Washer 12 C Table Leg 4 G M6 Bolt Cap 12 D M6 x 1...

Page 10: ...hardware kit s and identify all parts packed in the carton are present Note If any part is missing or damaged do not attempt to assemble Contact InSide Out Customer Support See page 12 Assemble produc...

Page 11: ...op A using Bolts D and Washers F Tighten Bolts Attach Bolt Caps G See Figure 2 Figure 2 Step 3 Turn table to upright position See Figure 3 Figure 3 Note Please see our video for additional assembly as...

Page 12: ...poses or items damaged due to acts of nature vandalism misuse or improper assembly are not covered Discoloration or fading of the finish or fabrics as a result of chemicals or spills pool water chemic...

Reviews: