background image

Page 7 of 9

ASSEMBLY INSTRUCTIONS

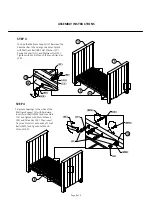
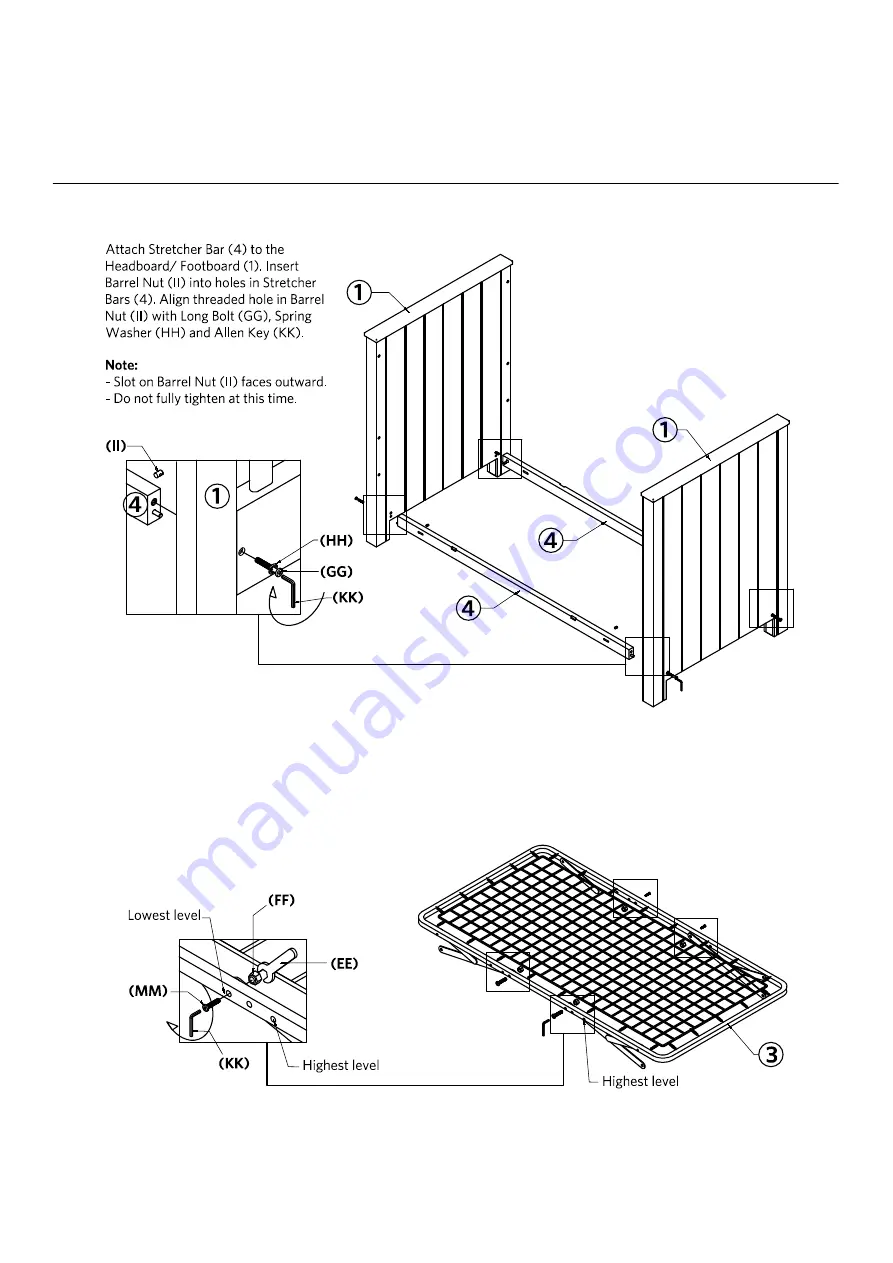
STEP 2

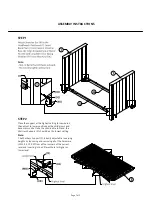
STEP 1

Note:

The Mattress Support (3) is easily adjustable to varying

heights by loosening and removing all of the hardware
(MM, EE, FF, KK) from all four corners of the current
level and inserting into a different hole for higher or
lower level.

Place the support at the highest setting for newborns,

then adjust to lower positions as the child grows and

becomes mobile. Once the child is able to stand, the
Mattress Support (3) should be at its lowest setting.

Summary of Contents for 367-19

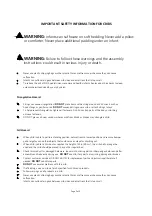
Page 1: ...use abrasive chemicals for cleaning Clean with mild soap on soft rag Rinse and dry thoroughly If the crib is to be stored store in a cool dry place and carefully package all original hardware to prot...

Page 2: ...ing on loose fasteners DO NOT place crib near window where cords from blinds or drapes may strangle a child Fall Hazard When child is able to pull to a standing position set mattress to lowest positio...

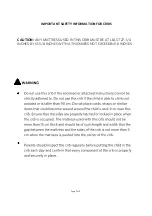
Page 3: ...Page 3 of 9 IMPORTANT SAFETY INFORMATION FOR CRIBS CAUTION ANY MATTRESS USED IN THIS CRIB MUST BE AT LEAST 27 1 4 INCHES BY 51 5 8 INCHES WITH A THICKNESS NOT EXCEEDING 6 INCHES...

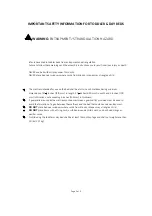
Page 4: ...tress having minimum dimensions of 51 5 8 inches 1310 mm in length 27 1 4 inches 690 mm in width and 4 inches 100 mm in thickness not exceeding 6 inches 152 mm in thickness If guardrails are used as t...

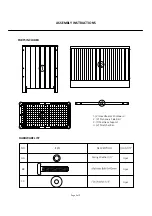
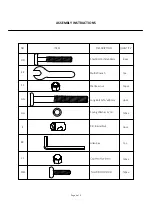
Page 5: ...EMBLY INSTRUCTIONS PARTS INCLUDED Spring Washer 1 4 4pcs 4pcs 4pcs 4 3 1 2 Headboard Footboard 2 2 Stationary Side Rail 3 1 Mattress Support 4 2 Stretcher Bar 1 2 NO ITEM DESCRIPTION QUANTITY BB AA CC...

Page 6: ...tress nut Spring Washer 5 16 Short Bolt 5 16 x50mm K D Barrel Nut Long Bolt 5 16 x80mm NO ITEM DESCRIPTION QUANTITY 8 pcs 1pc 16pcs 4pcs 12pcs 4pcs 1 pc Page 6 of 9 ASSEMBLY INSTRUCTIONS FF KK HH GG I...

Page 7: ...l of the hardware MM EE FF KK from all four corners of the current level and inserting into a different hole for higher or lower level Place the support at the highest setting for newborns then adjust...

Page 8: ...at Washer CC Spring Washer AA and Mattress Nut FF Tighten with Multi Wrench EE and Allen Key KK STEP 3 Fill empty openings in the sides of the Mattress Support 3 with hardware Insert Small Bolts MM an...

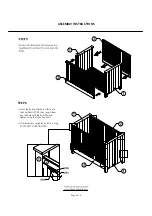
Page 9: ...ASSEMBLY INSTRUCTIONS Page 9 of 9 the Short Bolts DD then insert them into the holes of Side Rails 2 and tighten using the Allen Key KK fit DO NOT OVERTIGHTEN STEP 6 www rhbabyandchild com...

Reviews: