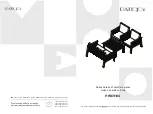
Convenience through innovation and thoughtful design
Instruction Manual
Read all instructions BEFORE assembly and USE of product.
KEEP INSTRUCTIONS FOR FUTURE USE.
12.09
www.babytrend.com
*Toys and mobile may vary
Convenience through innovation and thoughtful design
IF YOU EXPERIENCE ANY DIFFICULTY IN USING THIS PRODUCT,
PLEASE CONTACT OUR CUSTOMER SERVICE DEPARTMENT AT
1-800-328-7363 BETWEEN THE HOURS OF 8:00 A.M. AND 4:30 P.M. PACIFIC
STANDARD TIME FOR ASSISTANCE. PLEASE HAVE YOUR MODEL NUMBER AND
MANUFACTURING DATE AVAILABLE WHEN YOU CALL. THIS INFORMATION CAN BE
FOUND ON A SMALL STICKER UNDER THE PLAYARD.
Contact us by phone:
1-800-328-7363
(8:00am ~ 4:30pm PST)
or online http://www.babytrend.com
Contact us by mail:
Baby Trend, Inc.
1607 S. Campus Ave., Ontario, CA 91761
Nursery Center
Playard (fully assemble) x 1
Mattress x 1
Bassinet x 1
Metal Support Tubes (2 male, 2 female)
Changing Table x 1
Long Curved Bar x 2
Short Bar with Connector Knob x 2
Music Center x 1
---------------------------------------------
Travel / Storage Bag x 1
Close N Cozy (Type B)
Soft Goods x 1
Strap Set x 1
Side Basket x 1
Mattress Support Bar x 2
Lower Bar x 2
Center Cross Bar x 1
Upper Back Bar x 1
Upper frame x 2
Side frame x 2
Leg x 4
Screw x 4
Item#: PY87983
Check that you have all the below parts for this model
before assembling the playard.
This unit does not equipped with any mobile,
parent organizer and canopy.