21
Tutorial
Tu
tor
ia
l
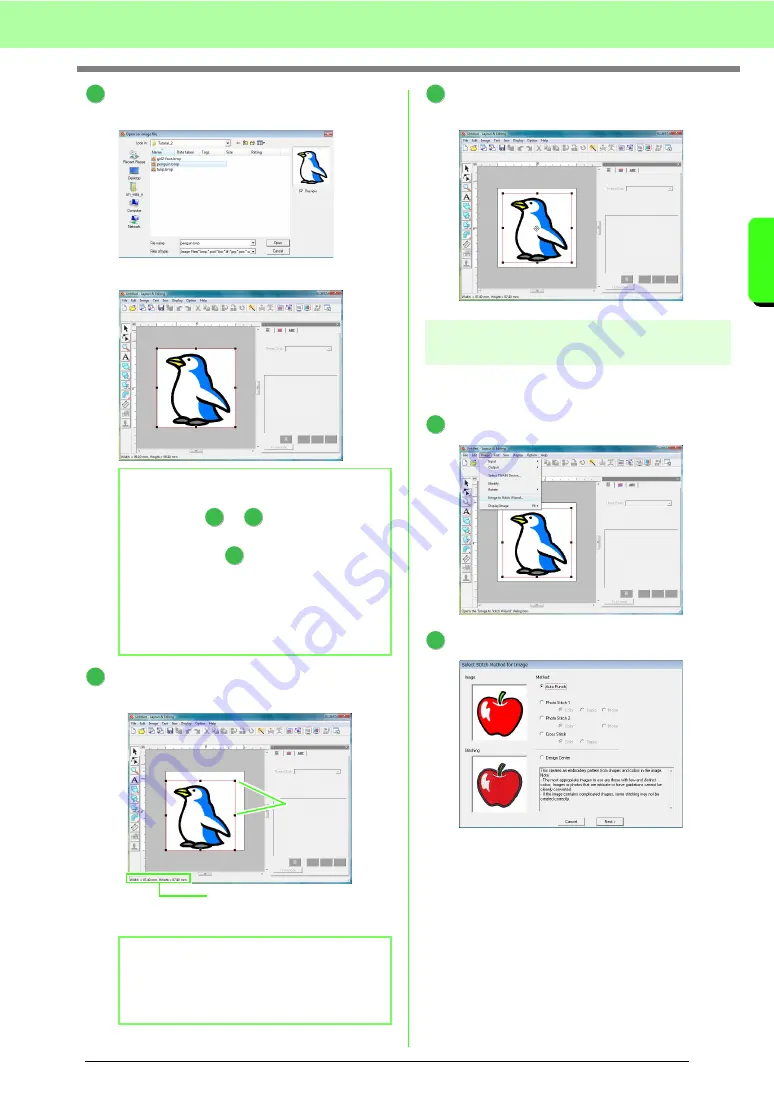
Select the sample file
penguin.bmp
, and then
click
Open
, or double-click the file’s icon.
→
The image appears in the work area.
Drag the handle to adjust the selected image
to the desired size.
Move the pointer over the selected image, and
then drag the image to the desired position.
Step 2
Automatically converting the
image to an embroidery pattern
Next, the image will automatically be converted to
an embroidery pattern.
Click
Image
, then
Image to Stitch Wizard
.
Select
Auto Punch
, and then click
Next
.
b
Memo:
Repeat steps
to
to choose another
picture image. If you change the way to import
data from in step
, you can import picture
images from a scanner, digital camera or
clipboard, or even create images with the
portrait function and import that image.
c
“Importing Image Data” on
page 120.
b
Memo:
If the handles have disappeared, right-click
the image, and then click
Modify Image
in the
menu that appeared.
3
1
3
1
4
Handles
Status bar shows the dimensions
(width and height) of the image.
5
1
2
Summary of Contents for Palette
Page 1: ......
Page 146: ...144 Arranging Embroidery Designs Layout Editing ...
Page 200: ...198 Managing Embroidery Design Files Design Database ...
Page 218: ...216 Creating Custom Stitch Patterns Programmable Stitch Creator ...
Page 244: ...242 Tips and Techniques ...
Page 264: ...262 Menus Tools ...
Page 266: ...264 Troubleshooting ...
Page 271: ...English ...


