902-757 Corkscrew Aztec Climber
Page
4
Rev. 04/9/2010
SportsPlay Equipment, Inc., 5642 Natural Bridge, St. Louis, MO 63120 (314) 389-4140
www.sportsplayinc.com
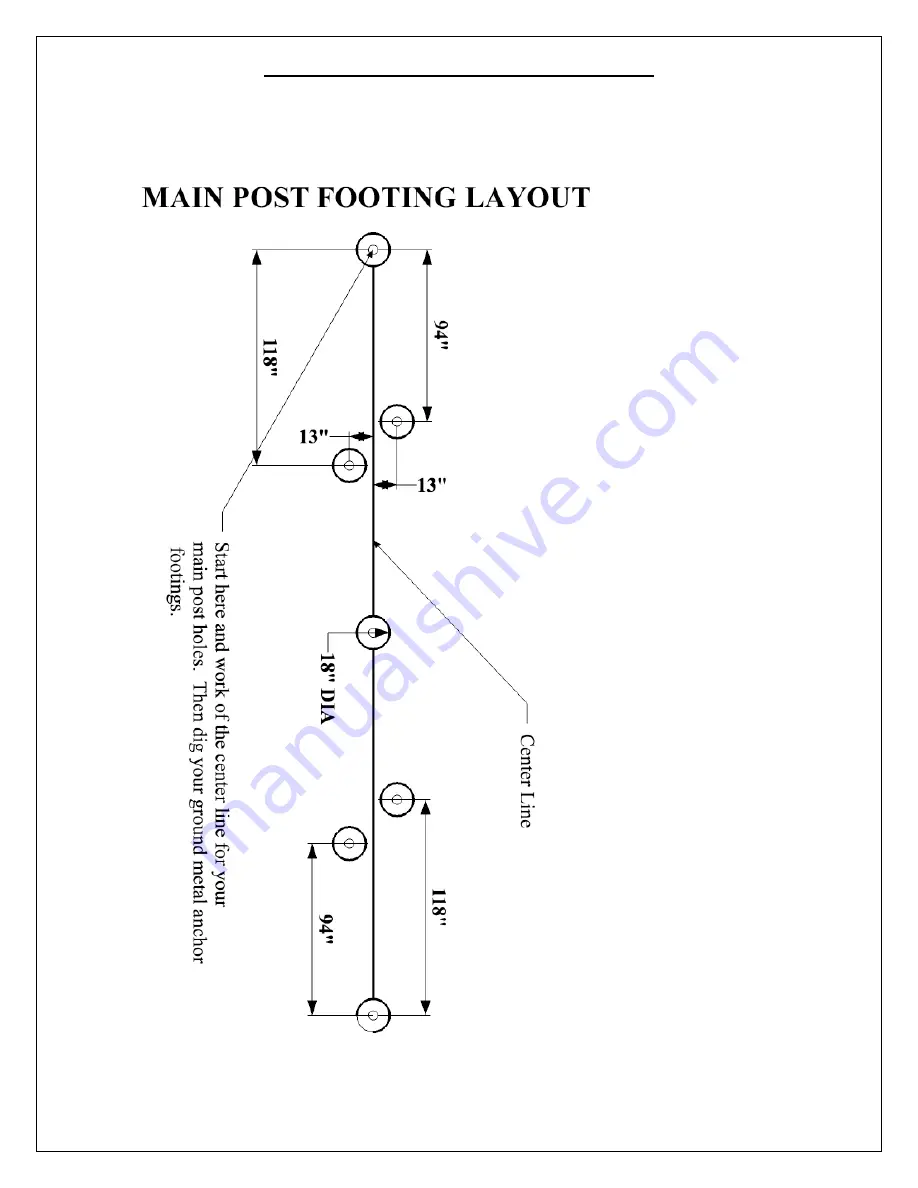
Footing Layout (Close up of the ends)
Page 1: ...improperly maintained can cause serious injury Periodical inspections maintenance repair and or replacement of damaged parts is necessary for safe operation of equipment Appropriate publications avai...
Page 2: ...ngs illustrated are satisfactory in most applications for pipe sizes up to 4 diameter Varying soil climatic conditions may require deeper and heavier footings in some areas Check local building codes...
Page 3: ...902 757 Corkscrew Aztec Climber Page 3 Rev 04 9 2010 SportsPlay Equipment Inc 5642 Natural Bridge St Louis MO 63120 314 389 4140 www sportsplayinc com Complete Footing Layout...
Page 4: ...902 757 Corkscrew Aztec Climber Page 4 Rev 04 9 2010 SportsPlay Equipment Inc 5642 Natural Bridge St Louis MO 63120 314 389 4140 www sportsplayinc com Footing Layout Close up of the ends...
Page 5: ...902 757 Corkscrew Aztec Climber Page 5 Rev 04 9 2010 SportsPlay Equipment Inc 5642 Natural Bridge St Louis MO 63120 314 389 4140 www sportsplayinc com...
Page 6: ...902 757 Corkscrew Aztec Climber Page 6 Rev 04 9 2010 SportsPlay Equipment Inc 5642 Natural Bridge St Louis MO 63120 314 389 4140 www sportsplayinc com Use Zone...
Page 7: ...in shipping or installation ASSEMBLY AND INSTALLATION NOTE All threaded ends of bolts protruding beyond nuts must be cut off and or peened to eliminate sharp edges No more than two threads should exte...
Page 8: ...bolt cap and securing to the bolt from the opposite side Repeat this process for the other two holes STEP 4 Repeat Steps 1 2 and 3 with other Ground Anchor and Plastic Panel STEP 5 Attach the other si...
Page 9: ...in turn to Horizontal Connecting Post Secure using same technique as before Note The Dragon Figure must face upwards as shown below STEP 8 Using the same technique as was used in the previous step at...
Page 10: ...slight dome to ensure proper drainage Wait 48 hours before removing braces Install resilient safety surfacing STEP 10 Attach Warning Label and Manufacturer s Identification Label to a clean surface T...