www.aztectent.com
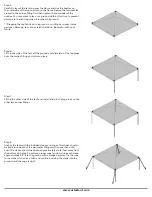
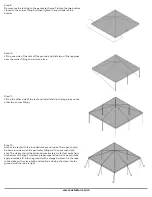
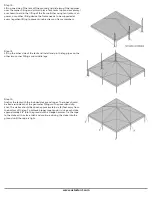
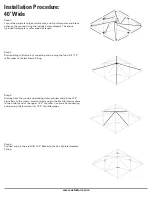
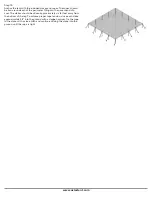
Step 5:
Continue by connecting and pinning the perimeter pipe to this corner
and work your way around the tent connecting all of the perimeter
pipes, side tees, and corner fi ttings until all of the upper framing is
connected and pinned.
Step 6:
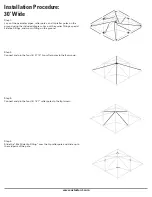
Carefully layout the tent top over the frame and use the buckles on the
underside of the top to attach to the frame. You may want to lay out
a ground cloth at this time to prevent damage to the tent top when it
touches the ground.
**Dragging the top fabric on the ground, or pulling hard over frame
parts can damage, tear, and scratch the fabric. Be careful with your
fabric.
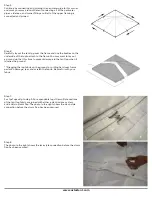
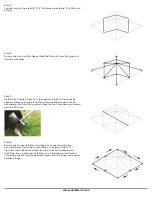
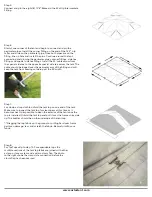
Step 7:
For 1pc Tops skip to step 9. For expandable tops the multiple sections
of the tent top fabric are joined with either a clasp or lace system
and a Velcro storm fl ap. The photo to the right shows the clasp style
connection before the storm fl ap has been secured.
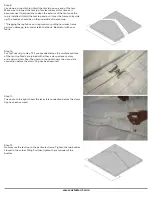
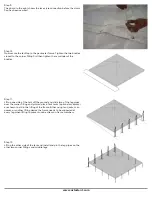
Step 8:
The photo to the right shows the lace style connection before the storm
fl ap has been secured.
Summary of Contents for STANDARD FRAME
Page 1: ...STANDARD FRAME PRODUCT MANUAL If YOU can IMAGINE it WE can BUILD it...
Page 27: ...www aztectent com...
Page 43: ......


