background image

4

Quantity 

Item  

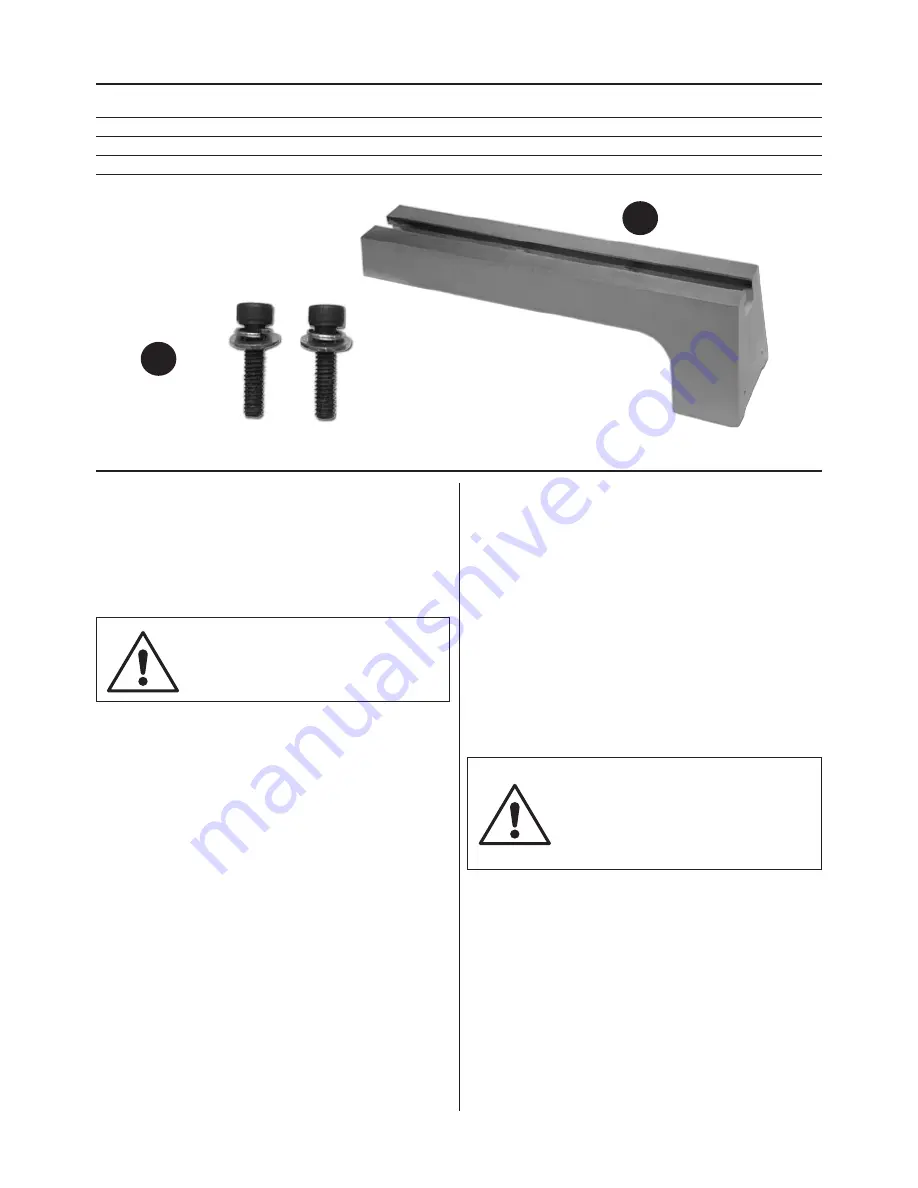
1 No  

Extension Bed (Product code: 951249)

2 No 

5

/

16

” x 1”  Caphead Bolts & Spring/washer

Optional Accessories

I

I

H

General Instructions for 230V Machines

Good Working Practices/Safety

Primary Precautions

Work Place/Environment

The following suggestions will enable you to observe 
good working practices, keep yourself and fellow 
workers safe and maintain your tools and equipment
in good working order.

WARNING! KEEP TOOLS AND 
EQUIPMENT OUT OF THE 
REACH OF YOUNG CHILDREN

These machines are supplied with a moulded 13 
Amp. Plug and 3 core power cable. Before using the
machine inspect the cable and the plug to make sure 
that neither are damaged. If any damage is visible, 
have the tool inspected/repaired by a suitably  
qualified person. If it is necessary to replace the plug, 
it is preferable to use an ‘unbreakable’ type that will 
resist damage. Only use a 13 Amp plug, and make 
sure the cable clamp is tightened securely. Fuse as 
required. If extension leads are to be used, carry out 
the same safety checks on them, and ensure that they 
are correctly rated to safely supply the current that is 
required for your machine.

Make sure when the machine is placed that it sits 
firmly on the bench or stand, that it does not rock,
that it is sufficiently clear of adjacent obstacles so 

that you have unimpeded access to all parts of the 
machine. The machine is designed for indoor use, do 
not use when or where it is liable to get wet. Keep the 
machine clean; it will enable you to more easily see 
any damage that may have occurred. 
 
Clean the overall machine with a damp soapy cloth 
if needs be, do not use any solvents or cleaners, as 
these may cause damage to any plastic parts or to 
the electrical components. Clean the machine  
components with a lightly oiled cloth. If the machine 
is liable to be standing idle for any length of time 
a light coat of machine or spray oil will minimise 
rusting.

Keep the work area as uncluttered  
as is practical, this includes personnel 
as well as material. Under no circum-
stances should CHILDREN be allowed 
in work areas.

It is good practice to leave the machine unplugged 
until work is about to commence, also make sure
to unplug the machine when it is not in use, or  
unattended. Always disconnect by pulling on the 
plug body and not the cable. Once you are ready to 
commence work, remove all tools used in the setting
operations (if any) and place safely out of the way. 
Re-connect the machine. 
Carry out a final “tightness” check e.g. chuck or face 
plate, work piece, tool rest, etc., check that the
correct speed has been selected. 
 

Summary of Contents for AT1416VS

Page 1: ...k AT1416VS Woodturning Lathe The AW1416VS utilises the very reliable inverter technology usually found on much larger machines Code 501214 Electronic variable speed is a desirable feature for woodturn...

Page 2: ...643 1417INV 1430 1430INV 1443 1443INV 1643INV Manufactured by The Kingcraft Machinery Company Limited is in compliance with the following standards or standardisation documents in accordance with Coun...

Page 3: ...stock 1 No Live Centre Fitted to Tailstock Packet Containing 1 No Push Rod 1 No 8mm Hex Key 2 No Steel Carryng Handles with four 1 4 unc x 5 8 Phillips Screws 1 No 24 Index Pin with Magnetic Base 2 No...

Page 4: ...ts firmly on the bench or stand that it does not rock that it is sufficiently clear of adjacent obstacles so that you have unimpeded access to all parts of the machine The machine is designed for indo...

Page 5: ...n A deep cut a lost fingertip or worse is not worth it Above all OBSERVE make sure you know what is happening around you and USE YOUR COMMON SENSE Specific Safety Instructions for Woodturning Lathes 1...

Page 6: ...e also a good idea as is eye protection if your cleaning process tends to be a little bit enthusiastic After cleaning lightly coat the machine with a thin layer of light machine oil N B If you used pa...

Page 7: ...e holes in the lathe Figure 08 I Step 3 Locate the two 5 16 unc x 1 caphead bolts and spring washers I Slot them through the holes in the extension bed H lightly screw them into the lathe bed using a...

Page 8: ...control unit Access panel lock Tailstock lock Lathe bed Motor Headstock wheel Headstock Faceplate Tool rest Tool rest lock Banjo Green ON Red OFF Spindle speed LED Speed control knob Forward Reverse s...

Page 9: ...easy to use keypad The digital keypad comes in two parts the display panel and keypad The display provides the parameter display and shows operation status of the AC drive The keypad provides program...

Page 10: ...th one of the 24 pre drilled hole positions on the index pulley See figs 9 10 11 Figure 11 Figure 12 Locate the 24 index pin F and slide the pin into the pre drilled holes to lock the pulley to the de...

Page 11: ...LATHE FROM THE MAINS SUPPLY Lower the access panel A on the headstock by loosening the access panel lock caphead screw B using a Hex key See figs 19 20 Open the motor access door C by pulling the spi...

Page 12: ...you may have been using stow carefully away the lathe is now ready to be used again Figure 19 Loosen the access panel caphead screw B using a Hex key Figure 20 Lower the access panel to give access t...

Page 13: ...bed and to prevent corrosion Check the tension of the belt and adjust See pages 11 12 for Changing the Belt Speed Check any build up of wood shaving on the motor and spindle pulley s and clean if nec...

Page 14: ...Parts Breakdown 14...

Page 15: ...Parts Breakdown 15...

Page 16: ...Parts List 1 16...

Page 17: ...Parts List 2 17...

Page 18: ...Parts List 3 18...

Page 19: ...athe Stand Product Code 951248 1 LEG BASE 1 2 LEG SUPPORT 1 3 LEG BAR 1 4 HEX SCREW 1 4 1 2 12 5 WASHER 1 4 12 6 CAP SCREW 3 8 1 4 7 WASHER 3 8 4 8 WHEEL 2 9 FOOT 3 8 2 10 NUT 3 8 2 11 NYLON NUT 5 16...

Page 20: ...Wiring Diagram 20...

Reviews: