21
W H I T E
A X M I N S T E R
W
Changing the Sanding Belt...
DISCONNECT THE SANDER FROM THE MAINS SUPPLY
!
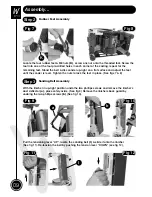
Raise the linisher to the upright position by loosening the two clamping nuts, see figs 1 &
39 & secure in position. refer to
(STEP 3 Sanding Belt Assembly)
, to remove the belt.
Inspect the new belt, ensure that there are no tears or rips (especially along the edges),
check the direction arrows on the inner surface of the belt and fit accordingly. (The direction
of the arrows should point to the drive drum end of the machine).
Note:
If you are using an old belt, and the arrow marking has worn off, check the direction
of travel (see diagram below.)
Tracking the belt
Direction of travel
Belt underlay
Glue Joint
Belt overlay
refer to
(STEP 3 Sanding Belt Assembly)
, to replace the belt.
NOTE1:
All directions are given from the view point of the operator standing behind the
drive drum end looking down the length of the machine. The tracking control works as
follows:- turning the tracking adjuster clockwise will track the belt to the right, anti-clockwise
will track the belt to the left.
NOTE2:
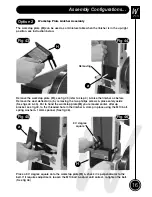
Using your hand, roll the belt towards the drive drum end, check that the belt
stays in the middle of the table, if not adjust the track control slightly, and move the belt
again, continue until the belt runs down the centre of the linishing table (See figs 13 & 14).
NOTE: You can wear a glove if you wish, to stop the abrasive on the belt cutting your
skin.
Replace the linishers back guard, described in
(STEP 3 Sanding Belt Assembly)
, lower
the linisher and clamp in place.
DO NOT MAKE LARGE ADJUSTMENTS, AND REMEMBER THE BELT MAY
TAKE SOME TIME TO REACT TO YOUR ALTERATION. LITTLE BY LITTLE IS A GOOD
MAXIM TO OBSERVE WHEN CARRYING OUT TRACKING OPERATIONS.
!

