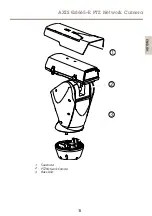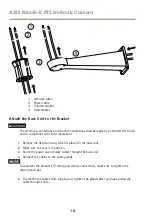
AXIS Q8665–E PTZ Network Camera
3
4
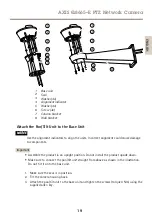
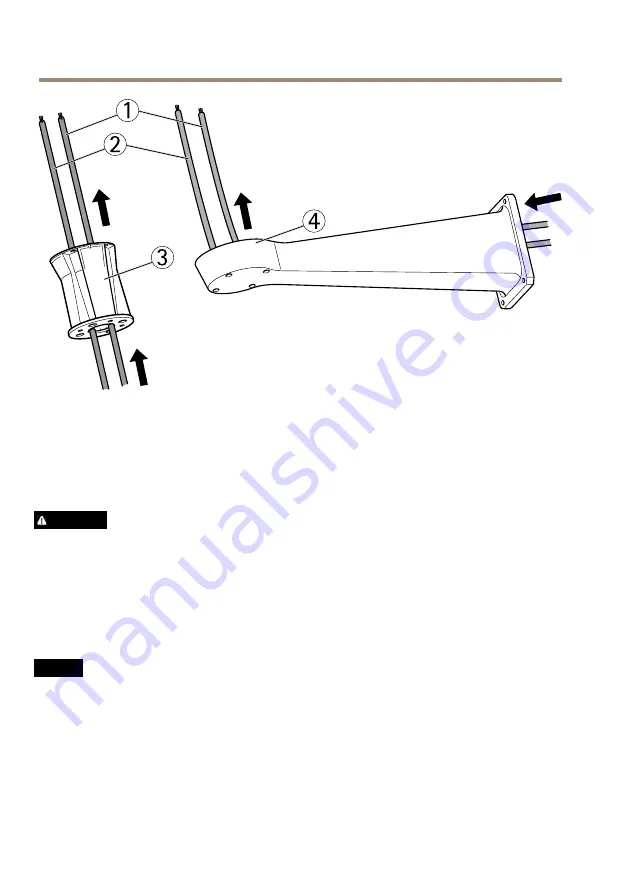
1
2
1
Network cable
2
Power cable
3
Column bracket
4
Wall bracket
Attach the Base Unit to the Bracket
WARNING
The electrical connections and conduit installations shall be made by a certified electrician
and in compliance with local regulations.
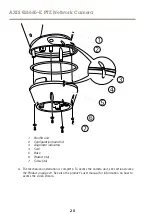
1. Remove the desiccant bag, which is placed in the base unit.
2. Make sure the seal is in position.
3. Route the power and network cables through the base unit.
4. Connect the cables to the cable glands.
NO
NO
NOTICE
TICE
TICE
To maintain the product's IP rating and reduce cable strain, make sure to tighten the
cable gland caps.
5. To prevent the cables from slipping out, tighten the glands after you have pulled the
cable through them.
16
Summary of Contents for Q8665-E
Page 4: ......
Page 8: ...8 ...
Page 11: ...AXIS Q8665 E PTZ Network Camera 2 3 1 1 Sunshield 2 PTZ Network Camera 3 Base Unit 11 ENGLISH ...
Page 26: ...26 ...
Page 30: ...30 ...
Page 48: ...48 ...
Page 52: ...52 ...
Page 70: ...70 ...
Page 74: ...74 ...
Page 92: ...92 ...
Page 96: ...96 ...
Page 99: ...AXIS Q8665 E PTZ Network Camera 2 3 1 1 Parasol 2 Cámara de red PTZ 3 Unidad base 99 ESPANÕL ...
Page 114: ...114 ...
Page 118: ...118 ...
Page 121: ...AXIS Q8665 E PTZ Network Camera 2 3 1 1 サンシールド 2 PTZネットワークカメラ 3 ベースユニット 121 ò ò ...

