6
EN
GLISH
Hardware Installation
1. Turn off the printer’s power.
2. Connect the print server to your printer with the supplied USB
cable.
3. Turn the printer’s power on.
4. Plug the AC power adapter into the power connector on the
backside of the wireless print server.
5. Wait 1 minute.
6. Press the print server’s external
Reset
button for 5 seconds. A
test page will be printed on the connected printer, displaying
information about the print server’s IP address, firmware
number, etc.
See
Print Server Management Using the Reset Button,
on page 21 for
detailed instructions on using the reset button.
• The Status LED will flicker when data is being transmitted and
printed.
• When the print server is powered on, the Status LED will flash 5
times as part of the unit’s Power On Self Test (POST). If the LED
doesn’t flash 5 times when you power on the unit, disconnect all
cables and repeat the installation procedure described here.
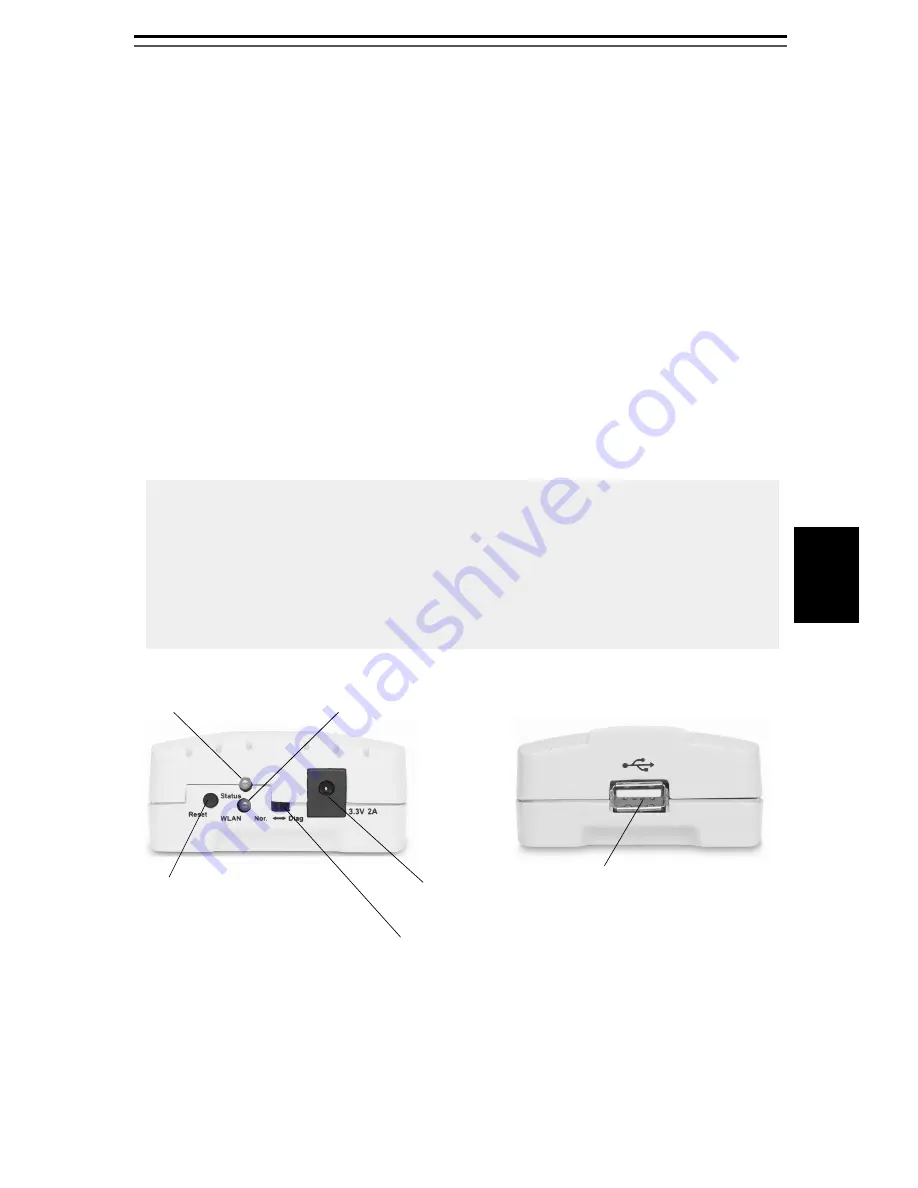
Reset button
:
Status LED
(orange)
WLAN LED
(green)
DIP switch:
Power connector
USB Connector
Nor.
= Normal mode
Diag.
= Diagnostic Mode
- Press once to restart print server.
- Press 5 seconds to print test page.


