


GOT815-834 User
’
s Manual
AMI BIOS Setup Utility
17
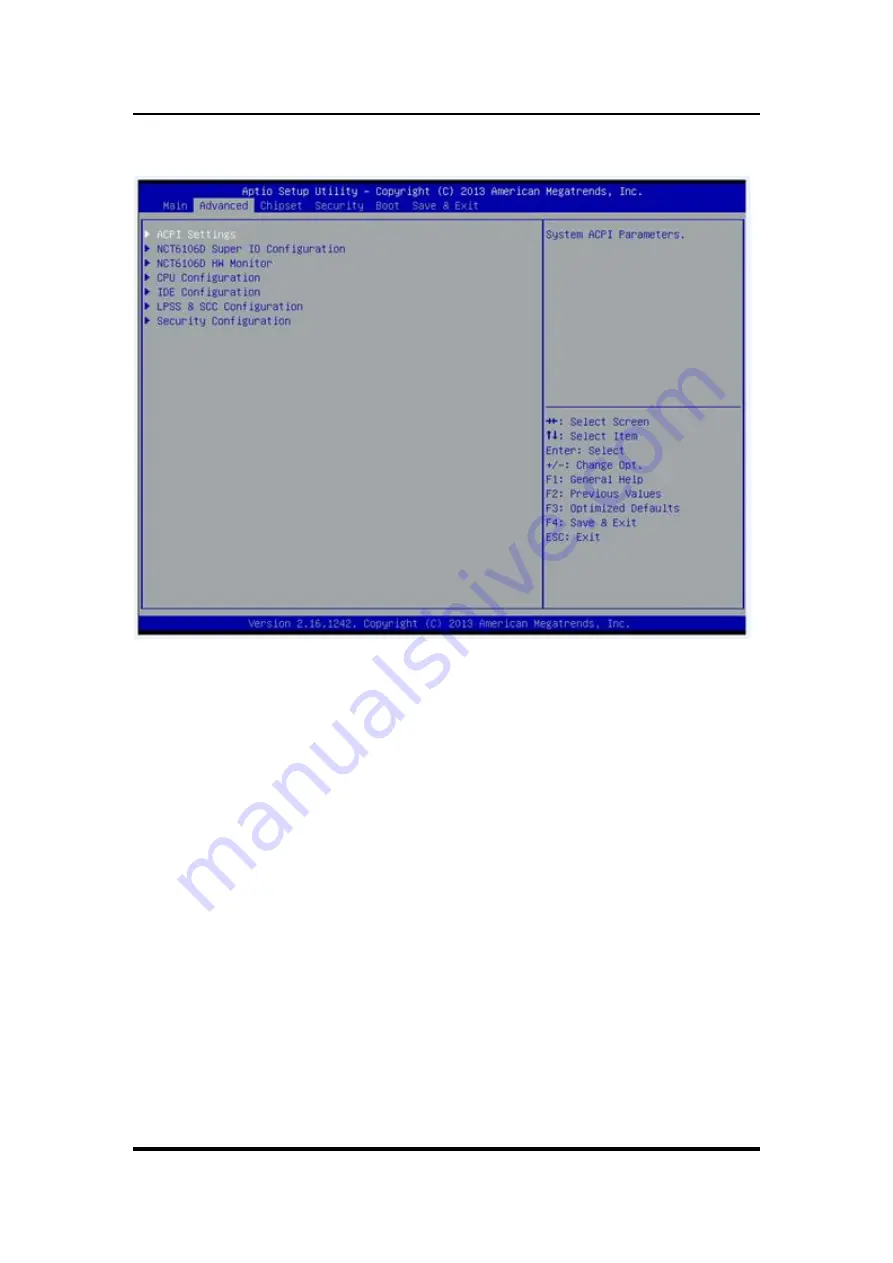
3.3 Advanced Menu
The Advanced menu allows users to set configuration of the CPU and other system
devices. You can select any of the items in the left frame of the screen to go to the
sub menus:
ACPI Settings
NCT6106D Super IO Configuration
NCT6106D H/W Monitor
CPU Configuration
IDE Configuration
LPSS & SCC Configuration
Security Configuration
For items marked with
“
”, please press <Enter> for more options.’
ACPI Settings
You can use this screen to select options for the ACPI Configuration, and change the value of
the selected option. A description of the selected item appears on the right side of the screen.
Summary of Contents for GOT817-834
Page 6: ...vi This page is intentionally left blank...
Page 14: ...GOT817 834 User s Manual Introduction 8 This page is intentionally left blank...
Page 34: ...GOT817 834 User s Manual 28 AMI BIOS Setup Utility South Bridge...
Page 36: ...GOT817 834 User s Manual 30 AMI BIOS Setup Utility 3 5 Security...
Page 38: ...GOT817 834 User s Manual 32 AMI BIOS Setup Utility 3 7 Save Exit...
Page 44: ...GOT817 834 User s Manual 38 Drivers Installation This page is intentionally left blank...


