background image

12 


b)


Setting the timer to turn one cooking zone off 

Set one zone 

 
Touch theorof the corresponding cooking zone you wantto set the 
timer for. 


Set the time by touching the or control of the timer 


Touching the“-”and“+” together, thetimer iscancelled, 
andthe“--”will show in the minute display. 


When the time is set, it will begin to count downimmediately.The 
display will show the remaining time and the timerindicator will 
flash for 5 seconds 


When cooking timer expires, the corresponding cookingzone will 
be switched off automatically 


Note:


a)


The red dot next to power level indicator will illuminate indicating that zone is selected. 


b)


If you want to change the time after the timer is set, you have to start from step 1. 


3.3.5Over-Temperature Protection 

A temperature sensor equipped can monitor the temperature inside the ceramic hob.When an excessive 
temperature is monitored, the ceramic hob will stop operation automatically. 

3.3.6Residual Heat Warning 

When the hob has been operating for some time,there will be some residualheat.The letter “ H”appears to 
warn you to keep away from it. 


Summary of Contents for A60-005 GL

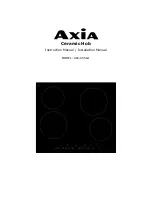
Page 1: ...Ceramic Hob Instruction Manual Installation Manual MODEL A60 005 GL...

Page 2: ...chnical Specification 8 3 Operation of Product 8 3 1 Touch Controls 8 3 2 Choosing the right Cookware 9 3 3 How to use 9 3 3 1 Start cooking 9 3 3 2 Finish cooking 10 3 3 3 Locking the Controls 10 3 3...

Page 3: ...death 1 2 2 Cut Hazard Take care panel edges are sharp Failure to use caution could result in injury or cuts 1 2 3 Important safety instructions Read these instructions carefully before installing or...

Page 4: ...with cardiac pacemakers or other electrical implants such as insulin pumps must consult with their doctor or implant manufacturer before using this appliance to make sure that their implants will not...

Page 5: ...sing the touch controls Do not rely on the pan detection feature to turn off the cooking zones when you remove the pans Do not allow children to play with the appliance or sit stand or climb on it Do...

Page 6: ...can be used by children aged from 8 years and above and persons with reduced physical sensory or mental capabilities or lack of experience and knowledge if they have been given supervision or instruc...

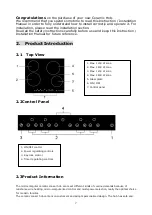
Page 7: ...Product Introduction 2 1 Top View 2 2Control Panel 2 3Product Information The microcomputer ceramic cooker hob can meet different kinds of cuisine demands because of resistance wire heating micro comp...

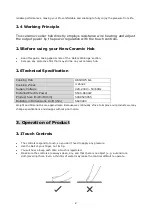
Page 8: ...g Zones 4 Zones Supply Voltage 220 240V 50 60Hz Installed Electric Power 5500 6600W Product Size D W H mm 590X520X55 Building in Dimensions A B mm 560X490 Weight and Dimensions are approximate Because...

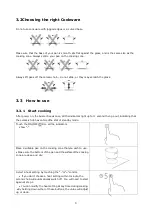
Page 9: ...ors light up for 1 second then go out indicating that the ceramic hob has enteredthe stat of standby mode Touch the ON OFF control all the indicators show Place a suitable pan on the cooking zone that...

Page 10: ...e controls are locked all the controls except the ON OFF control are disabled To lock the controls Touch the lockcontrol The timer indicator will show Lo To unlock the controls Make sure the ceramic h...

Page 11: ...he will show in the minute display When the time is set it will begin to count downimmediately The display will show the remaining time and the timerindicator will flash for 5 seconds Buzzer will beep...

Page 12: ...oking timer expires the corresponding cookingzone will be switched off automatically Note a The red dot next to power level indicator will illuminate indicating that zone is selected b If you want to...

Page 13: ...ed saucesbelow boiling point Some tasks including cooking rice by the absorption method may require a setting higher than thelowest setting to ensure the food is cooked properly in the time recommende...

Page 14: ...sta 9 stir frying searing bringing soup to the boil boiling water 6 Care and Cleaning What How Important Everyday soiling on glass fingerprints marks stains left by food or non sugary spillovers on th...

Page 15: ...opoff 2 Soak up the spill 3 Wipe the touch control area witha clean damp sponge or cloth 4 Wipe the area completely dry with a paper towel 5 Switch the power to the cooktopback on The cooktop may beep...

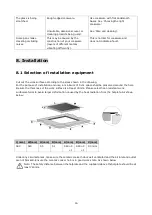
Page 16: ...g to the sizes shown in the drawing For the purpose of installation and use a minimum of 5 cm space shall be preserved around the hole Be sure the thickness of the work surface is at least 30mm Please...

Page 17: ...ced on a stable smooth surface use the packaging Do not apply force onto thecontrols protruding from the hob Fix the hob on the work surface by screw four brackets on the bottom of hob see picture aft...

Page 18: ...not to be used 8 4 Connecting the hob to the mains power supply The power supply should be connected in compliance with the relevant standard or a single pole circuitbreaker The method of connection...

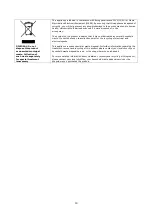
Page 19: ...sed of in the wrong way The symbol on the product indicates that it may not betreated as normal household waste It should be taken to acollection point for the recycling of electrical and electronicgo...

Reviews: