background image

3

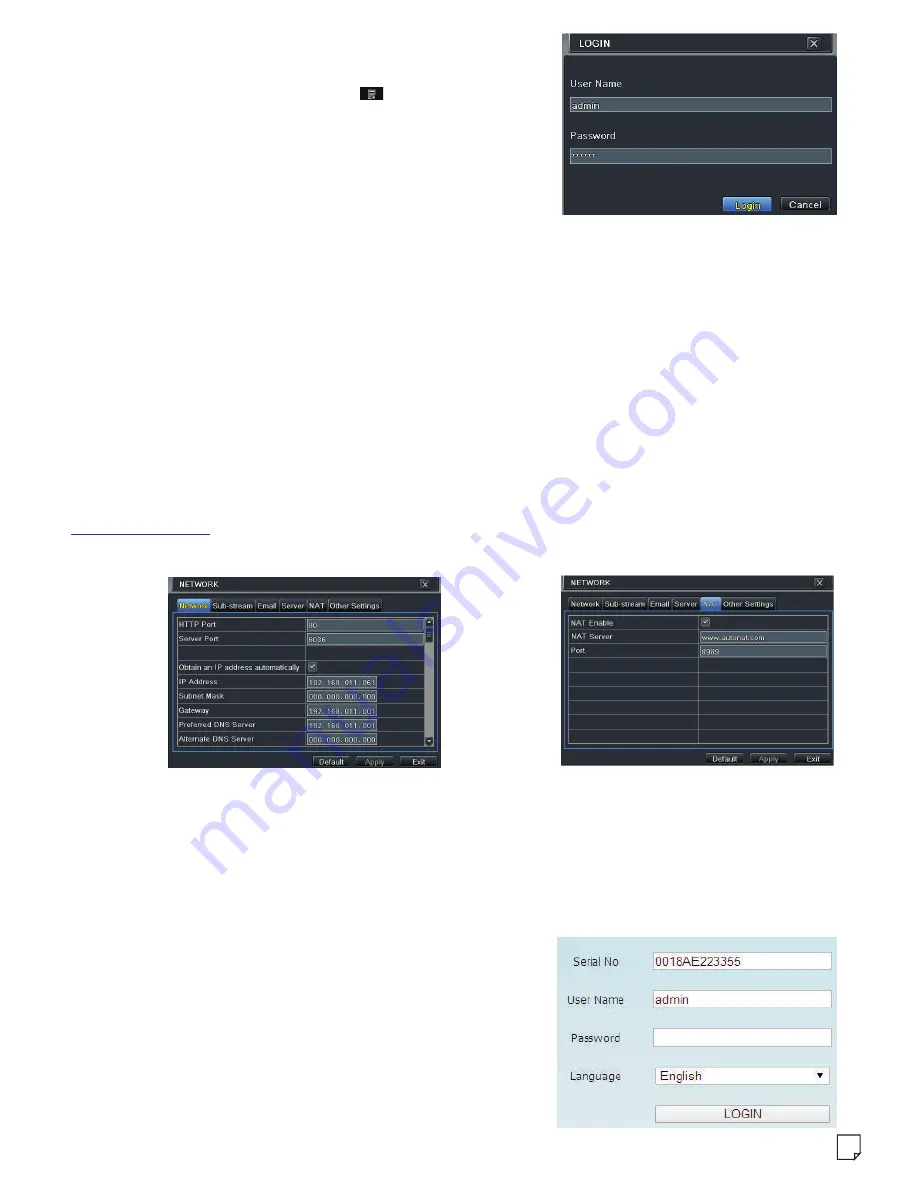
(Fig 1)

(Fig 2)

► 

After finishing the NAT settings, you can enter  the NAT Server on the PC(Input 

http://www.autonat.com

to goto the IE client). If you are the first time to access the NAT, the network will download the ActiveX 

automatically. After installing ActiveX successfully, it will pop up the login box:

Serial No

: The MAC address of the DVR(Go to Menu

Information

Network to check the MAC address of

the DVR).

User Name

: the username of DVR, the default username

is admin.

Password

: the password of DVR, the default 

password is 123456.

NAT Access

6.


Login

After the wizard setup, you can see the live image.Right 

click  to pop up a menu toolbar. Click 

  main menu 

button. This will take you to see a login box. The default 

username is

 admin

; the


default


password is


123456

.

Enter username and password  and click “Login”  button

 to go into the main menu setup.

7.


NAT

► 

The DVR shall be powered on and connected to the network. 

 Go to Menu

Setup

Network. Refer to Fig 1. You can obtain the IP address, Subnet Mask and 

Gateway automatically. Also you can manually input them according to the configuration of PC. 

Please make sure  the network segment is the same as that of the network which is used.

 Set the preferred or alternative DNS Server. Click “Apply” to save the parameters.


Go to Menu

Setup

Network

NAT tab. Refer to Fig 2. 

⑤ 

Enable NAT and input the NAT Server and Port number (The default NAT Server is 

 ; the default Port number is 8989)  

⑥ 

Click “Apply” to save the parameters.

NAT Settings


www.autonat.com

.

Summary of Contents for T900

Page 1: ...Digital Video Recorder Quick Start Guide ...

Page 2: ...be used for a long period of time 2 Packing Check Please check the device and the accessories after getting the device If there are any damages shortages or defects please contact your dealer immediately 3 HDD Installation This series of the product supports to install 1 SATA hard drives Please use the HDD the manufacturers recommend specially for security and safe field Please make sure that the ...

Page 3: ...ut connect to microphone Audio output connect to sound box Network port Connect USB mouse or USB storage devices 5 Startup Shutdown Startup Connect the monitor Connect with the power The device will boot and the power indicator will turn blue A Wizard window will pop up Shutdown By mouse Enter Main Menu and then select Shutdown icon This will bring up a shutdown window The device will shut down by...

Page 4: ...lick main menu button This will take you to see a login box The default username is admin the default password is 123456 Enter username and password and click Login button to go into the main menu setup 7 NAT The DVR shall be powered on and connected to the network Go to Menu Setup Network Refer to Fig 1 You can obtain the IP address Subnet Mask and Gateway automatically Also you can manually inpu...

Page 5: ...ithout port mapping Go to Other Settings tab and enable UPnP and then click Apply button to save Enable the UPnP function in the router 9 Manual Recording Before recording please install and format a HDD Right click the mouse in the live interface to pop up the following menu toolbar Click button to start recording 10 Playback Right click the mouse in the live interface to pop up the menu toolbar ...

Reviews: