www.AVuno.com
www.AVuno.com
| Page 11
| Page 10
OPERATING INSTRUCTIONS
OPERATING INSTRUCTIONS
REMOTE CONTROL
•
Insert the batteries into the remote control making sure to align the battery polarities correctly.
•
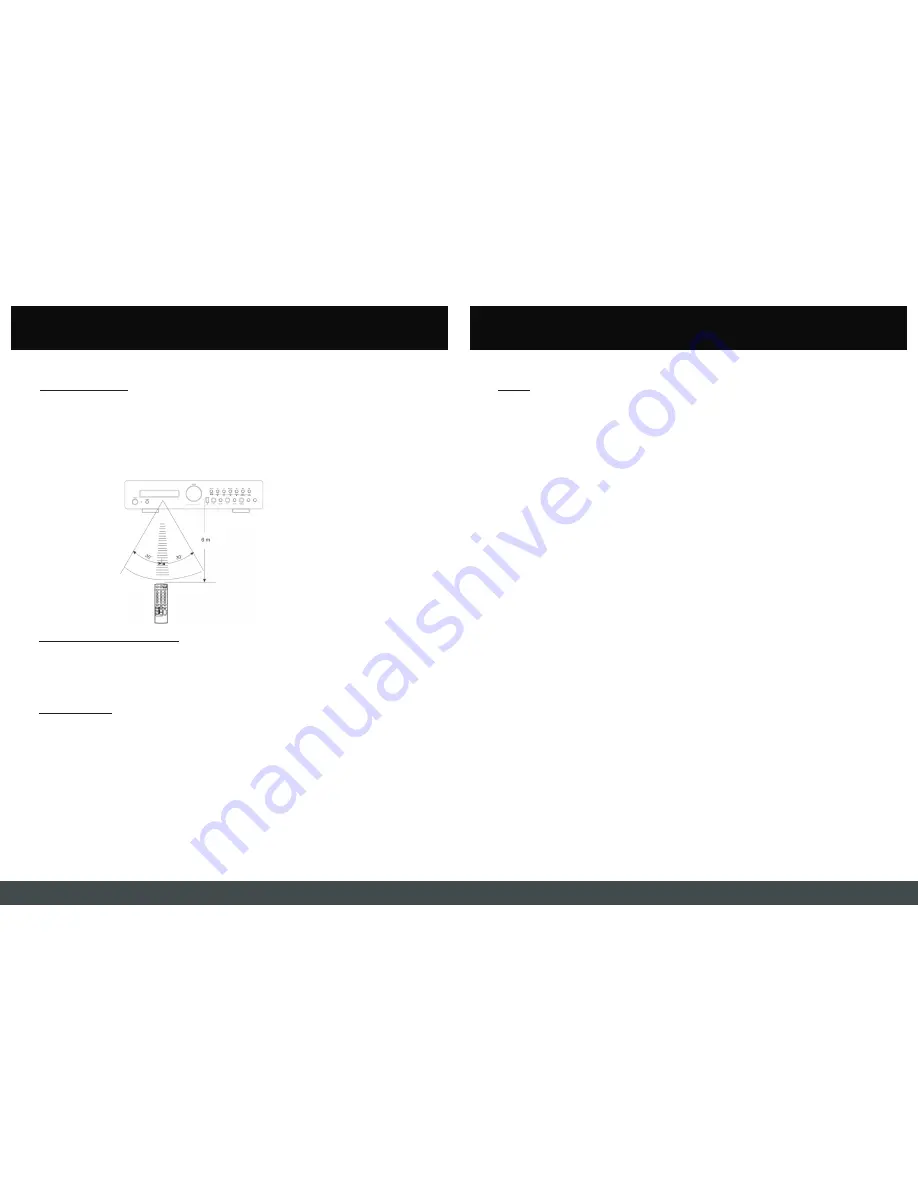
Point the remote control at the front panel of the unit and select your desired function.
•
The remote control will work up to a maximum of 6m from the unit and at a 30 degree angle
left or right to the perpendicular.
•
For best performance ensure there is no obstacle between the remote control and the unit and
where possible try not to expose the remote sensor to direct lighting.
•
Remember batteries can leak so remove them if the remote control is not going to be in use
for an extended period of time. Avoid contact with liquids as this could damage the remote
control.
TUNER
•
Pressing the USB / TUNER button twice, on either the remote control or front panel of the unit
turns on the tuner section.
•
To listen to another source just select it from the remote control or if you are using the front
panel controls just press the USB / TUNER button a third time to EXIT this mode and then
select the required source from the front panel selections.
•
The tuner is AM / FM with RDS facilities.
•
To start enjoying your tuner simply select the band you require AM or FM and press the scan
+ or scan – button to tune the radio up or down the band. Pressing the scan button once
tunes one step at a time, however holding the scan button down for 3 seconds or so makes
the tuner search through the band automatically. Once a station has been found it will stop,
allowing you to listen. Depress the scan button for 3 seconds again to continue searching for
other stations.
•
There are 64 presets available 32 on AM and 32 on FM. Each of these 32 presets consists of
four groups A, B, C or D and each of these groups is made up of 8 presets each.
•
You can automatically preset all available radio stations by pressing and holding the AUTO
button on the remote control. The tuner will scan the band selected and preset any detected
stations sequentially.
•
To manually preset your stations using the remote first tune in the desired station. Choose the
group A – D from the keypad that you wish to store it in. Press the MEMORY button,
“MEMORY” will appear in the digital display. Next assign it a position 1 – 8 using the keypad
on the remote. Once this is done “OK” will appear in the display to confirm the station has
been stored.
•
To manually preset your stations using the front panel controls first tune in the desired station.
Choose the group A – D using the “A/B/C/D” button pressing it until the desired group
appears. Press the MEMORY button, “MEMORY” will appear in the digital display. Using the
1 -8 button, press it repeatedly until the desired position appears in the display and store it by
pressing the MEMORY button “OK” will appear in the display to confirm the station has been
stored.
•
To recall your presets at anytime simply select the group A – D and the desired preset, sit
back and enjoy.
SELECTING A SOUND SOURCE
•
Select the sound source you require from the front panel controls or the remote control DVD,
CD VCR, AUX / PHONO or USB / TUNER.
•
Adjust the volume to the desired level and by pressing the menu button you can adjust the
bass, treble and balance to suit your needs.
USB PLAYBACK
•
To select the USB player press the USB/TUNER button until the display shows “USB INPUT”
•
If no USB device is connected it will read “USB NOT READY”.
•
If a USB devise is detected it will start playback at track 1 on the device. By pressing the ID3
button on the remote you can get the display to show different information about the track
playing. Pressing it repeatedly displays either the folder name, the folder and track number
playing, the track title, artist name, album title or the filename of the track.
•
If the device contains several folders with different tracks you can choose which folder you
want to play by pressing the FOLDER/TRACK button on the remote or front panel. “CHOOSE
FOLDER” appears in the display and you can then flick through the folders using the NEXT
and PREVIOUS buttons. To play a track from the desired folder simply press the
FOLDER/TRACK button again, “CHOOSE TRACK” appears in the display and you can then
skip through the tracks using the NEXT and PREVIOUS buttons.
•
The USB player can handle USB devices with FAT32 or FAT16 format.
•
Note also that even though the player can handle over 65,000 folders or songs, the 3 digit
display means that when the song count exceeds 999, the count will start again from 1.


