Smoke Sensor w/Escape Light
(RMA-SS1-SEN)
AVTECH Software, Inc.
Page 2 of 3
AVTECH.com
Configure Your Smoke Sensor w/Escape Light
With Room Alert’s Built-In Web Interface
Navigate to
Settings
Æ
Alarm Options
in your Room Alert web interface. The options you
see below will vary depending on the model.
1.
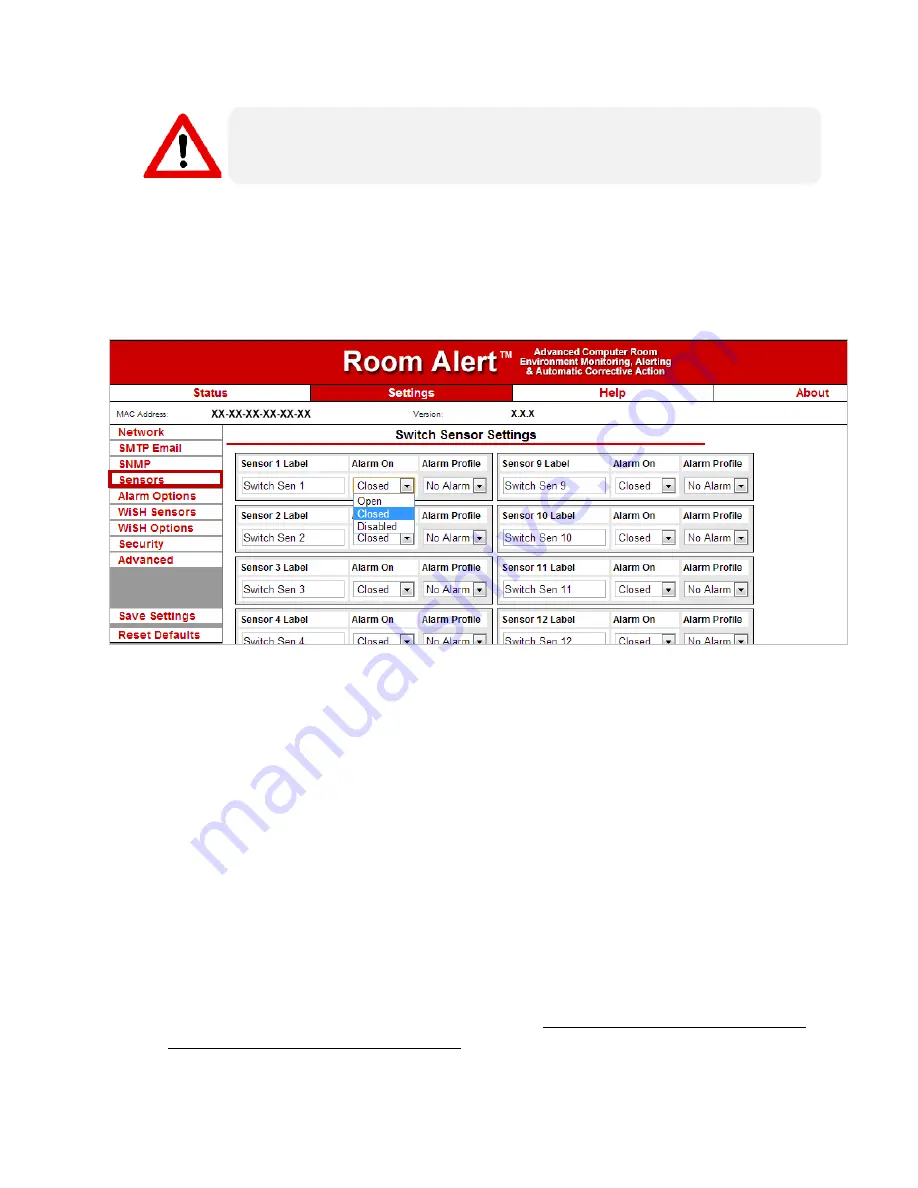
Scroll down to “Switch Sensor Settings.”
2.
Find the switch sensor label that matches the port you connected your sensor to. For
example, if you used the first switch sensor port on your Room Alert, look for “Sensor 1
Label”; if you used the second, look for “Sensor 2 Label,” and so on.
3.
In “Sensor X Label,” you may leave the default name or enter something more
descriptive, such as “Server 8 Smoke” or “Smoke Rm 2.”
4.
In “Alarm On,” choose “Closed,” which means the smoke alarm has been triggered. The
default state is “Open,” which means the smoke alarm has NOT been triggered.
5.
For models with the “Use Alarm Profile” feature: if you have configured Alarm Profiles
in the Alarm Options screen, you may choose a profile from the drop-down menu.
Otherwise, you may leave the default, “No Alarm.”
6.
Click
Accept Changes
at the bottom of your screen to temporarily save your settings.
You may now navigate to another screen; however, if you close the web interface before
the next step, you will lose your changes.
7.
Click
Save Settings
in the navigation bar to the left of your screen. Your Room Alert
Do not connect the dry contacts on AVTECH products or other electrical appliances
to live circuits.
Use only low-voltage 2-wire cable to connect dry contacts.


