Avtech Ezum DGC1304-10 User Manual Download Page 3


INSTALLATION 

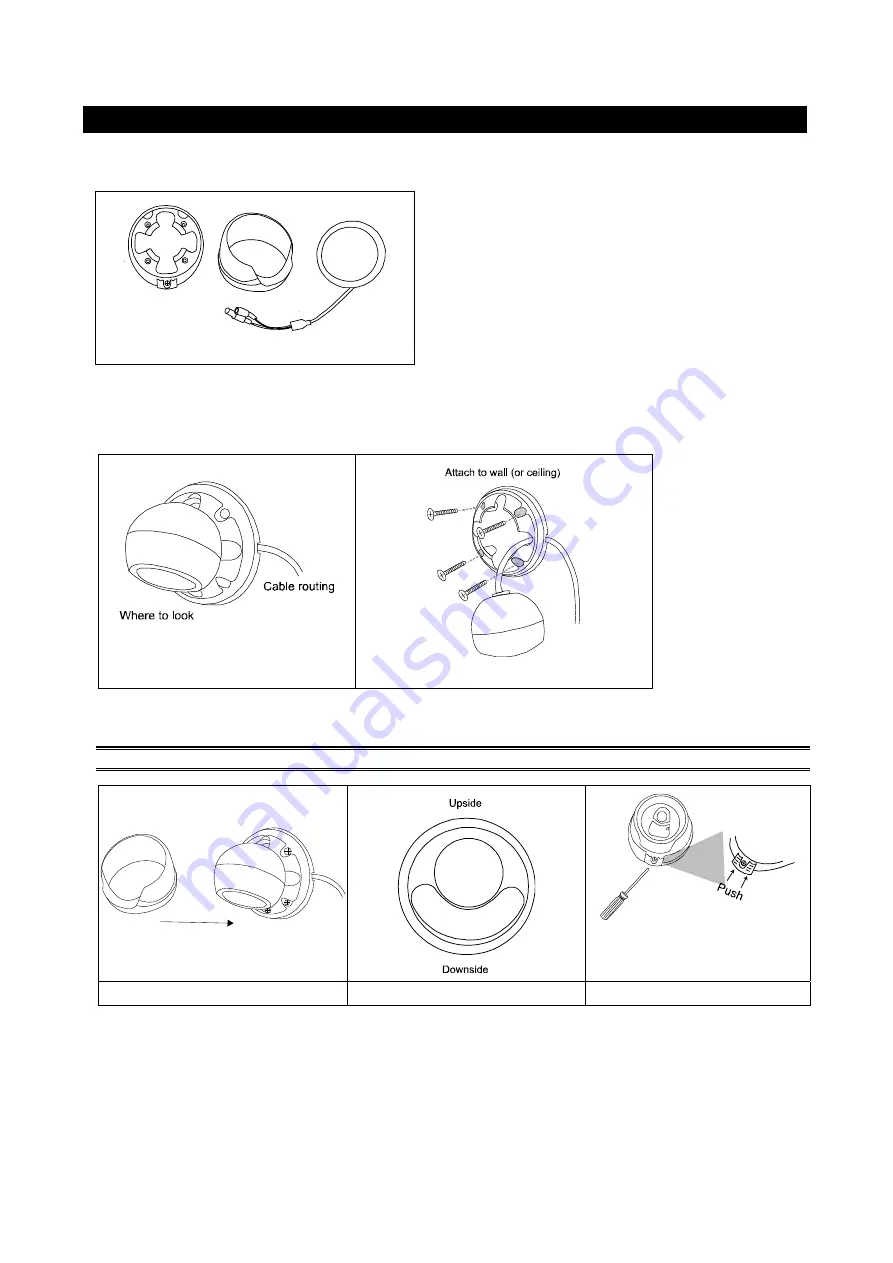
Step1:  Disassemble the camera base into two parts, and you should have three parts in total including the camera lens 

as illustrated in 

Figure 1


Figure 1


Step2:  Locate the base on the place you would like to install the camera; make sure the cable can be arranged 

properly in the base. (Refer to Figure 2) 

Step3:  Drill 4 holes and screw the base to the wall (or ceiling). 


Figure 2


Figure 3


Step4:  Put together the case and the lens, and slightly adjust the camera lens. Make sure it faces your target 

surveillance area. 

NOTE: 

Do not install the lens upside down. (Refer to 

Figure5

Put together


Figure 4


Figure 5


Figure 6


Step 5:  Rotate the case to the base and make sure it’s fastened. (Refer to 

Figure 6

Step 6:


Power on the camera and fine-tune the viewing angle. 
For details, please refer to the section, "

FOCAL LENGTH & FOCUS ADJUSTMENT

". 


Summary of Contents for Ezum DGC1304-10

Page 1: ...o constitute a risk of electric shock to persons This exclamation point within an equilateral triangle is intended to alert the user to the presence of important operating and maintenance servicing in...

Page 2: ...s 1080P 25fps Min Illumination 0 1 Lux F1 6 Wide F2 8 Tele 0 Lux IR LED ON S N Ratio More than 48dB AGC OFF Shutter Speed 1 30 1 25 sec 1 720000 1 600000 sec Lens Motorized f2 8 f8 0mm F1 6 F2 8 Lens...

Page 3: ...tep3 Drill 4 holes and screw the base to the wall or ceiling Figure 2 Figure 3 Step4 Put together the case and the lens and slightly adjust the camera lens Make sure it faces your target surveillance...

Page 4: ...zoom out on the image to its original size Zoom in out Click to zoom in out the image Focus near far Click to adjust the focus of the image IR intensity Click and drag the slider from 0 5 to adjust th...

Page 5: ...P to enter the menu of camera parameters ADVANCED CONFIG CAMERA CH1 CH2 CH3 CH4 DETECTION OSD MENU SETUP ALERT DCCS MENU SETUP NETWORK DISPLAY RECORD F W E8 DCCS DEVICE AVT SERIES NOTIFY CONNECTION OK...

Page 6: ...damage the camera With this function the camera will delay the mode switch at night since the light change is temporary and unnecessary to pay attention AWB MODE AUTO Automatically adjust the white b...

Page 7: ...ft side EX Extend narrow the current area from the right side SY Extend narrow the current area from the top EY Extend narrow the current area from the bottom MOTION MOTION Enable ON disable OFF motio...

Page 8: ...level to compensate the brightness of the image if needed The more the value the brighter the image will be MIRROR OFF ON Enable to turn the images horizontally based on your installation situation wh...

Reviews: