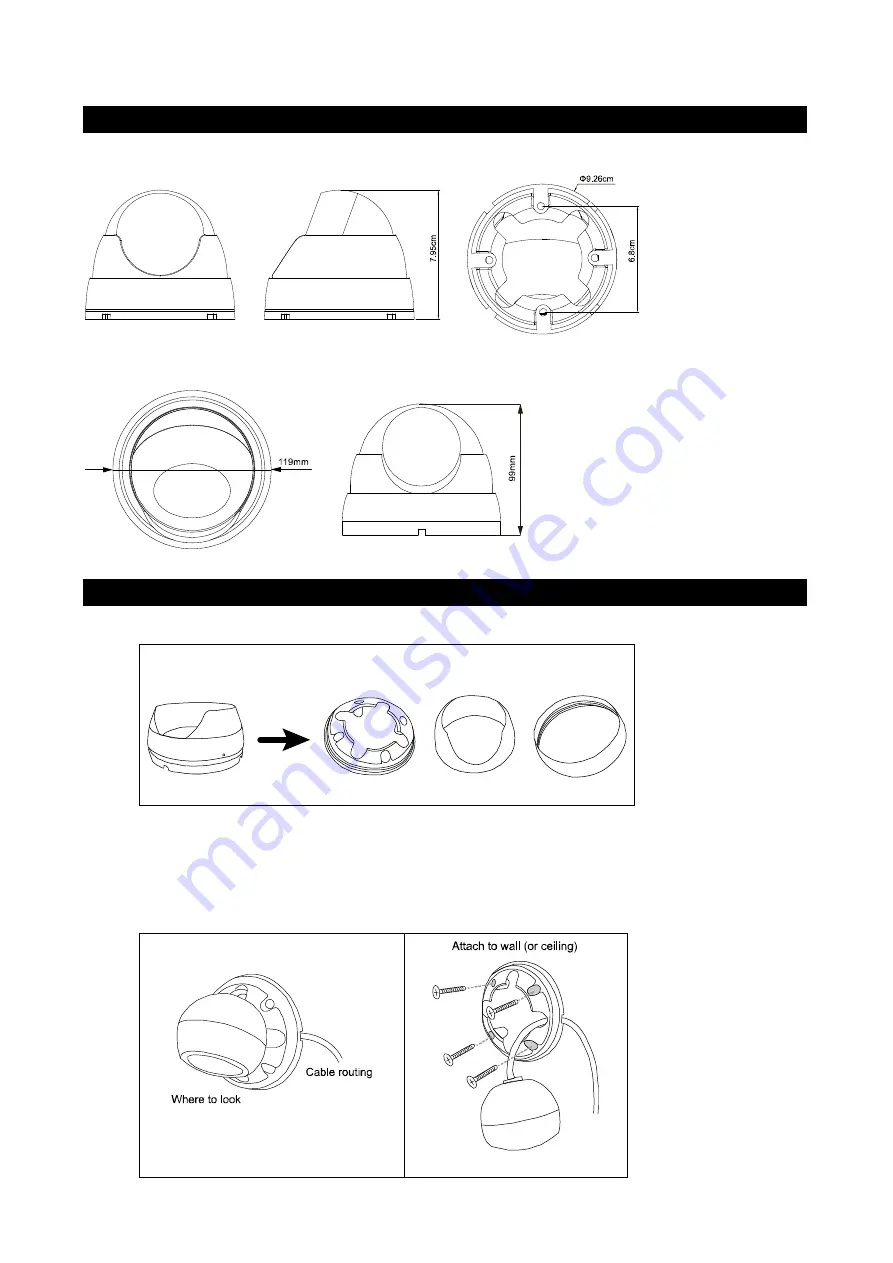
DIMENSIONS*
Model 1
Model 2
*Dimensional Tolerance: ± 5mm
INSTALLATION
Step1: Disassemble the camera case into three parts as illustrated in
Figure 1
.
Part 1
Part 2
Base
Figure 1
Step2: Locate where you want to install this camera (wall or ceiling), and drill holes on the wall or ceiling for
securing the bracket and routing the cables (if necessary).
Step3: Attach the bracket to the wall (or ceiling), and make sure the cables are routed and arranged
properly in the bracket, as shown in
Figure 2.
Step4: Secure the bracket to the wall (or ceiling), as shown in
Figure 3.
Figure 2
Figure 3


