


UM30, UM60, UM90 User Manual
Operation
When all connections to the amplifier are made, turn all rotary controls down and switch on the power (13)
and a power LED will illuminate. Ensure a signal is being fed to the LINE IN connection and gradually increase
the MASTER rotary control (6) part way for testing. Increase the LINE IN rotary (4) until the output is heard
through the speakers. Turn up the MASTER to the maximum required volume level and reduce the LINE IN
control if necessary.
Note: If a line input is not connected to a UM series mixer-amplifier, the initial test can be made
using the built-in Media audio player. See section below for instructions.
If a microphone is connected, make sure it is switched on and gradually increase the MIC control (3) whilst
speaking into the microphone until the required volume level is reached. The microphone should not be able
to “hear” the speakers, which can cau
se feedback (squealing or howling noise).
Media player
UM series mixer-amplifiers are fitted with a built-in media player. This section comprises a Bluetooth receiver,
USB audio player, FM tuner and AUX input. Pressing the SOURCE select button (22) will step through
Bluetooth, USB, AUX and FM tuner modes. Pressing the MUTE button (27) for any source will mute the output.
Bluetooth
The Bluetooth function allows connection of a smart phone or tablet to the media player section for playback
of stored files or streamed digital audio.
In order to enable this function, it will be necessary to pair the sending device to the receiver as follows.
1.
Open the Bluetooth settings menu on the smart phone or tablet (or other sending device)
2.
Scan for Bluetooth devices and look for “adastra
0000
” in the list of available devices
(ensure that the UM amp is powered on and within reception range)
3.
Select “adastra
0000
” and the sending device should confirm t
hat it is connected as an audio device.
(note that “0000” may be a different number if it has been edited –
see below)
4.
Play audio from the sending device, ensuring that volume controls are not turned down/muted
5.
Turn up the MEDIA volume control (5) on the amplifier to the required level.
The Previous, Next and Play/pause buttons (23, 25, 24) will operate in Bluetooth as remote playback controls.
Holding the Previous track or Next track buttons will adjust the output volume of the player down or up.
The Bluetooth name can be customized to enable identification of individual nearby amplifiers.
To customize the Bluetooth number press and hold the Play/Pause button until adastra 0000 is displayed with
one of the characters flashing. Press Previous or Next buttons to edit the number and Play/Pause to select
another character. Hold Play/Pause to store the ID and exit.
Note: Android devices have the facility to re-name devices within the Bluetooth settings menu.
If the Bluetooth ID has been re-named on the Android device, editing the Bluetooth ID on the media player
will not affect the name displayed on that Android device.
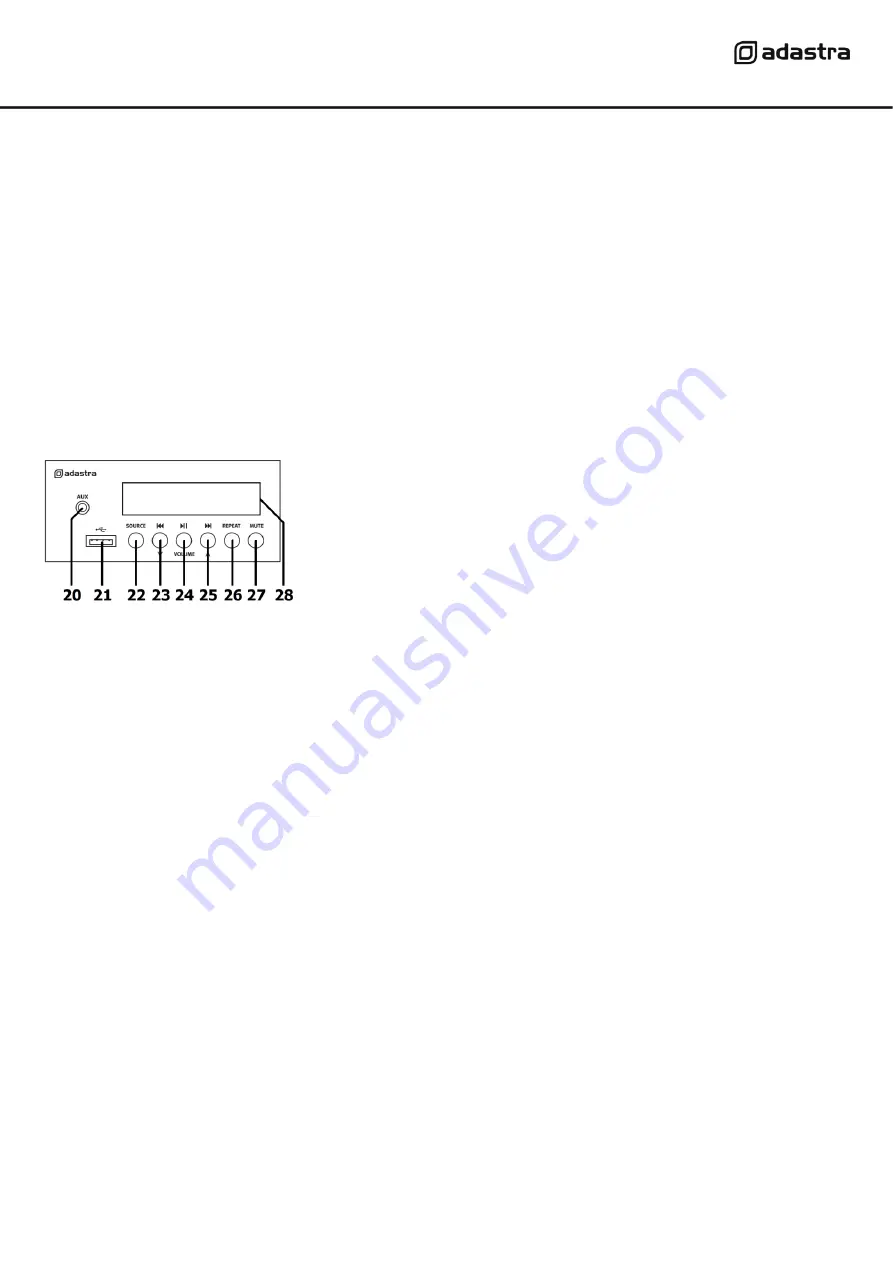
20. AUX input 3.5mm jack
21. USB port
22. SOURCE select button
23. Previous / volume down button
24. Play / pause button
25. Next / volume up button
26. REPEAT mode button
27. MUTE button
28. Media player display


