background image

13 

1.10.2.2


Setup via AirPlay configuration for iOS 


ü


First switch off the AVM device completely using the mains switch on the rear panel (32) 
and wait a short moment until you switch it on again using the mains switch. 
 

ü


As soon as your AVM device has completed the startup process and is in the general 
operating state, open the 

WLAN

 menu in the 

Settings

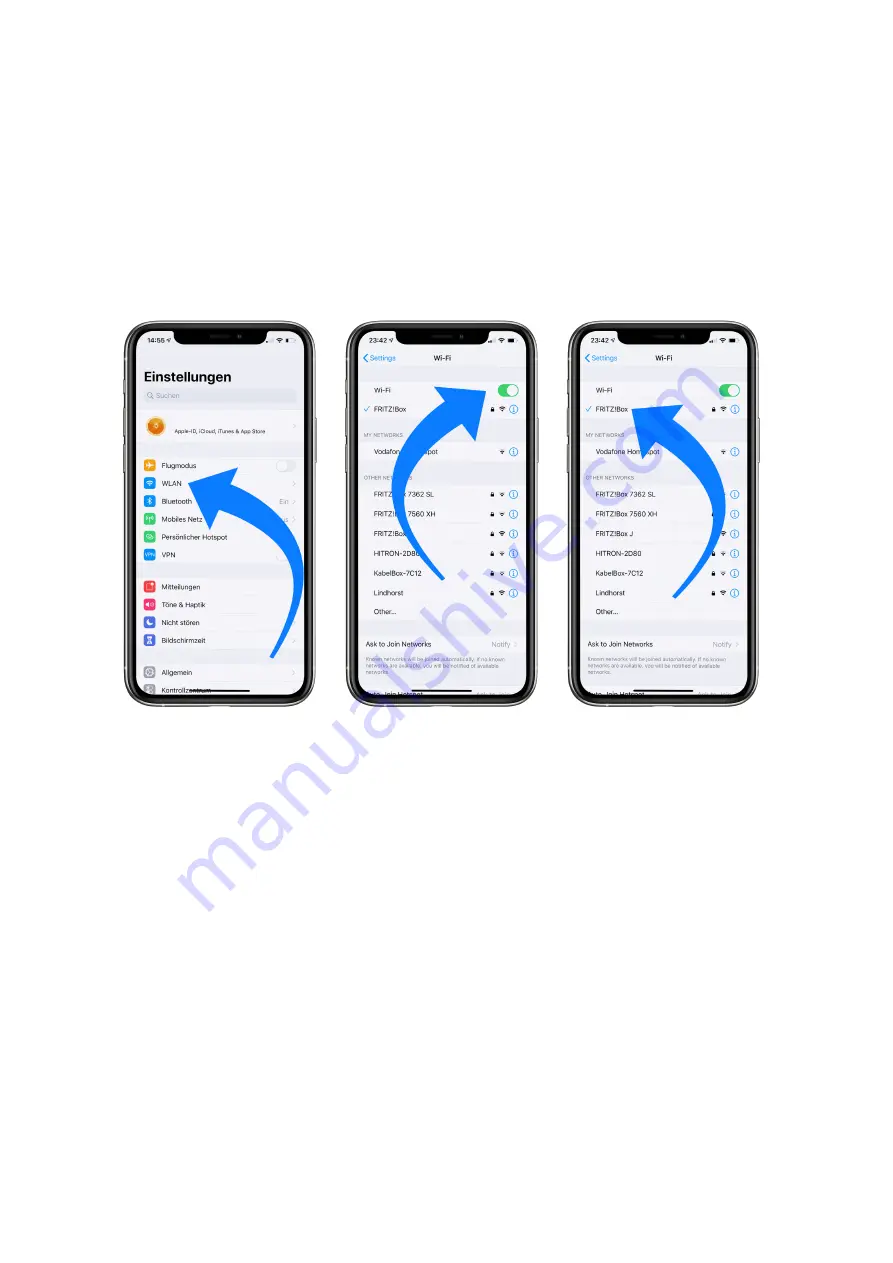
 of your iPhone or iPad. Make sure 

the WLAN function is enabled and your iPhone or iPad is connected to the desired WLAN. 


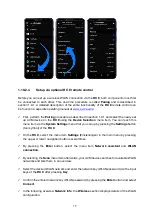
ü


Select the AVM device you want to connect to your WLAN in the 

WLAN

 menu under the 

menu item 

SET UP NEW AIRPLAY SPEAKER

. In the example below, the AVM device is 

listed as 

CS 6.3-00c440

. Wait a moment if the device is not immediately displayed. Your 

iPhone or iPad will continuously search for new devices and update the view of available 
WLAN networks at short intervals. If the AVM device does not appear even after a short 
wait, repeat the AVM device power-up procedure as described above. 


ü


In  the  following 

Airplay  Setup

  menu,  check  that  the  desired  WLAN  is  selected  under 

NETWORK

 and, if necessary, change the device name for your AVM device under 

Speaker 

Name

. Optionally set a password. Then start the connection process via 

Next

. The WLAN 

access data including the password is now automatically transferred from your iPhone or 
iPad  to  your  AVM  device.  As  soon  as  the  configuration  is  finished,  you  will  receive  a 
corresponding feedback, which you confirm with 

Done

. Your AVM device is now integrated 

into your WLAN and ready for operation. 


Summary of Contents for OVATION CS 6.3

Page 1: ...Operating instructions OVATION SD 6 3 OVATION SD 8 3 ...

Page 2: ......

Page 3: ...rm that the unit to which this manual belongs fulfills the EC rules necessary to obtain the sign the necessary measurements were taken with positive results AVM Audio Video Manufaktur GmbH Daimlerstraße 8 D 76316 Malsch Germany www avm audio info avm audio ...

Page 4: ...ail Please note Since the range of functions of your OVATION SD 6 3 8 3 may be expanded by future software updates it is in the nature of things that these instructions must also be supplemented The latest version of this manual is therefore always available for free download from our website at www avm audio If you have any questions that we have not been able to answer with these instructions pl...

Page 5: ...C X App for iOS and Android 9 1 10 Network installation LAN WiFi 9 1 11 Software Firmware Updates 18 2 Basic operation 20 2 1 First operation self test 20 2 2 Switching on stand by 20 2 3 Selecting a source 20 2 4 Volume setting 20 3 Advanced Settings MENU 21 3 1 Global settings 21 3 2 Line Settings XLR RCA 23 3 3 Digital inputs COAX OPTO USB 23 3 4 Personal Setup 24 3 5 Reset Factory Settings 27 ...

Page 6: ...e the original packing has already been opened please contact your local dealer Often your dealer prepares your new device prior to delivery to adapt and change the configuration to your personal needs 1 2 Control and operating elements The numbers in the drawings below mark the control elements They refer to the numbers in the text where the operation of the unit is described 1 Power button on of...

Page 7: ...ains connector 32 Mains switch 33 Trigger outputs 34 Connector for external IR receiver 35 Phase LED 36 Link 37 Configuration port 1 3 Installation and cooling The unit can become hot depending on demanded output power or environmental temperature Therefore it is important that the cooling air can flow unhindered into the air inlet in the bottom and flow out through the holes in the rear panel Dir...

Page 8: ...nect the outputs of your signal sources to the analogue inputs 14 17 The upper row is for the left channel the lower row is for the right channel 1 7 Connecting a recorder The input of a digital recorder must be connected to the digital outputs 18 19 The signal on the digital outputs depends on the selected source such as DIG COAX DIG OPT 1 8 RC 9 remote control The optionally available RC 9 remot...

Page 9: ...from the Apple App Store and the Google Play Store 1 10 Network installation LAN WiFi To use the extensive streaming and networking features such as Spotify Connect Apple AirPlay TIDAL QOBUZ HIGHRESAUDIO web radio podcasts or music servers your device must be connected to your home network or the internet via a router You can choose from a wired LAN connection 28 or a wireless WiFi connection When...

Page 10: ...r a short startup process the RC X App automatically searches for available AVM devices in your local network and lists them with their device names and IP addresses You can recognize an IP address by a sequence of numbers separated by several dots Often an IP address starts with 192 168 xxx x ü Select an available device from the list by tapping it and wait a short moment until a connection betwe...

Page 11: ...s Point ü RC 9 remote control 1 10 2 1 Setup via WPS WPS Wi Fi Protected Setup is a standard for easy and secure wireless network connection with encryption All you need is a WiFi router with WPS function Please refer to the relevant documentation to find out whether your router is equipped with WPS The setup of a WPS connection is done via the Personal Setup Menu of your AVM device For details on...

Page 12: ...WPS function on your WiFi router within two minutes ü As soon as your AVM device has successfully established a WLAN connection via WPS the name of the connected WLAN is shown on the display e g Joined WLAN WLAN Name SSID ü To finish the process press the BACK menu button and then exit the Personal Setup menu by pressing the EXIT menu button After a short save procedure the display shows Exit Save...

Page 13: ...0c440 Wait a moment if the device is not immediately displayed Your iPhone or iPad will continuously search for new devices and update the view of available WLAN networks at short intervals If the AVM device does not appear even after a short wait repeat the AVM device power up procedure as described above ü In the following Airplay Setup menu check that the desired WLAN is selected under NETWORK ...

Page 14: ...e Apple App Store and install it on your iPhone or iPad Then start the RC X App and select the AVM device from the start menu ü Call up the menu item Network Info in the Settings In the Wireless section you can view details of the WLAN configuration that has been carried out ...

Page 15: ...ttings of your Android smartphone or tablet and navigate to the WLAN menu item Make sure that the WLAN function is turned on and select the open WLAN network which consists of the name softap and an attached sequence of numbers and digits In the example below softap_501E2D00C440 ü If necessary ignore the note that the selected WLAN network cannot access the Internet By selecting the WLAN network s...

Page 16: ...arch results In the example below the WLAN network is named FRITZ Box A WLAN network name is also called SSID ü Enter the password for the WLAN network and complete the setup via Connect ü Call up the menu item Network Info in the Settings In the Wireless section you can view details of the WLAN configuration that has been carried out ...

Page 17: ... System Settings menu that you call up by pressing the Settings button tool symbol of the RC 9 ü On the RC 9 select the menu item Settings Einstellungen in the main menu by pressing the upper or lower navigation button several times ü By pressing the Enter button select the menu item Network assistant and WLAN connection ü By selecting the Scan menu item afterwards your AVM device searches for ava...

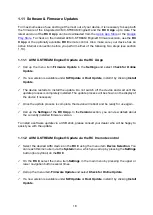
Page 18: ...t switch off the device and wait until the update process is completely installed The update process will be shown on the display of the device if necessary ü Once the update process is complete the device will reboot and be ready for use again ü Call up the Settings of the RC X App In the Version section you can view details about the currently installed firmware version To install a software upd...

Page 19: ...y ü Once the update process is complete the device will reboot and be ready for use again ü Select the menu item Settings in the main menu by pressing the upper or lower navigation key several times In the Version section you can view details about the currently installed firmware version To install a software update via a USB stick please consult your dealer who will be happy to assist you with t...

Page 20: ...orm or if you leave the house for a longer time we recommend you switch the amplifier off by using the mains switch 32 or pull the mains plug 31 2 3 Selecting a source A local source is selected by turning the source selector 2 You can choose between six digital inputs and two analog stereo inputs The selected source is shown on the left side of the display in capital letters and is marked with SO...

Page 21: ...ween two different inputs With the sensitivity setting menu you can avoid this Select a local digital or analog input with the source selector 2 and adjust the monitoring volume to a comfortable level with the volume control 6 Check by switching to other inputs whether all levels are nearly identical If you find a difference press the MENU button Select the INPUT LVL menu with the ITEM menu button...

Page 22: ...always set to GLOBAL NOTE In case tone control is set to BYPASS the menu will skip the set bass set treble and set loudness settings 3 1 3 1 Set loudness If you listen to music at low levels you often recognize that bass and treble reproduction are weak This is because the human ear is not sensitive to bass and treble at low sound levels To compensate this you can use the parametric loudness funct...

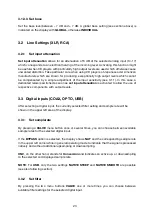
Page 23: ... activated to allow the use of respective components with output levels 3 3 Digital inputs COAX OPTO USB After selecting a digital input the currently selected filter setting and sample rate will be shown in the upper left area of the display 3 3 1 Set samplerate By pressing a VALUE menu button once or several times you can choose between available sample rates for the selected digital input If th...

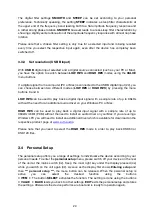
Page 24: ...al input signal with a sample rate of up to 96kHz without the need for an additional audio driver on your Windows PC or Mac HIGH RES can be used to play back a digital input signal with a sample rate of up to 384kHz 24Bit PCM without the need to install an audio driver on your Mac If you are using a Windows PC you will need to install an additional driver which is available for download on the res...

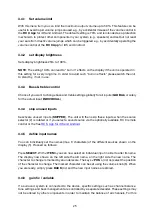
Page 25: ...ctual input INDIVIDUAL 3 4 4 skip unused inputs Deactivate unused inputs SKIPPED The unit will then skip these inputs when the source selector 2 is rotated or if you select a sound source via the optionally available RC 9 remote control or the free RC S App for iOS and Android 3 4 5 define input names You can individually set the names max 8 characters of the different sources shown on the display...

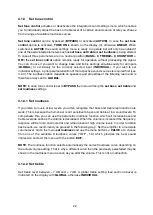
Page 26: ...e to activate the set ir control function ON 3 4 8 Set auto standby To save energy the unit is equipped with a circuit that automatically puts the unit into standby mode if there is no music signal on the currently active input for more than 20 minutes This function is activated ACTIVE by default and can be deactivated permanently with this menu item NOT ACTIVE The selected setting is permanently ...

Page 27: ... the Status LED 29 starts blinking briefly after a few seconds As soon as the Status LED 29 goes out and stops blinking you can release the RESET button 30 The device will now perform a reset to its factory settings and restart to its general operating state Alternatively a factory reset can also be performed using the RC X App for iOS and Android or the RC 9 remote control To do this select the m...

Page 28: ...s button MUTE on your remote control or increase the volume using the rotary encoder 6 b Inadvertent switching to stand by Press power button 1 If the Standby LED and display do not light up a fuse can be blown due to overvoltage e g in case of a thunderstorm etc Please contact your dealer 2 Remote control doesn t work a Charge the included lithium ion battery of the optionally available RC 9 remo...

Page 29: ...the defect is to be included with the returned unit In cases of doubt we reserve the right to request a copy of the bill of sale We also reserve the right to levy a handling charge for items returned without good or valid reason or if the unit proves to be not defective NOTE If you are returning the unit from a country other than Germany you should ensure that correct export documents are obtained...

Reviews: