

User's Guide Model 116Hnm
RECORDER USGH Settings
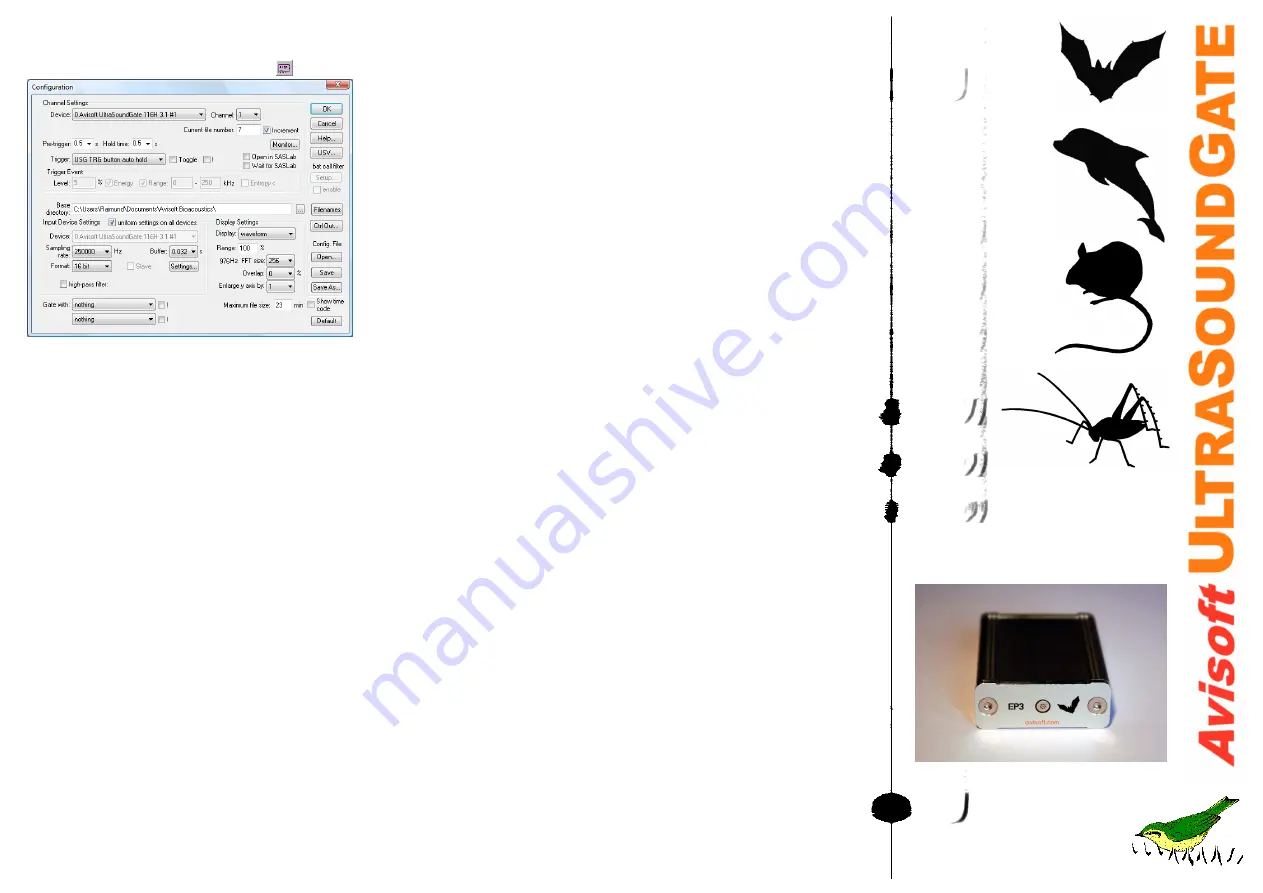
The configuration dialog box can be launched from the menu
Options/Configuration... or through the button
The input sample rate can be selected from the
Input Device
Settings
section. Available sample rates are 300, 250, 214,
187, 166, 150, 125, 100, 75, 62 and 50 kHz.
The
Buffer
setting determines the USB transfer buffer size
on the PC. Shorter durations w ill provide low real-time
spectrogram display latencies but might lead to erroneous
USB transfers under certain conditions.
This option can be advantageous for monitoring applications that
require minimal .WAV files sizes. Note that the frequency scale of the
resulting .WAV files will be reversed.
Turn on the polarization v oltage
This option has no effect on the
model 116Hnm.
Ignore GetOv erlappedResult error
By default, the
GetOverlapped
Result
error message will stop the monitoring/recording process.
If this
option is activated, the monitoring procedure will be immediately
restarted, which is desired in long-term monitoring applications.
TRG out mode
This option has no effect on the model 116Hnm.
Monitor undersampling ratio
This option has no effect on the model
116Hnm
The
Settings
...
button in the
Input Device Settings
section
launches the
Advanced USGH Device Settings
dialog box
that provides several additional device-specific option :
Enable m aster/slave m ode for synchronizing several
devices
This option has no effect on the model 116Hnm.
Activate slave m ode for this device
This option has no
effect on the model 116Hnm.
Enable low pow er m ode
The A/D converter chip can
optionally be operated in a pow er-saving mode that w ould
increase the battery life in mobile laptop-based systems. The
low -pow er mode slightly degrades the dynamic range
performance.
Enable autom atic offset com pensation
If activated, this
option removes potential DC offset voltages from the input
signal. This option should be activated.
Keep DI
This option should alw ays be deactivated on the
USG 116Hnm.
Enable band-pass m ode
At a few sample rates (50, 62.5,
75, 150, 187.5, 200 and 250 kHz), the A/D converter can be
configured for a special band-pass mode in w hich the
analog input bandw idth ranges from fs/2 to fs instead of the
normal mode from 0 to fs/2.
Sound-activated recording can be arranged by selecting the
Trigger
source option
level of this channel
.
Manual recording with pre-trigger can be accomplished by selecting
the Trigger option
permanent with pretrigger
and activating the
pause button. Once the pause button is then released, the recording
will start with the selected pretrigger duration. Another way to
manually trigger a recording would be option
left-click / touch
window area,
which will start a .wav file as soon as the RECORDER
software window area below the button bar record is left-clicked or
touched.
The Pre-trigger duration should be kept as short as possible. Long pre-
trigger settings can lead to data transmission errors if the sample rate
is high.
In order to simplify the operation of the Avisoft-RECORDER software
in the field, a link to
RECORDER USGH
may be added to the
Windows
Startup folder
(
Start->All Programs->Startup
). Additionally,
the Avisoft-RECORDER option
Monitoring/Autostart
should be
activated. This arrangement will start the monitoring process
automatically after booting the computer (the UltraSoundGate device
must be attached to the USB port prior to booting Windows).
The menu
Options/Configuration management/Presets
provides a
number of default settings that might help to configure the system for
a specific task.
Note that the relatively low gain of the UltraSoiundGate 116Hnm
requires that the trigger threshold is set to a low level. For passive bat
monitoring try the preset
Options / Configuration management /
Preset / Bat monitoring using USG116Hnm/Hnb/Hnbm.
This will also
activate the
x10
option on the Display Settings section of the
Configuration Dialog box that provides a better (more sensitive) real-
time spectrogram display.
In order to facilitate the operation of the software on tablet PCs, the
option
Options/Display/Large buttons
should be activated.
Please refer to the users guide or the online help system for further
details on the Avisoft-RECORDER software
(http://www.avisoft.com/RECORDER.pdf).


