

2
Portable Scanner
Quick Guide
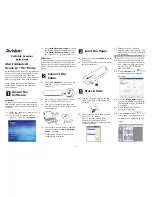
Start Advanced
Scans In “PC” Mode
By switching to the “PC mode”, installing the
scanner driver and connecting the scanner
to your computer with USB cable, the
scanner allows you to start advanced scans
from your computer like a regular scanner.
Please follow these steps to install the
software and connecting the scanner to
your computer.
Install the
Software
Important:
To ensure your computer can identify the
USB scanner, please install scanner driver
first before connecting the scanner to your
computer.
1.1
Place the supplied CD-ROM onto y
CD-ROM drive.
1.2
The software installation graphic
appears. If not, run
“setup.exe”
.
1.3
Click
Install Button Manager
to install
the Button Manager software and then
click
Install Scanner Driver
to install
the scanner driver on your computer.
Important:
To use the buttons on the scanner, you need
to install Button Manager. To ensure Button
Manager work properly, please FIRST install
Button Manager before installing the scanner
driver.
Connect the
Cable
2.1
Move the
POWER
knob to any number
between “1” and “5” to turn on the
scanner.
2.2
Insert the mini end of the USB cable to
the mini USB port of the scanner.
2.3
Turn on your computer, and then plug
the other flat ends into two USB ports on
your computer.
2.4
The computer should detect a new USB
device and prompt a
“New Hardware
Found”
message.
2.5 Follow the on-screen instructions to
complete the installation.
Load the Paper
3.1
Insert your document
FACE UP
into the
feeding slot.
3.2
Align your document to the left side of
the paper feed slot.
Start A Scan
4.1
Turn the operation mode to the “
PC
”
mode at the back of the scanner as
indicated.
4.2
Use provided Avision Capture Tool to
start your scan. Select
Start>Programs>Avision AVxxx
Scanner>Avision Capture Tool.
The Select Scanner Model dialog box
will be displayed.
4.3
Select your driver type and
scanner model and click
OK
. The
Avision Capture Tool dialog box will
be displayed.
4.4
Choose your desired file format
from the File Format drop down list
box. (Default is BMP, other choice
includes TIFF, MTIFF, GIF, PDF,
MPDF, and JPEG.)
4.5
Click the
Setup
button (
) to
prompt the Scanner Properties
dialog box.
4.6
From the
Image Selection
box,
choose your desired image type for
your scanned image. (Default is
Front B&W)
4.7
Click
OK
to quit the Scanner
Properties dialog box.
4.8
Click the
Scan
button (
) to
start a scan. The document will
be scanned and displayed on the
screen.