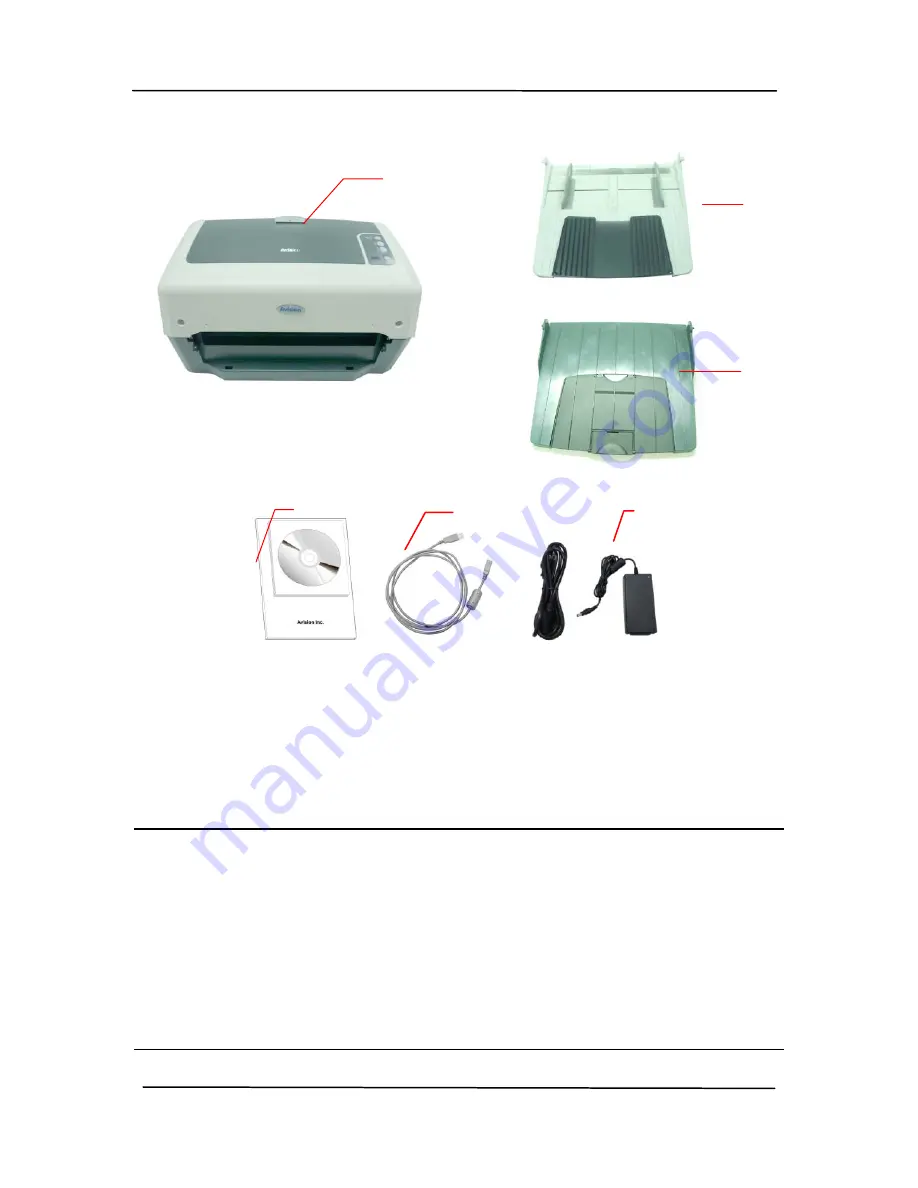
Avision FT-1109H Manual Download Page 6


1-2 


1.


Scanner Main Unit 

2.


ADF Paper Tray 

3.


ADF Output Paper Tray 

4.


Software CD & Quick Guide 

5.


USB Cable 

6.


Power Adapter & Power Cord 


Note:  

1.


Only use the AC adapter included in the machine.  Using 

other AC adapters may damage the machine and void the 

warranty. 

2.


The suitable power supply cord will be provided and 

evaluated when national approval. 

3.


Please unpack the packing carefully, and check the contents 

against the checklist.  If any items are missing or damaged, 

please contact your dealer immediately. 


Summary of Contents for FT-1109H

Page 1: ...Sheet Fed Duplex Scanner Guick Guide Regulatory model FT 1109H Avision Inc English...

Page 2: ...ter language in any form or by any means electronic mechanical magnetic optical chemical manual or otherwise without the prior written permission of Avision Inc Material scanned by this product may be...

Page 3: ...Your Paper 3 1 3 2 Verifying Your Scanner Installation 3 3 3 3 A Glance of the Scanner Properties Dialog Box 3 7 4 ISIS Interface Operation 4 1 5 Using the Buttons 5 1 5 1 Installing Button Manager V2...

Page 4: ......

Page 5: ...Before you install and operate the new scanner please take a few minutes to read through this manual It provides proper instructions for you to unpack install operate and maintain the scanner The fol...

Page 6: ...apter included in the machine Using other AC adapters may damage the machine and void the warranty 2 The suitable power supply cord will be provided and evaluated when national approval 3 Please unpac...

Page 7: ...Tray 1 Pull the ADF Release button to open the front cover 2 Insert the pin with a inclined plane on the right side of the Input Paper Tray to the hole on the rear of the scanner as illustrated ADF R...

Page 8: ...b to press the place near the pin with a inclined plane of the other side of the Input Paper Tray and then insert the pin to the hole of the scanner as illustrated Pin with a inclined plane Hole Press...

Page 9: ...2 3 2 2 Installing the Output Paper Tray 1 Insert the smaller pin of the left side of the Output Paper Tray to the hole on the front of scanner as illustrated Output Paper Tray...

Page 10: ...Use your thumb to press the place near the pin of the other side of the Output Paper Tray and then insert the smaller pin to the hole on the scanner as illustrated The smaller pin Hole Press the hinge...

Page 11: ...ndows XP or Windows Vista after the installation of scanner driver is completed this scanner allows you to scan via a TWAIN ISIS or a WIA interface Start your TWAIN compliant image editing software ap...

Page 12: ...tton on the front panel the Power LED will flash When it is finished and ready to scan the LED indicator will stop flashing and become steadily on To turn off the scanner press the Power Switch button...

Page 13: ...r V2 To use the buttons on the scanner you need to install Button Manager V2 To ensure Button Manager V2 works properly please FIRST install Button Manager V2 before installing the scanner driver Inst...

Page 14: ...you already have Adobe Reader installed on your computer you may disregard this item View Manual Click View Manual to view or print the detailed user manual for the scanner and Button Manager V2 resp...

Page 15: ...ur computer 2 The computer should detect a new USB device and prompt a New Hardware Found message 3 In Windows XP click the Next button to continue When the XP certification screen appears click Conti...

Page 16: ...o USB devices You have to install Found New Hardware wizard twice to complete the installation 4 When the Finish dialog is prompted click the Finish button 5 Click View Manual to view or print the det...

Page 17: ...fications Document s can range in size from 2 by 3 inches to 11 69 by 17 inches Document s can range in weight from 7 to 110 lbs 28 413 g m2 Document s should be square or rectangular and in good cond...

Page 18: ...tiple documents loosen the paper before loading Document feeding 1 Place your document with the text face down on the ADF Paper Tray If you are scanning two sides of documents place the first page fac...

Page 19: ...not correct please review the preceding section to check if the cable connection and scanner driver have been successfully installed Before you begin be sure the scanner is on 1 Select Start Programs...

Page 20: ...in the File Path box Default is C My Scan Image Note If you do not wish to save the scanned image deselect the Save button since default is Save Enable In this case the thumbnail view will be disabled...

Page 21: ...Scanner Properties dialog box please see the subsequent chapter Using the Scanner Properties Dialog Box 8 Place your document face down on the document glass or face up in the auto document feeder 9 I...

Page 22: ...he scanned image in Fit Page or Actual Size 100 button from the Viewing toolbars at the right side 12 Click the Close box or Quit from the File menu to exit the Scan Validation Tool Fit Page View Stat...

Page 23: ...based on type of scanner 3 Brightness Adjust the brightness level from 100 to 100 4 Contrast Adjust the contrast level from 100 to 100 5 Resolution Determine the quality of the scanned image The indus...

Page 24: ......

Page 25: ...on on the ISIS interface screen is briefly described as below Mode Select one of scan modes including B W gray color options Dither 5 halftone levels available can be disabled Dots per inch Select you...

Page 26: ......

Page 27: ...5 1 5 Using the Buttons The following picture shows the 4 buttons and 1 function screen on the scanner Function Screen Power Switch Scan Button Cancel Button Function Select Button...

Page 28: ...is recommended to check the button configurations first to ensure a proper file format and a destination application 5 2 Checking the Button Configurations before Scanning 1 Click the Scan button on...

Page 29: ...ou wish to change the setting use this window to reset the setting for the file format destination application or other scan settings 4 Click the OK button to leave the window Folder and file name for...

Page 30: ...int and displays the scanned image in the window of Microsoft Paint the LCD screen should show 3 3 Press the Scan button on the scanner 4 After the scanning is finished the Microsoft Paint software wi...

Page 31: ...ne to its original state The Cleaning Procedures 1 Soak a clean lintless cloth with some isopropyl alcohol 95 2 Press the ADF Release button on the upper Open the front cover slightly to the left Wipe...

Page 32: ...6 2 ADF Roller ADF Pad ADF Roller...

Page 33: ...ss the ADF Release button Open the front cover to the left 2 Wet a clean lintless cloth with some isopropyl alcohol 95 3 Wipe the glass and the white area as illustrated in below from side to side to...

Page 34: ......

Page 35: ...f a paper jam follow the procedures below to remove the paper 1 Pull the ADF Release Button on the left side Gently open the front cover to the left 2 Carefully pull the paper out of the ADF unit 3 Cl...

Reviews: