User’s Manual
4-42
3.
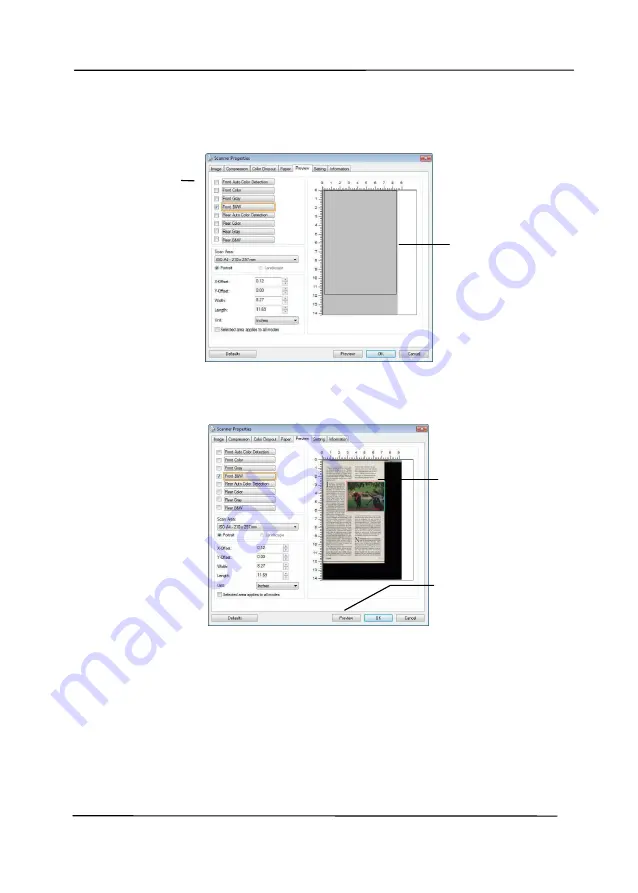
Click the Preview tab to display the Preview window. A
black rectangular box appears to indicate the max. scan size
your have just selected.
4.
Click the Preview button to view the entire image in low
resolution to correctly crop your relative scan area.
5.
Select image type from the Image Selection box. The
selected image will appear in highlighted color. (For
example, Front Color)
6.
Place your cursor on the Preview window and click your left
mouse button. A cross sign will appear as illustrated.
Create your relative scan size diagonally by dragging the
left mouse button to your preferable size. The selected area
will appear in a red box as illustrated.
A black
rectangular
box
The Preview
Image
The Preview
Button
The Image
Selection
Box
Summary of Contents for AD340GN-AEG
Page 1: ...Sheet fed Scanner User s Manual Regulatory model FF 2009B Avision Inc ...
Page 52: ...User s Manual 4 5 ...
Page 61: ...User s Manual 4 14 Error Diffusion Image Dynamic Threshold Dynamic Threshold AD ...
Page 64: ...User s Manual 4 17 Normal Photo Document Threshold 230 Normal Photo Document Threshold 230 ...
Page 77: ...User s Manual 4 30 The Compression tab dialog box ...
Page 81: ...User s Manual 4 34 The Color Dropout dialog box ...


