Installation Guide
Avigilon H6M Mini Dome Camera Models:
Surface Mount: H6M-D(-IR)
In-Ceiling Mount: H6M-D(-IR) + H6M-MT-DCIL1
Pendant Mount: H6M-D(-IR) + H6M-MT-NPTA1
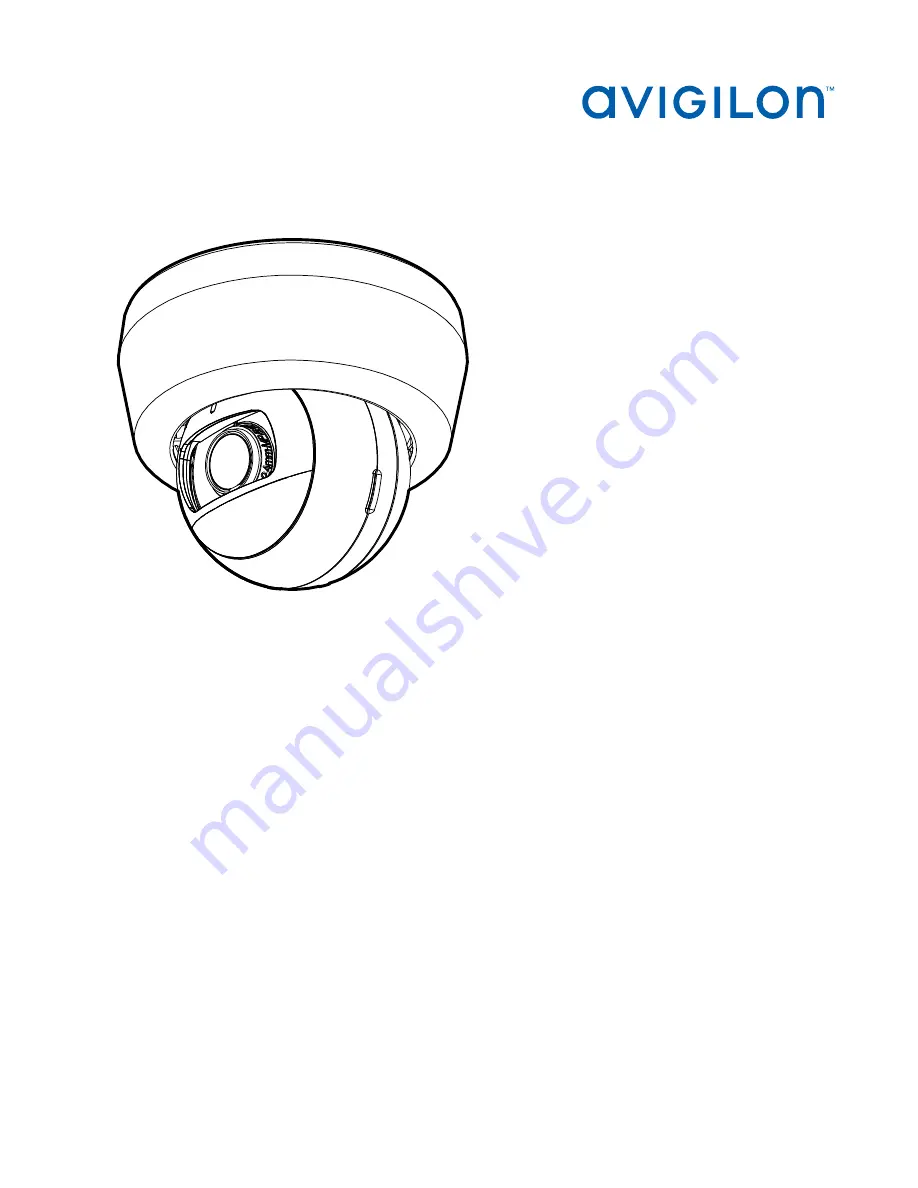
Page 1: ...Installation Guide Avigilon H6M Mini Dome Camera Models Surface Mount H6M D IR In Ceiling Mount H6M D IR H6M MT DCIL1 Pendant Mount H6M D IR H6M MT NPTA1 ...
Page 2: ...ason CAUTION Failure to observe the following instructions may result in injury to persons or damage to the device l Do not expose the camera directly to high levels of x ray laser or UV radiation Direct exposure to high levels of x ray laser or UV radiation may cause permanent damage to the image sensor l Do not install near any heat sources such as radiators heat registers stoves or other source...
Page 3: ...he receiver is connected l Consult the dealer or an experienced radio TV technician for help Changes or modifications made to this equipment not expressly approved by Avigilon Corporation or parties authorized by Avigilon Corporation could void the user s authority to operate this equipment Disposal and Recycling Information When this product has reached the end of its useful life please dispose o...
Page 4: ...ign trademark patent or other intellectual property rights of Avigilon Corporation or its licensors Disclaimer This document has been compiled and published using product descriptions and specifications available at the time of publication The contents of this document and the specifications of the products discussed herein are subject to change without notice Avigilon Corporation reserves the rig...
Page 5: ...llation 16 Camera Package Contents 16 Using the Surface Mount Adapter 16 Installing the Camera Base to the Mounting Adapter 18 Attaching the Bezel 18 In Ceiling Mount Installation 20 Camera Package Contents 20 Using the In Ceiling Mounting Adapter 20 Installing the Camera Base to the Mounting Adapter 23 Attaching the Bezel 24 Pendant Mount Installation 26 Camera Package Contents 26 Using the Penda...
Page 6: ...ections and LED Behavior 36 Disassembling an Installed Camera 38 Removing the Camera from the Surface Mounting Adapter 38 Removing the Camera from the In Ceiling Mounting Adapter 39 Removing the Camera from the Pendant Mounting Adapter 40 Resetting to Factory Default Settings 41 Setting the IP Address Using the ARP Ping Method 42 Limited Warranty and Technical Support 43 6 ...
Page 7: ...thernet port Accepts power and Ethernet connection to the network The camera can only be powered by Power over Ethernet PoE Server communication and image data transmission also occur over this connection 2 Serial number tag Provides the serial number and MAC address for the camera 3 Firmware revert button Used to reset the camera For more information see Resetting to Factory Default Settings on p...
Page 8: ...mera housing clips Clips that attach the camera body to the mounting adapter 7 Locking latch Orange colored latch that locks the camera in place after the camera has been aimed For more information see Aiming the Camera on page 33 8 Infrared illuminator optional The infrared illuminator is available on selected models 9 Camera lens The lens is behind the protective dome Surface Mount Overview Cove...
Page 9: ...er 2 Logo guide Used to indicate the direction the logos will be facing when the installation is complete 3 Cable entry hole An entry hole for the cables required for camera operation 4 Mounting holes Screw holes for mounting the surface mounting adapter to the ceiling or wall 5 Bezel attachment clips Clips to hold the bezel in place Surface Mounting Adapter View 9 ...
Page 10: ... internal mechanisms for aiming the camera 2 ln ceiling mount bezel Used to protect the camera latch the camera internals and the mounting adapter 3 Mounting adapter Used to mount the camera to a wall or ceiling panel The mounting clamps and retainer are not shown In Ceiling Mount Overview 10 ...
Page 11: ... slots Slots that the camera housing clips are inserted into to attach the camera body to the ceiling mounting adapter 3 Bezel attachment clips Clips to hold the bezel in place 4 Mounting clamps Metal springs with plastic tabs that extend outward to hold the in ceiling mounting adapter in place In ceiling Mounting Adapter View 11 ...
Page 12: ...mera 2 Camera bezel Used to protect the camera latch the camera internals and the mounting adapter 3 NPT adapter Used to mount the camera to a 1 2 Male NPT pipe thread 4 NPT pipe Used for installing cameras from the ceilings Note The NPT pipe is not supplied by Avigilon and should be sourced separately Pendant Mount Overview 12 ...
Page 13: ...tachment slots Slots that the camera housing clips are inserted into to attach the camera body to the mounting adapter 3 Mounting adapter Adapter plate for installing the camera to the pendant NPT adapter 4 Mounting screws Screws to install the mounting adapter to the pendant NPT adapter Pendant Mounting Adapter View 13 ...
Page 14: ...ent temperature is 30 C 86 F 1 Locate and open the flap on the side of the camera packaging Look for the Config label 2 Connect a network cable to the RJ45 plug on the configuration cable The network cable must provide PoE IEEE 802 3af Class 3 to power the camera during configuration 3 Connect to the camera using an ACC Client the Camera Configuration Tool or the camera s web browser interface to ...
Page 15: ...e installed above 2 74 m 9 feet l The camera should tilt downwards no more than 45 degrees l The camera image should be level with the horizon line l The camera should be mounted to a stable surface to minimize the physical movement of the camera after installation For more details see Designing a Site for Video Analytics The document is available on the Avigilon website Mounting and Aiming Video ...
Page 16: ...s to be installed in a different way use one of the other mounting adapter options and refer to their sections for more information l In Ceiling Mount Installation on page 20 l Pendant Mount Installation on page 26 Perform the following steps if the required cables are coming from inside the mounting surface and the camera will be mounted immediately over the cable hole Use this procedure on surfa...
Page 17: ...ounting holes into the mounting surface and drill the cable entry hole 2 Pull the required Ethernet cable through the cable entry hole 3 Drive two screws to fasten the mounting adapter to the mounting surface Using the Surface Mount Adapter 17 ...
Page 18: ...shed 2 Position the camera in the mounting adapter reinserting the connected cable through the cable entry hole 3 Align the camera housing clips on the camera base to the camera attachment retainers on the mounting adapter Press the camera base into the mounting adapter The camera base clicks into place and is held securely Attaching the Bezel Note Before installing the bezel we recommend that you...
Page 19: ...nner side of the bezel 2 Place the bezel up against the mounting adapter with the raised slots slightly to the left of the bezel mounting clips on the mounting adapter 3 Rotate the bezel clockwise until it snaps into place Attaching the Bezel 19 ...
Page 20: ... adapter for an H6M Mini Dome Camera l In ceiling mounting template sticker l Low profile bezel Using the In Ceiling Mounting Adapter If the camera needs to be installed into a ceiling you can disregard the surface mount adapter that is provided with the camera and use the in ceiling mounting adapter instead If the camera needs to be installed in a different way use one of the other mounting adapt...
Page 21: ... mounting template to cut an entry hole for the camera into the ceiling 2 Insert the in ceiling mounting adapter into the entry hole then pull the required cable through the adapter Using the In Ceiling Mounting Adapter 21 ...
Page 22: ...amp handles up so that the metal arms extend outside the mounting adapter 5 With your thumb on the outside edge of the mounting adapter and your forefinger on one of the orange clamp handles pinch the clamp down until the clamp is secured Using the In Ceiling Mounting Adapter 22 ...
Page 23: ...of the dome bubble until the installation is complete After you install the mounting adapter mount the camera base to the adapter using the following steps 1 Connect the Ethernet port attached to the camera to the Ethernet cable that was pulled through the adapter The connection status LED indicator will turn on once a network link has been established 2 Position the camera in the mounting adapter...
Page 24: ...ra and adjust the field of view that the camera covers as well as any image and display settings For more information see l Connecting to the Camera on page 32 l Aiming the Camera on page 33 After you lock the camera in place attach the bezel to the mounting adapter by completing the following steps 1 Locate the two clips on the inner side of the bezel 2 Place the bezel up against the mounting ada...
Page 25: ...3 Rotate the bezel clockwise until it snaps into place Attaching the Bezel 25 ...
Page 26: ...emplate sticker l 2 screws and anchors for solid walls Ensure the low profile pendent mounting adapter package H6M MT NPTA1 contains the following l Pendant mounting adapter for an H4 Mini Dome Camera l Pendant mount bezel same as Surface mount bezel l 2 screws for pendant mounting adapter Using the Pendant Mounting Adapter If the camera needs to be installed in a different way use one of the othe...
Page 27: ...ll the required Ethernet cable through the pendant adapter 3 Align camera widest part of the screw hole slots on the wall plate with the two screws in the NPT adapter and push the wall plate into place so that the screws go through the holes Using the Pendant Mounting Adapter 27 ...
Page 28: ... plate clockwise so the two screws align with the narrow part of the screw hole slots You can also adjust the location of the logo on the bezel by how much you rotate the plate Using the Pendant Mounting Adapter 28 ...
Page 29: ...e adapter using the following steps 1 Connect the Ethernet port attached to the camera to the Ethernet cable that was pulled through the adapter The connection status LED indicator will turn on once a network link has been established 2 Position the camera in the mounting adapter pushing the excess connected cable upwards into the NPT adapter 3 Align the camera housing clips on the camera base to ...
Page 30: ...on see l Connecting to the Camera on page 32 l Aiming the Camera on page 33 After you lock the camera in place attach the bezel to the mounting adapter by completing the following steps 1 Locate the two plastic features on the interior of the bezel 2 Place the bezel up against the mounting adapter with the raised slots slightly to the left of the bezel mounting clips on the mounting adapter Attach...
Page 31: ...3 Rotate the bezel clockwise until it snaps into place Attaching the Bezel 31 ...
Page 32: ...rsion 6 14 12 or later when connecting a camera in the factory default state the client software will ask you to create a new user For more information see the Avigilon Control Center Client User Guide l Avigilon Cloud Services ACS v3 0 or later when adding a camera you will be asked to create a new user for cameras in the factory default state For more information see the Avigilon Cloud Services ...
Page 33: ...Note When you are aiming the camera reference the live stream for the camera 1 Unlock the orange locking latch on the camera base if it is already locked The lens should be pointing in the general direction of the intended view The vertical line indicator between the optical window and the camera base indicates the top of the view 2 Start with the line indicator as close to the mounting adapter as...
Page 34: ...3 Swivel the locking latch to lock it into the closed position Aiming the Camera 34 ...
Page 35: ... the Avigilon High Definition H4 and H5 IP Camera Web Interface User Guide Configuring the Camera Once installed use one of the following methods to configure the camera l If you have installed multiple cameras you can use the Camera Configuration Tool to configure common settings For more information see the Camera Configuration Tool User Guide l If the camera is connected to the Avigilon Control...
Page 36: ...g the camera s web user interface For more information see the Avigilon High Definition H4 and H5 IP Camera Web Interface User Guide Troubleshooting Network Connections and LED Behavior Note For any of the below LED behaviors ensure that the camera is getting power and is using a good network cable before trying another solution LED Behavior Suggested Solution Green LED is off and amber is on Perf...
Page 37: ...firmware revert button Resetting through the camera s web interface will not produce the desired result A different LED blinking pattern than those described above Perform a factory reset of the camera using the physical firmware revert button Resetting through the camera s web interface will not produce the desired result Troubleshooting Network Connections and LED Behavior 37 ...
Page 38: ...ounter clockwise until it releases Some force will be required to release the bezel and you will hear a click as it is released 2 Pinch the camera housing clips in the attachment slots to release the camera body from the surface mount and pull the camera out of the mount Disassembling an Installed Camera 38 ...
Page 39: ...eleases Some force will be required to release the bezel and you will hear a click as it is released 2 Pinch the camera housing clips in the attachment slots to release the camera body from the ceiling mount and pull the camera out of the mount Removing the Camera from the In Ceiling Mounting Adapter 39 ...
Page 40: ...eleases Some force will be required to release the bezel and you will hear a click as it is released 2 Pinch the camera housing clips in the attachment slots to release the camera body from the pendant mount and pull the camera out of the mount Removing the Camera from the Pendant Mounting Adapter 40 ...
Page 41: ...n to reset the device The firmware revert button is shown in the following diagram 1 Ensure the device is powered on 2 Using a straightened paperclip or similar tool gently press and hold the firmware revert button 3 Release the button after three seconds CAUTION Do not apply excessive force Inserting the tool too far may damage the camera Resetting to Factory Default Settings 41 ...
Page 42: ... H4 and H5 IP Camera Web Interface User Guide 1 Locate and make note of the MAC Address MAC listed on the Serial Number Tag for reference 2 Open a Command Prompt window and enter the following commands a arp s New Camera IP Address Camera MAC Address For example arp s 192 168 1 10 00 18 85 12 45 78 b ping l 123 t New Camera IP Address For example ping l 123 t 192 168 1 10 3 Reboot the camera 4 Clo...
Page 43: ...t Avigilon warranty terms for this product are provided at avigilon com warranty Warranty service and technical support can be obtained by contacting Avigilon Technical Support avigilon com contact Limited Warranty and Technical Support 43 ...