

75"/ 86"
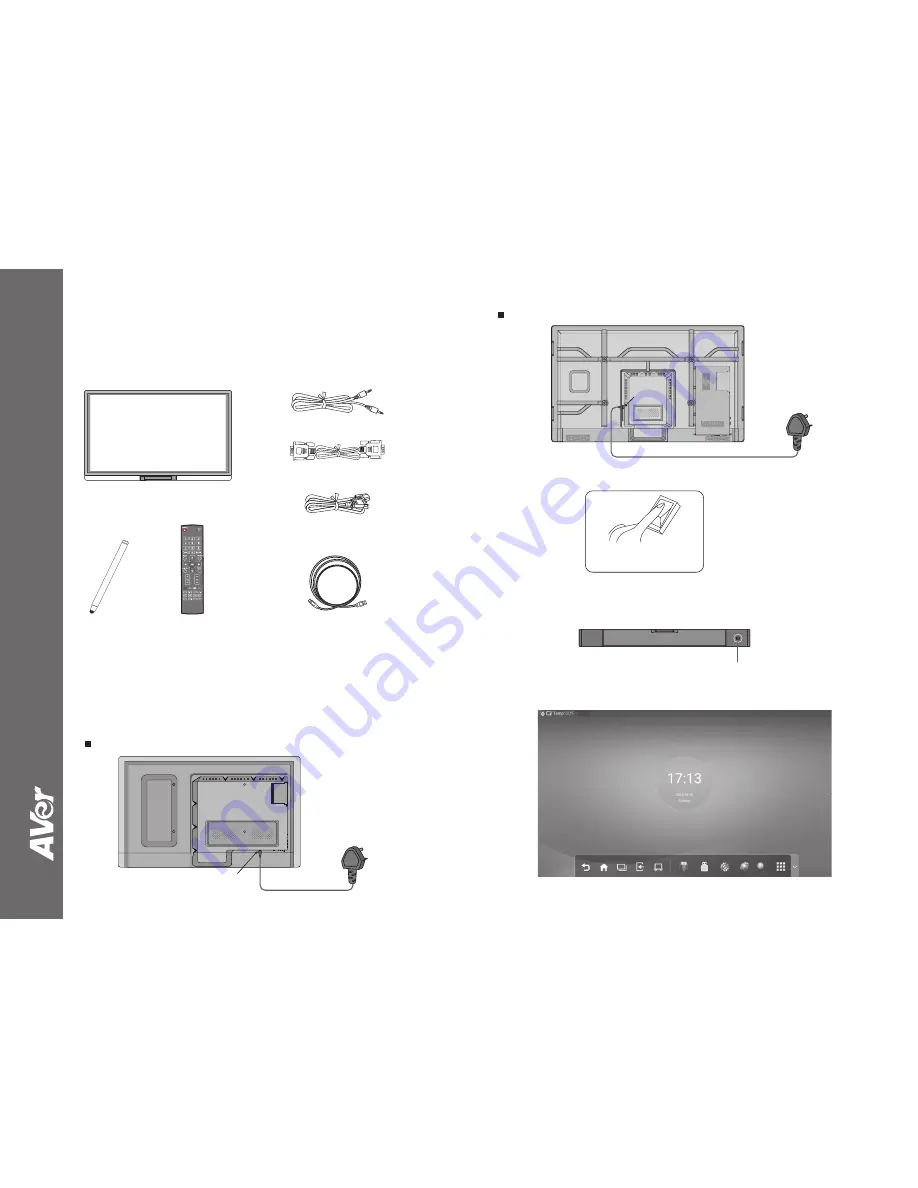
2. Press rocker switch to enter standby status and the power indicator will turn to red.
3. Next, press the power switch (located on the front panel) or the power button on the remote control to turn
on the interactive panel. If you have an OPS computer installed, it will turn on, too. The power indicator on
the front panel turns green when the system is fully started.
4. The main display screen will be shown as below.
Rocker switch
(next to the power port)
Power switch
(Located at front panel)
power port
Power cord
©
20
16
A
Ver
In
fo
rm
ati
on
In
c.
A
ll
righ
ts
re
se
rve
d.
Package Contents
Audio cable
AVer CP series
(65”, 75”, 86”)
USB cable (5M)
Power cable x 3
(US, UK, EU)
Stylus pen x 2
Optional Accessories
1. Wall mount
2. Floor stand
3. OPS
4. Wireless presentation receiver
Start Up
1. Connect the power cord to power port (100V - 240V, 50Hz/60Hz), then, plug into wall outlet.
65"
AVer CP Series
Quick Start Guide
power port
Power cord
VGA cable
Remote control


