

700503146 Issue 4 (2nd April 2012) Page 1 of 2
Avaya IP Office Unified Communications Module Instruction Sheet
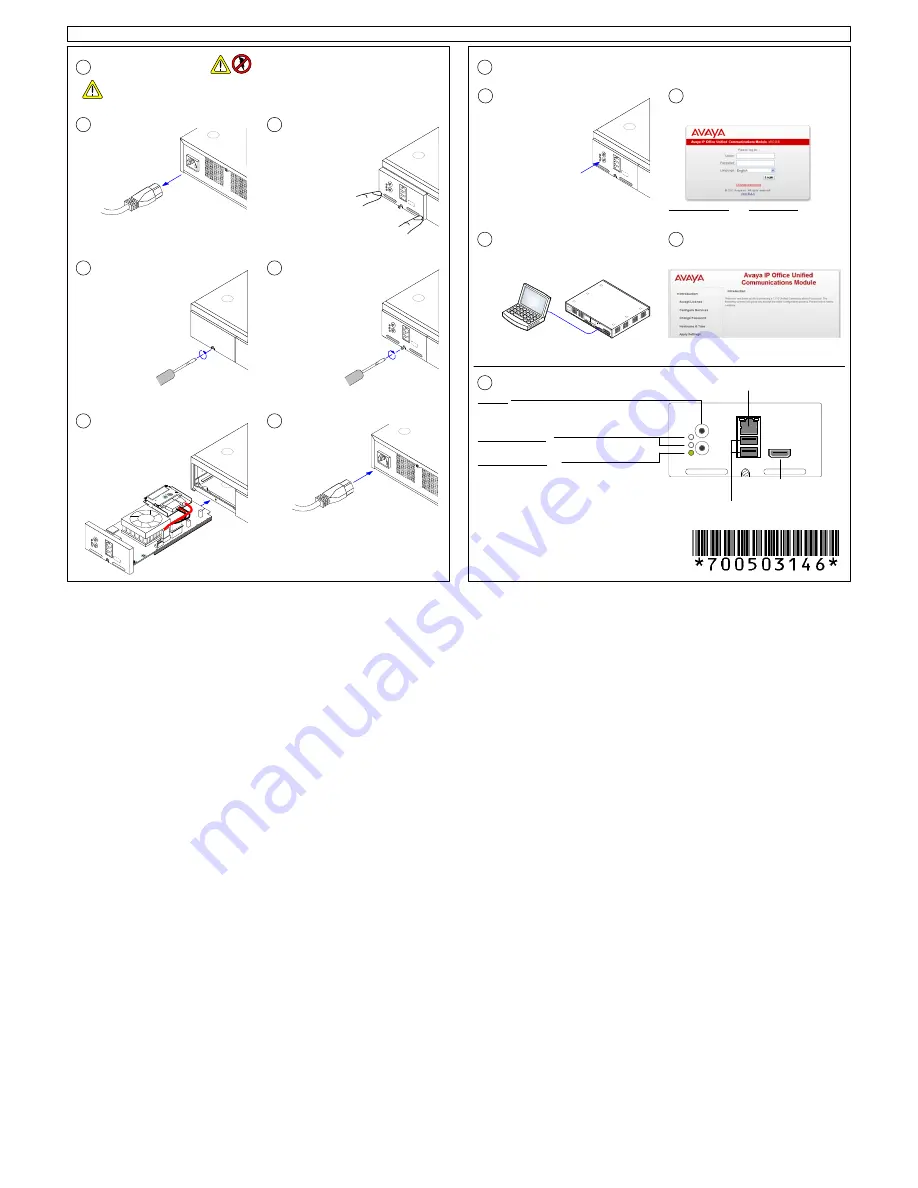
Module Installation
1
Module Initialization
2
Anti-Static precautions must
be observed at all times.
a
Remove Power
Any available slot can be
used.
b
Remove a Slot Cover
Undo the retaining screw. Any
available slot can be used.
Any unused
slot.
c
Insert the Module
During insertion check that the
module has engaged with the
slot rails.
Apply pressure at the
bottom of the front
panel.
d
Apply Pressure at the Base
Apply pressure at the base to
engage with the card socket.
e
Secure the Module
Retighten the retaining screw.
f
Power On
Reconnect power to the
system and switch on.
The Unified Communications Module is only supported in an
IP500 V2
control unit, running
IP Office Release 8.0 SP1 and only in systems with an
IP Office Essential Edition
license.
These instructions assume that initial installation and configuration of the system has been
completed.
a
Check the Module LEDs
Wait for the lower LED to become
green with an amber blink every 5
seconds. This takes up to 2
minutes.
Lower LED =
Green On + Amber blink.
http://
<IP Office LAN1 IP Address>
:7070
b
Browse to the Module
Connection directly or via the customer’s
LAN to the LAN or WAN port on the system.
Do not use the port on the front of the
module.
Lower Status LED
- Solid Red:
Unpacking and initializing.
- Flashing Red:
Module initialization.
- Flashing Green:
OS initializing.
- Solid Green with Amber flash:
OK.
- Off with Amber Flash:
Card shutdown.
Upper LEDs 1 & 2
- Amber:
BIOS Starting up.
Ethernet Port:
Not used.
Buttons
- Upper Button:
Module Shutdown/Startup.
-
Lower Button:
Not used.
USB Ports:
Used for maintenance.
Module Summary
3
HDMI Port:
Used for
maintenance.
c
Logon
When the logon menu is displayed, logon using
the default name and password:
Release Pre-8.1
-
Logon:
webcontrol
-
Password:
web
d
Module Service Selection
Work through the menus to enable the module
services.
Release 8.1+
-
Logon:
Administrator
-
Password:
Administrator