Pre-upgrade service pack requirements
Issue 2 June 2005
19
Pre-upgrade service pack requirements
The upgrade may require a pre-upgrade service pack, depending on the release of Avaya
Communication Manager from which you are upgrading.
on page 19 describes when a service pack is required.
5. Obtain post-upgrade
service pack file, if any.
Go to http://support.avaya.com and check
Software/Firmware Downloads to see if there is a
service pack file available for the Communication
Manager release you are upgrading to. For
example, release 2.1, load 411.7. If there is a
service pack file available, download it and take it
to the site.
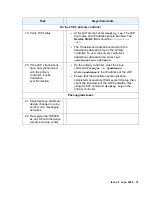
6. Obtain Communication
Manager 2.x software
CD and a USB
CD-ROM drive.
The steps to remaster the S8300 hard drive and
install the 2.x release of Communication
Manager software require the Unity CD and an
external USB CD-ROM drive.
Task
Steps/Comments
Table 2: Pre-upgrade service pack requirements
Software release of existing
media server
Pre-upgrade service pack requirement
Release 1.0, 1.1.x, all other
1.x.x releases not listed below
(R011x.01.xxx.x)
On the Maintenance Web Interface, the pre-upgrade
service pack is not compatible; therefore, there is no
provision for Linux backup/restore. You must manually
record all configuration data for later reentry.
Release 1.2.x/1.3
(R011x.02.110.4)
(R011x.03.526.6)
You need the service pack that sets up the Linux backup/
restore feature on the Maintenance Web Interface. You
install the pre-upgrade service pack, then back up and
restore the system files. If you back up the files to the
customer’s network, you must minimally reconfigure the
media server to assign an IP address to the Ethernet port
connected to the customer’s network. Make sure you have
the configuration settings before going on site.
Release 1.3.1
(R011x.03.1.531.0)
(R011x.03.1.5xx.x)
You do not need the service pack. You can back up and
restore the system files without the service pack. If you
back up the files to the customer’s network, you must
minimally reconfigure the media server to assign an IP
address to the Ethernet port connected to the customer’s
network. Make sure you have the configuration settings
before going on site.


