


Chapter 6 Avaya P334T-ML Front and Rear Panels
Avaya P334T-ML User’s Guide
31
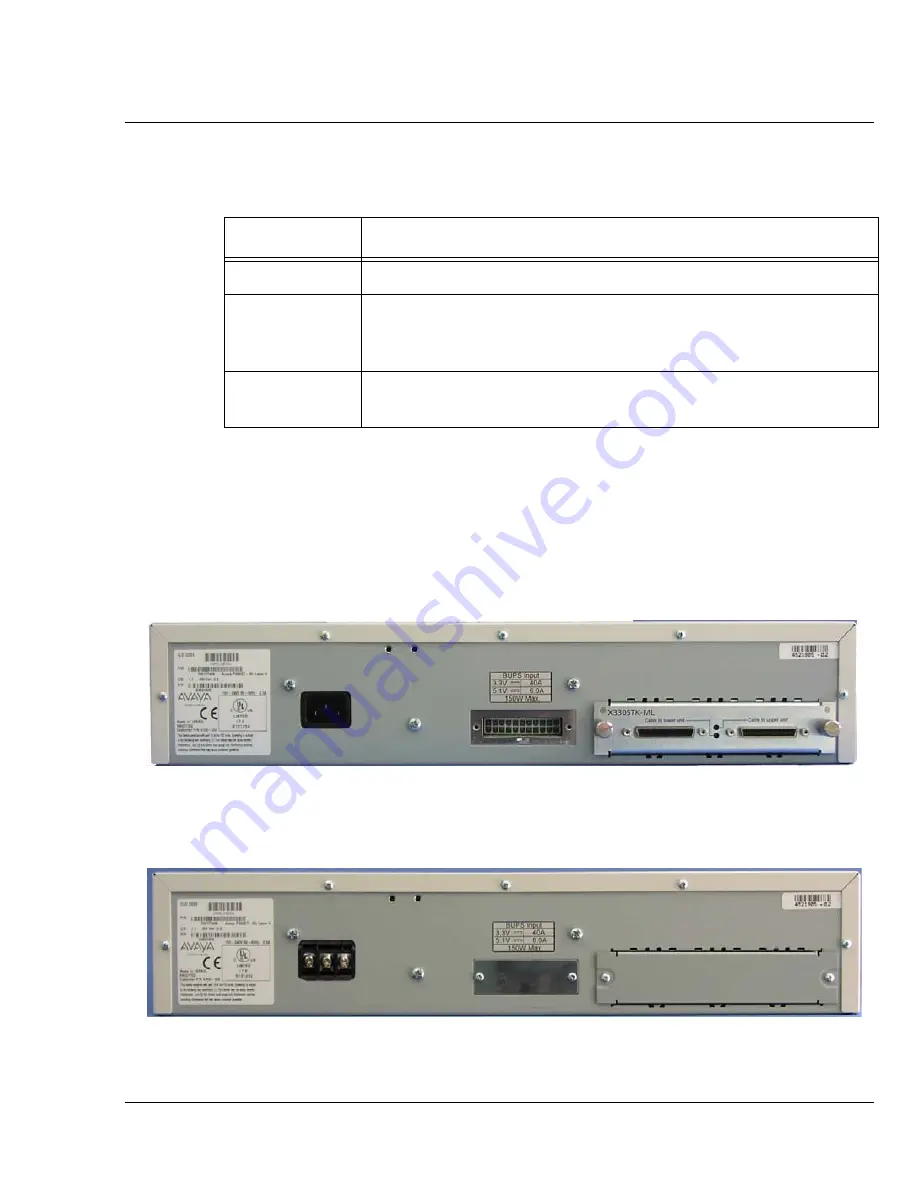
Avaya P334T-ML Back Panel
The P334T-ML back panel contains a Stacking Sub-module slot, power supply and
BUPS-ML connector. Figure 6.3 shows the back panel of the AC version switch and
Figure 6.4 shows the back panel of the DC version switch with a stacking sub-
module installed.
Figure 6.4
P334T-ML AC version Back Panel (with Stacking Sub-module,
BUPS-ML connector cover plate removed)
Figure 6.5
P334T-ML DC Back Panel (without Stacking Sub-module installed,
BUPS-ML connector cover plate shown)
Table 6.2
Avaya
P334T-ML
<- -> Select buttons
Description
Function
Left/Right
Individual – select LED function (see table above)
Reset module
Press both right and left buttons together for approximately 2
seconds. All LEDs on module light up until buttons are
released.
Reset stack
Press both Right and Left buttons together for 4 seconds. All
LEDs on stack light up until buttons are released.
Summary of Contents for P334T-ML
Page 14: ...IV Avaya P334T ML User s Guide ...
Page 15: ...Avaya SECTION 1 OVERVIEW ...
Page 16: ......
Page 30: ...Chapter 3 14 Avaya P334T ML User s Guide ...
Page 31: ...SECTION 2 INSTALLATION ...
Page 32: ......
Page 73: ...SECTION 3 CONFIGURATION ...
Page 74: ......
Page 78: ...Chapter 9 P330 Default Settings 62 Avaya P334T ML User s Guide ...
Page 92: ...Chapter 10 Switch Configuration 76 Avaya P334T ML User s Guide ...
Page 136: ...Chapter 11 Avaya P330 Layer 2 Features 120 Avaya P334T ML User s Guide ...
Page 146: ...Chapter 12 Avaya P330 Layer 3 Features 130 Avaya P334T ML User s Guide ...
Page 171: ...Avaya SECTION 4 TROUBLESHOOTING AND MAINTENANCE ...
Page 172: ......
Page 174: ...Chapter 13 Troubleshooting the Installation 158 Avaya P334T ML User s Guide ...
Page 176: ...Chapter 14 Maintenance 160 Avaya P334T ML User s Guide ...


