Avalon Camano Owner'S Manual Download Page 31


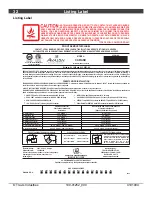
Limited 7 Year Warranty 

31


© Travis Industries 

100-01252_000 

4101004 

CONDITIONS & EXCLUSIONS 

1.  This new  appliance must be installed by a qualified installer.  It must be installed, operated, and maintained at all times in accordance with 

the instructions in the Owner’s Manual.  Any alteration, willful abuse, accident, neglect, or misuse of the product shall nullify this warranty. 

2.  This warranty is nontransferable, and is made to the ORIGINAL purchaser, provided that the purchase was made through an authorized 

Travis dealer. 

3.  Discoloration and some minor expansion, contraction, or movement of certain parts and resulting noise, is normal and not a defect and, 

therefore, not covered under warranty.   

4.  This warranty does not cover misuse of the stove.  Misuse includes over-firing (operation where the connector or stove may glow red) of this 

appliance can cause serious damage and will nullify this warranty. Misuse includes use of salt saturated wood, chemically treated wood, or 
any fuel not recommended in the manual. 

5.  Damage to the stove due to improper break-in procedures (see manual for proper break in). 
6.  The salt air environment of coastal areas or a high humidity environment can be corrosive to the castings.  These conditions can be corrosive 

and can cause the cast iron to rust.  This warranty does not cover any damage caused by a salt air or high humidity environment. 

7.  Damage to the appliance while it is in transit is not covered by this warranty, but is subject to a claim against the common carrier. 
8.  The warranty, as outlined within this document, does not apply to the chimney components or other Non-Travis accessories used in 

conjunction with the installation of this product. If in doubt as to the extent of this warranty, contact your authorized Travis retailer before 
installation.   

9.  Travis Industries will not be responsible for inadequate performance caused by environmental conditions such as nearby trees, buildings, 

roof tops, wind, hills or mountains or negative pressure or other influences from mechanical systems such as furnaces, fans, clothes dryers, 
etc. 

10. This Warranty is void if: 

a.  The appliance has been operated in atmospheres contaminated by chlorine, fluorine or other damaging chemicals. 
b.  The appliance is subject to submersion in water or prolonged periods of dampness or condensation. 
c.  Any damage to the appliance, combustion chamber, heat exchanger or other components due to water, or weather damage which is 

the result of, but not limited to, improper chimney/venting installation. 

11. Exclusions to this 5 Year Warranty include:  injury, loss of use, damage, failure to function due to accident, negligence, misuse, improper 

installation, alteration or adjustment of the manufacturer's settings of components, lack of proper and regular maintenance, damage incurred 
while the appliance is in transit, alteration, or act of God. 

12. This 5 Year warranty excludes damage caused by normal wear and tear, such as paint discoloration or chipping, worn or torn gasketing, 

chipped or cracked firebrick, etc.  Also excluded is damage to the appliance caused by abuse, improper installation, modification of the 
appliance, or the use of fuel other than  that for which the appliance is configured (use cord wood only).   

13. Damage to brass or plated surfaces caused by fingerprints, scratches, melted items, or other external sources left on the surfaces from the 

use of abrasive cleaners is not covered in this warranty.  Damage to the surfaces from over-firing (operation where the steel may glow red) is 
not covered in this warranty. 

14. TRAVIS INDUSTRIES, INC. is free of liability for any damages caused by the appliance, as well as inconvenience expenses and materials.  

Incidental or consequential damages are not covered by this warranty.  In some states, the exclusion of incidental or consequential damage 
may not apply. 

15. This warranty does not cover any loss or damage incurred by the use or removal of any component or apparatus to or from the Travis  

appliance without the express written permission of TRAVIS INDUSTRIES, INC.  and bearing a TRAVIS INDUSTRIES, INC. label of 
approval.  This warranty does not cover a stove repaired by someone other than a Travis Industries authorized dealer. 

16. Any statement or representation of Travis products and their performance contained in Travis advertising, packaging literature, or printed 

material is not part of this 5 year warranty. 

17. This warranty is automatically voided if the appliance’s serial number has been removed or altered in any way. If the appliance is used for 

commercial purposes, it is excluded from this warranty. 

18. No dealer, distributor, or similar person has the authority to represent or warrant Travis products beyond the terms contained within this 

warranty.  TRAVIS INDUSTRIES, INC. assumes no liability for such warranties or representations. 

19. Travis Industries will not cover the cost of the removal or re-installation of hearths, facing, mantels, venting or other components. 
20. If for any reason any section of this warranty is declared invalid, the balance of the warranty remains in effect and all other clauses shall 

remain in effect. 

21. This 5 year warranty is the only warranty supplied by Travis Industries, Inc., the manufacturer of the  appliance.  All other warranties, whether 

express or implied, are hereby expressly disclaimed and purchaser’s recourse is expressly limited to the warranties set forth herein. 

IF WARRANTY SERVICE IS NEEDED: 

1.  If you discover a problem that you believe is covered by this warranty, you MUST REPORT it to your Travis dealer WITHIN 30 DAYS, giving 

them proof of purchase, the purchase date, and the model name and serial number. 

2.  Travis Industries has the option of either repairing or replacing the defective component.  
3.  If your dealer is unable to repair your appliance’s defect, he may process a warranty claim through TRAVIS INDUSTRIES, INC., 

including the name of the dealership where you purchased the appliance, a copy of your receipt showing the date of the appliance’s 
purchase, and the serial number on your appliance.  At that time, you may be asked to ship your appliance, freight charges prepaid, 
to TRAVIS INDUSTRIES, INC.  TRAVIS INDUSTRIES, INC., at its option, will repair or replace, free of charge, your  appliance if it is 
found to be defective in material or workmanship within the time frame stated within this 5 year warranty.  TRAVIS INDUSTRIES, 
INC. will return your appliance, freight charges (years 1 to 3) prepaid by TRAVIS INDUSTRIES, INC., to your regional distributor, or 
dealership.  

4. Check with your dealer in advance for any costs to you when arranging a warranty call.  Mileage or service charges are not covered by 

this warranty. This charge can vary from store to store. 

5. Any appliance or part thereof that is repaired or replaced during the limited warranty period will be warranted under the terms of the 

limited warranty for a period not to exceed the remaining term of the original limited warranty or six(6) months, whichever is longer. 


Page 2 of 2 


Summary of Contents for Camano

Page 1: ...e SAFETY NOTICE If this appliance is not properly installed a house fire may result For your safety follow the installation directions Contact local building or fire officials about restrictions and installation inspection requirements in your area Copyright 2010 Travis Industries Inc 10 00 100 01252_000 4101004 Listed Tested to U L 1482 ULC S627 ULC S628 ...

Page 2: ...n and operation of your new appliance an easier and more enjoyable experience We offer our continual support and guidance to help you achieve the maximum benefit and enjoyment from your appliance Important Information No other Avalon Camano appliance has the same serial number as yours The serial number is stamped onto the label on the back of the appliance This serial number will be needed in cas...

Page 3: ...onry Chimney 17 Operating Your Appliance Safety Notice 18 Before Your First Fire 18 Opening the Door 18 Starting a Fire 19 Adjusting the Burn Rate 20 Ash Removal 20 Optional Blower Operation 21 Re Loading the Stove 21 Overnight Burn 21 Normal Operating Sounds 21 Hints for Burning 22 Selecting Wood 22 Troubleshooting 23 Maintaining Your Appliance Daily Maintenance 24 Remove Ash 24 Clean The Glass 2...

Page 4: ...ll children of the danger of a high temperature appliance Young children should be supervised when they are in the same room as the appliance 36 Keep furniture drapes curtains wood paper and other combustibles a minimum of 36 away from the front of the appliance This appliance must be properly installed to prevent the possibility of a house fire The instructions must be strictly adhered to Do not ...

Page 5: ...Allow the appliance to cool before carrying out any maintenance or cleaning Overfiring the appliance may cause a house fire If a unit or chimney connector glows you are overfiring Maintain the door and glass seal and keep them in good condition Do not operate this heater with broken or missing glass Avoid placing wood against the glass when loading Do not slam the door or strike the glass Do not u...

Page 6: ...ns Approximate Maximum Heating Capacity in square feet 750 to 1 400 Maximum BTU s per Hour Cord Wood Calculation 66 800 Maximum Burn Time Up to 8 Hours Heating capacity will vary depending on the home s floor plan degree of insulation and the outside temperature It is also affected by the quality and moisture level of the fuel Dimensions a 29 1 2 749mm 17 3 8 441mm 5 8 16mm 24 1 2 622mm 5 3 4 146m...

Page 7: ...pes of installations and the considerations for each type Alternative methods of installation are available if they comply with local building codes Installation Type Considerations Standard Ceiling with a Factory Built Chimney Page 15 Requires ceiling and roof penetration Provides best draft Cathedral Ceiling with a Factory Built Chimney Page 15 Cathedral style chimney support required Provides b...

Page 8: ...ll to stove 10 7 1 2 D Connector to sidewall 27 21 1 2 E Connector to backwall 19 1 2 11 1 2 F Connector to cornerwall 19 1 2 16 1 2 G Floor protection side and back 6 US 8 Canada 6 US 8 Canada H Floor protection front 16 US 18 Canada 16 US 18 Canada Reduced clearance installations require one of the chimneys and connectors listed below AMERI TEC model DCC with model HS chimney DURAVENT model DVL ...

Page 9: ...lation i Measure rear and side clearances from the stove top j Vent diameter varies depending on brand and model k Measure front clearances from the stove top 24 1 2 622mm 17 3 8 441mm 5 3 4 146mm i j k g g h a b d e Figure 2 Top View Corner Installation 24 1 2 622mm 17 3 8 441mm 5 3 4 146mm c f i j k g g h Figure 3 ...

Page 10: ...ired the installation shall conform to CAN CSA B365 Installation Code for Solid Fuel Burning Appliances and Equipment The chimney connector should be as short and direct as possible No more than 180o of elbows two 90o elbows or two 45o one 90o elbow etc may be used for the entire system connector and chimney Horizontal runs should slope upwards 1 4 per foot and be a maximum 36 long The chimney con...

Page 11: ...ings when passing through a ceiling see b below No more than 180o of elbows two 90o elbows or two 45o one 90o elbow etc may be used for the entire system connector and chimney NOTE Additional elbows may be allowed if draft is sufficient Whenever elbows are used the draft is adversely affected Additional chimney height may be required to boost draft a Min System Height 15 Max System Height 33 b Roo...

Page 12: ...ny portion of the roof within 10 of the chimney Chimney must extend 3 above the roof Chimney must extend 2 above any portion of the roof within 10 of the chimney Figure 5 Outside Air Requirements Required for mobile homes in certain localities check with local building official Must not be drawn from an enclosed space garage unventilated crawl space Requires the outside air kit sku 99200139 see a ...

Page 13: ... one of the above listed connectors NOTE Reduced clearance connectors may not connect to the flue collar an appliance adapter may be required Alcoves are classified as combustible or non combustible Non combustible alcoves must have walls and a ceiling that are 3 1 2 thick of a non combustible material brick stone or concrete see Figure 7 This non combustible material must be spaced and ventilated...

Page 14: ... collar an appliance adapter may be required Stove placement must maintain the following clearances to combustibles drywall furniture etc a b d e c f Figure 8 Minimum Clearance See the illustration above Reduced Clearance Connector A Sidewall to stove 13 B Backwall to stove 9 C Cornerwall to stove 7 1 2 D Connector to sidewall 21 1 2 E Connector to backwall 11 1 2 F Connector to cornerwall 16 1 2 ...

Page 15: ...chimney manufacturer s instructions and clearances for floor penetrations A ceiling support is required an attic insulation shield is required where insulation is present Insulation Minimum 15 4 57M Maximum 33 10 05M Figure 10 Cathedral Ceiling with a Factory Built Chimney Chimney Cap See the section Chimney Termination Requirements for more details Chimney Sections Minimum Air Space to Combustibl...

Page 16: ...ptional insulated chase Wall Bands and Supports Insulated Tee with cleanout Min 18 457mm clearance to ceiling Floor Protection See Floor Protection Requirements for details Minimum 15 4 57M Maximum 33 10 05M Figure 12 Hearth Stove Positive Connection Remove damper or wire it open Airtight Insulated Clean Out Min 18 457mm Combustible Mantle NOTE The entire fireplace and chimney must be clean undama...

Page 17: ...etails Combustible Mantle Min 18 457mm See the section Stove Placement Requirements for minimum clearances required Figure 14 Interior or Exterior Masonry Chimney NOTE This type on installation is not allowed in Canada NOTE This type of installation requires a UBC approved masonry connector or other method approved by the NFPA 211 standard See Chimney Connector Requirements on page 10 for further ...

Page 18: ... agent will soon dissipate Door Gasket The door gasket might adhere to the paint on the front of the heater Leave the door slightly ajar for the first fire and be careful when opening the door after the first fire 2 to 4 hours Over Firing the Stove This stove was designed to operate at a high temperature But due to differences in vent configuration fuel and draft this appliance can be operated at ...

Page 19: ...use DO NOT USE CHEMICALS OR FLUIDS TO START THE FIRE DO NOT BURN GARBAGE OR FLAMMABLE FLUIDS SUCH AS GASOLINE NAPHTHA OR ENGINE OIL Do not place such fuel within space heater installation clearances or within the space required for charging and ash removal If using a firestarter use only products specifically designed for stoves follow the manufacturer s instructions carefully HOT WHILE IN OPERATI...

Page 20: ... use gloves or a tool to prevent burns The air control may take several minutes to influence the burn rate When making adjustments you may wish to let the stove burn for 10 minutes to gauge performance Ash Removal ASHES Ashes should be placed in a metal container with a tight fitting lid The closed container of ashes should be placed on a noncombustible floor or on the ground away from all combust...

Page 21: ...n 2 Open the door slightly Let the airflow inside the firebox to stabilize before opening the doors fully 3 Load wood onto the fire Overnight Burn This stove is large enough to accommodate burn times up to eight hours Follow the steps below to achieve an overnight burn 1 Move the air control to high burn and let the stove become hot burn for approximately 15 minutes 2 Load as much wood as possible...

Page 22: ...es less creosote Testing Wood Moisture Split wood stored in a dry area will be fully dry within a year This insures dry wood If purchasing wood for immediate use test the wood with a moisture meter Some experienced wood burners can measure wood moisture by knocking pieces together and listening for a clear knock and not a thud Wet Wood Leads To Leads To Dry Wood Leads To Leads To Less Heat More He...

Page 23: ...e cases a small amount of smoke may enter the home Adding more pipe or a draft inducing cap may help Stove Does Not Burn Hot Enough Wood is Wet see the section Selecting Wood on page 22 for details on wood Make sure the air control is all the way open Slide the control back and forth to insure the control is not stuck Insufficient Draft Chimney height and outside conditions can negatively affect d...

Page 24: ...e hearth to catch ash and protect against scratching 3 Open the door and scoop the ash into a metal container with a tight fitting lid The closed container of ashes should be placed on a noncombustible floor or on the ground away from all combustible materials pending final disposal ASHES Improperly disposed ashes lead to fires Hot ashes placed in cardboard boxes dumped in back yards or stored in ...

Page 25: ...etwen the door frame and cam To loosen the door cam add a washer between the door frame and cam Door Frame with gasket Washers Nut Door Handle 9 16 Wrench Cam Creosote Formation and Need for Removal When wood is burned slowly it produces tar and other organic vapors which combine with expelled moisture to form creosote The creosote vapors condense in the relatively cool chimney flue of a slow burn...

Page 26: ...rom burning and creating odors The optional blower should be vacuumed every year to remove any buildup of dust lint etc Use a vacuum cleaner to remove any buildup on the screens of the blower BOTTOM OF STOVE Firebrick and Baffle Inspection Use the illustration on page 28 as a reference for checking the following items Make sure the appliance is cool before proceeding Baffle Firebricks check the br...

Page 27: ...ver tighten the glass clips Replacing the Door Gasket The door gasket inserts into the outer groove of the door RTV High temp silicone holds it in place Before installing remove any residual cement Lay the gasket in place start at the lower right corner and cut off any excess gasket do not stretch the gasket You may need to open and close the door repeatedly to get the gasket to seat fully Replaci...

Page 28: ...r Tube Roll Pins 6 98900357 4 Air Tube Retainer Sleeve 3 250 00042 5 Brick 9 x 4 5 un cut 16 251 00000 6 Brick Cut 9 x 2 25 3 251 00001 7 Brick Cut 9 x 1 375 2 251 00018 Floor and Side Firebrick Removal Replacement Do not pry firebrick they chip and crack easily Remove the floor firebricks first The side firebrick are removed later because they are pinned in place by the floor firebrick Clean the ...

Page 29: ...lt them downwards to remove Air Tube Removal Replacement All three air tubes are identical a b Remove the left pin on the air tube collar Air Tube Collar Air Tube Slide the air tube to the left swing it down and remove from the firebox Roll Pin Baffle Removal Replacement The baffle is held up by the front air tube Make sure to support the baffle after removing the air tubes Lift the four baffle fi...

Page 30: ...irebrick Breakage from thermal shock Accessories Legs Pedestal Blower Re Installation Allowance In cases where heater must be removed from home for repairs a partial cost of re installation is covered pre authorization required One Way Freight Allowance One way freight allowance on pre authorized repair done at factory is covered Exclusions Paint Gasketing Years 3 THROUGH 5 COVERAGE PARTS LABOR Fi...

Page 31: ...ers is not covered in this warranty Damage to the surfaces from over firing operation where the steel may glow red is not covered in this warranty 14 TRAVIS INDUSTRIES INC is free of liability for any damages caused by the appliance as well as inconvenience expenses and materials Incidental or consequential damages are not covered by this warranty In some states the exclusion of incidental or cons...

Page 32: ... CLEARANCE INSTALLATIONS REQUIRE One of the Listed doublewall connectors listed below In addition manufactured home installations require outside air use the optional pedestal or outside air boot AMERI TEC model DCC connector with model HS chimney DURA VENT model DVL connector with DURA PLUS chimney GSW JAKES EVANS SUPERPIPE 2100 I C C EXCEL 103 HT chimney with HP connector METALFAB model DW conne...

Page 33: ...lide the wire clip over the edge of the strip of metal between the two knock outs Feed the two snap disk wires into the eye of the wire clip Remove all slack from the wire making sure not to dislodge the snap disk Pinch the eye of the wire clip to secure the wires Wire Clip Snap Disk Wires WARNING To prevent electrical shock the wires must be secured so they do not contact the firebox above the co...

Page 34: ...oval 6 Exterior Chimney 12 Features 6 Fire Starting 19 Firebox Assembly 28 Firebox Parts 28 Firebrick and Baffle Inspection 26 Firebrick Removal Replacement 28 Floor Protection Requirements stove 8 Glass Cleaning 24 Glass Replacement 27 Hearth Floor Protection Stove 8 Hearth Stove 17 Heating Specifications 6 Hints for Burns 22 Installation Options 6 Installation stove 7 Listing Label 32 Maintenanc...

Reviews: