Quick Start Steps
To get started quickly please follow the steps below. Some features and hardware setups don’t require the same connections;
if you don’t see the need for a particular step simply skip it and move on to the next step. Make sure to perform all required
steps. This section will get your Zara up and running quickly using the default settings for ripping CDs etc.
Step 1 - Required Connections
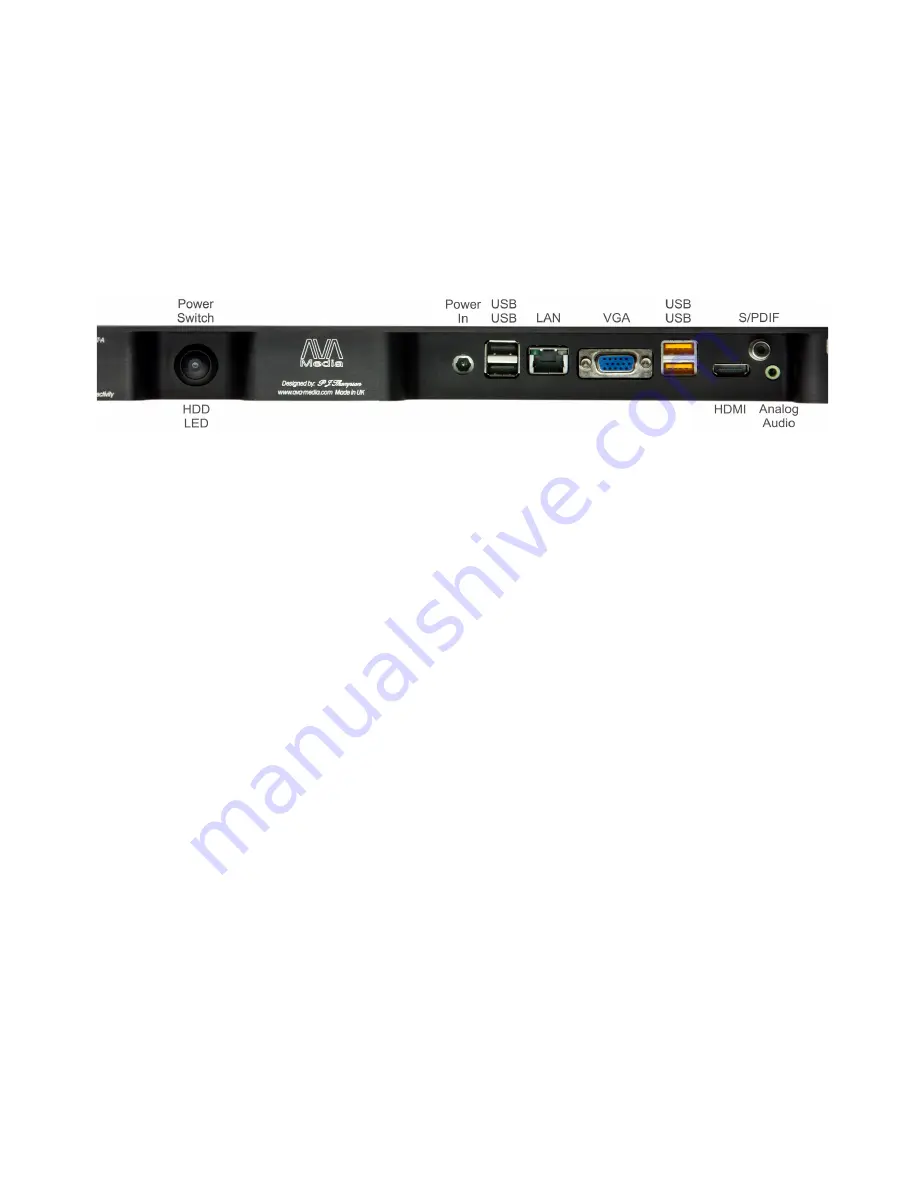
• Connect to the local Network via an RJ-45 Ethernet Cable to a network port.
• Connect the Analog or S/PDIF output to your Hi-Fi Stereo pre-amp inputs (Connection of the audio is helpful to monitor
playback).
NOTE: Because the Zara is computer based hardware containing a large internal hard-drive and other computer components,
we strongly recommends connecting it to a quality Power Conditioner/Power Surge protector. This will increase protection
from unwanted surges in the power line.
Step 1a - Optional Connections
These options are only needed if the Local User Interface is going to be used via a connected VGA monitor or TV.
• Connect a standard or USB mouse and keyboard.
NOTE: A keyboard is not absolutely needed as the Local User Interface has an on screen keyboard, but a connected keyboard will
make interfacing easier and faster.
• Connect a VGA computer monitor or any VGA compatible monitor, or HDMI TV
Step 2 - Power Up
After all of the connections have been made connect the Power Supply Adaptor the power to the Zara. If required press the
power button located at the rear (left) of the unit. Wait for the system to boot up. A small white light on the front of the unit
indicates the unit is on. The light in the power button at the back indicates hard disk activity.
Step 3 - Install Zara Desktop Interface Software
Insert the CD supplied into a PC located on the same network as the Zara. Click on the ‘Install AVA Media Zara icon, from the
menu displayed. This will install the Zara Desktop Interface software on your computer and will be used to setup the Zara.
Step 4 - Identify Zara to the Desktop Interface
From the Zara Desktop Interface click on File | Connect. Click on Scan for Zara ’s to see all Zara s on the
local network. Click on the name of the unit this session of the Zara Desktop Interface will be interfacing with. It is only pos-
sible to connect to one Zara unit at a time via the Zara Desktop Interface software.


