- 3 -
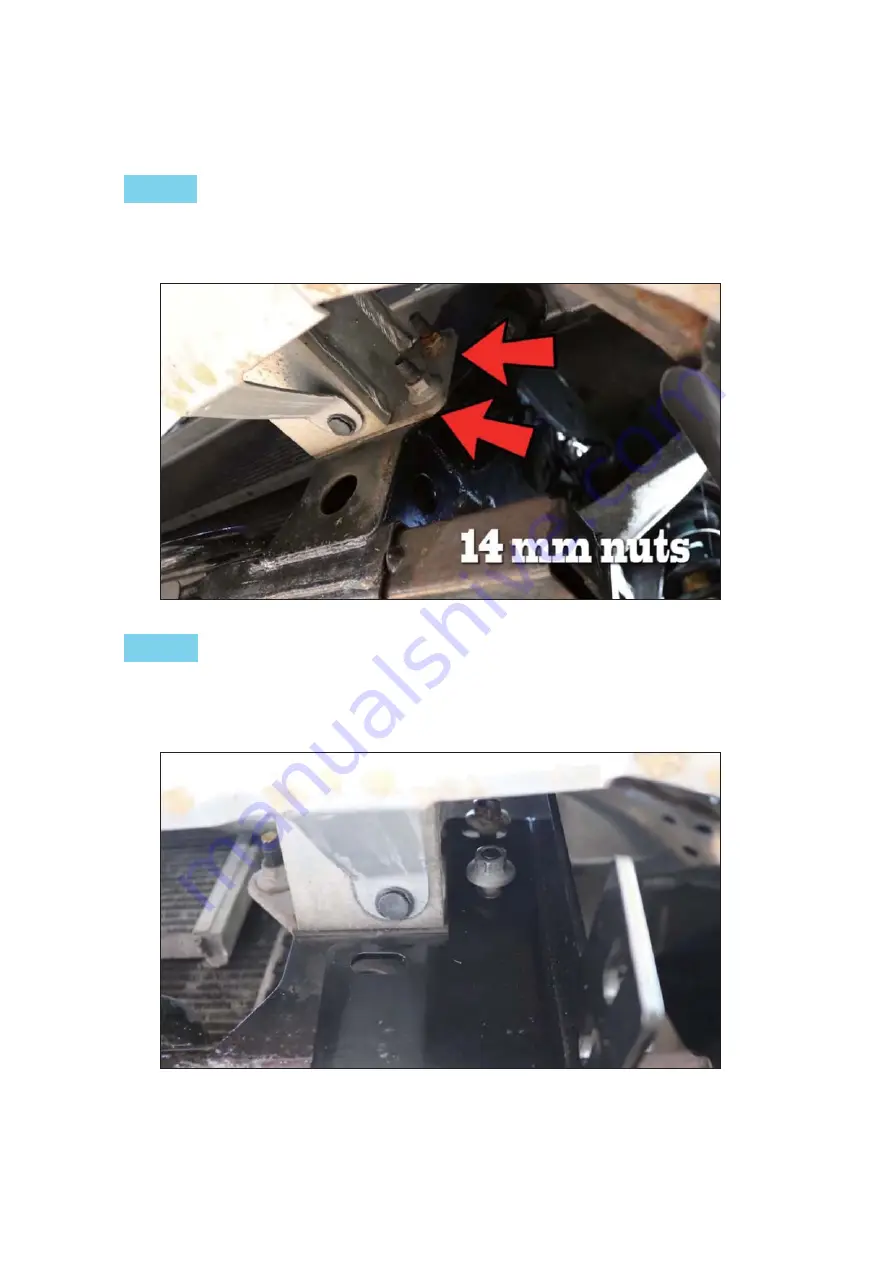
STEP 1
STEP 2
Remove the 2 X M14 nuts of the original car with a wrench. (As shown in Figure 1)
Install bracket 1 with the original car bolts and nuts. Do not tighten at this time.
(As shown in Figure 2)
PIC 1
PIC 2
Page 1: ...ly in the event of any scratches After installation you may need to re tighten all hardware periodically to ensure safety The installation pictures are only for your reference There may be some differ...
Page 2: ...2 3 576 67...
Page 3: ...P 1 STEP 2 STEP 2 Remove the 2 X M14 nuts of the original car with a wrench As shown in Figure 1 Install bracket 1 with the original car bolts and nuts Do not tighten at this time As shown in Figure 2...
Page 4: ...beam and the bracket 1 2 Insert the bolt into the bracket 1 and the car girders use the thicken washer No 4 M10 large washer No 7 M10 spring washer No 8 and M10 nut No 9 in turn as shown in Figure 3 F...
Page 5: ...on is complete Wiring the harness of the light bar 1 Open the front cover of the car hood cover 2 Unscrew the bolts of the positive and negative electrodes on the car battery 3 Arrange the wiring harn...
Page 6: ...6 1 Product and hardware didn t fit your car 2 Missed required mounting hardware 3 Received a damaged product 4 Received a wrong product If you get in trouble regarding Contact us info autosaver88 com...