


Texture Alignment
Use the Texture Alignment tool to align the texture of the render appearance to the surface pattern of the
material (defined on the Graphics tab of the Materials dialog). When you render a 3D view, the rendered
image displays the texture, positioned as specified using the Texture Alignment tool.
You access the Texture Alignment tool on the
Aligning the Render Appearance to the Surface Pattern
The following procedure assumes that you have done the following:
■
Specified a surface pattern for the material. See
Changing the Display Properties of a Material
473.
■
Specified a texture for the render appearance of the material. See
Changing the Render Appearance of a
on page 475.
To align the render appearance to the surface pattern
1
On the Render Appearance tab of the Materials dialog, click Texture Alignment.
TIP
If the Texture Alignment button is not active, click the Graphics tab and specify a surface pattern
for the material.
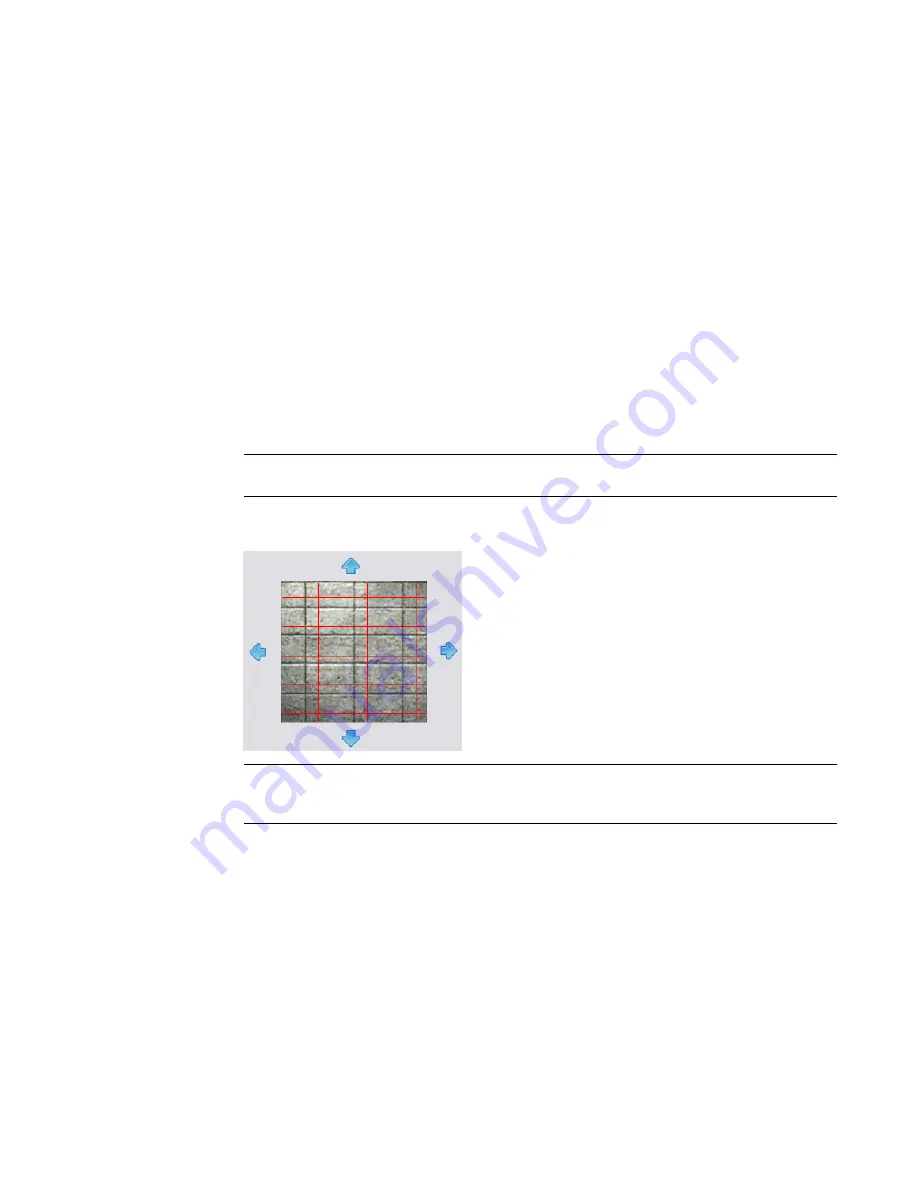
The Align Render Appearance to Surface Pattern dialog displays. The preview area displays the
texture specified for the render appearance, overlaid with the surface pattern for the material.
NOTE
If the render appearance is dark and the surface pattern uses black lines, it may be difficult to
see the surface pattern. Try changing the color of the surface pattern lines to white or another light
color to make them more visible.
2
Use the arrows to position the render appearance relative to the surface pattern as desired.
To rotate the texture or change its sample size, use the render appearance properties where you
specify the image file for the texture. See
Specifying an Image File for a Render Appearance
page 485.
Changing the Render Appearance of a Material | 477
Summary of Contents for 256B1-05A761-1301 - AutoCAD Revit Structure Suite 2010
Page 1: ...Revit Architecture 2010 User s Guide March 2009 ...
Page 4: ......
Page 42: ...xlii ...
Page 84: ...42 ...
Page 126: ...84 ...
Page 166: ...124 ...
Page 229: ...Schedule Field Formatting Calculating Totals Specifying Schedule Properties 187 ...
Page 230: ...Schedule with Grid Lines Schedule with Grid Lines and an Outline 188 Chapter 5 Project Views ...
Page 304: ...262 ...
Page 427: ...Defining the first scale vector Defining the second scale vector Resizing Graphically 385 ...
Page 454: ...Before painting applying material to stairs 412 Chapter 8 Editing Elements ...
Page 456: ...414 ...
Page 486: ...444 ...
Page 674: ...632 ...
Page 809: ...Curtain wall Curtain Grid Curtain Walls Curtain Grids and Mullions 767 ...
Page 994: ...952 ...
Page 1016: ...974 ...
Page 1204: ...1162 ...
Page 1290: ...1248 ...
Page 1318: ...1276 ...
Page 1372: ...1330 ...
Page 1382: ...1340 ...
Page 1462: ...1420 ...
Page 1492: ...1450 ...


