7
Make sure the goods has not been damaged
during transport and that the goods are according
to your order. Read the User Instructions for Ca-
rolift and make sure you understand how the hoist
will be operated after the installation.
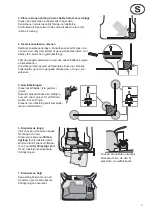
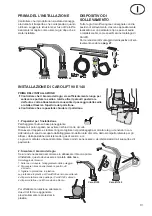
1. Preparing for installation
Place the vehicle on horizontal ground.
Disconnect minus pole to avoid risk for short circuit.
Lift away the carpet and check the most suitable side for installing the hoist.
Consider fender well, side tool compartment, positon of exhaust system etc.
Spacers might be needed to obtain a horisontal installation for the hoist,
which should be mounted horizontally.
DOCKING DEVICE
All Carolift hoists are delivered with a docking
device, specially designed for different types and
weights of wheelchairs/scooters, according to spe-
cifi cation in the Carolift catalogue.
Instructions on how to assembly the docking de-
vice are found on page
27
.
PRIOR TO INSTALLATION
INSTALLING CAROLIFT 90 OCH 140
BROMS-
SKRUVAR
2. Dismount the hoist arm
If the installation requires shortening and/or lowering of hoist arm
this must be dismounted from the motor base.
Dismounting the hoist arm:
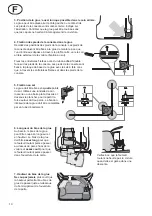
1. Unscrew the pulley housing and remove it from the
hoist arm.
2. Remove the hoist arm by loosening the four stop screws
3. Remove the plastic cover.
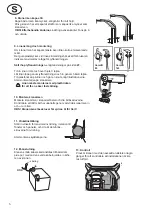
The plastic cover of Carolift 90 is removed by unscrewing four
plate screws. The cover of Carolift 140 is removed by un-
screwing four plate screws and one M5 screw, nut and hat.
Loosen the two lock screws for rotation
and place the plastic covers back again,
just by hanging them there temporarily.
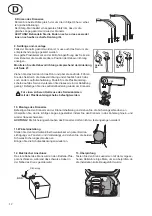
Check that the lenght of the hoist arm is suffi cient for lifting the
mobility device passed rear bumper and short enough to pass
through rear doorway.
Check that rear doors/hatch can be closed.
½ + extra
Carolift 140
Carolift 90
2x
2x
2x
1x
Carolift 140
Carolift 90
CHECK FOLLOWING:
Summary of Contents for CAROLIFT 140
Page 1: ......
Page 2: ...2 ...
Page 25: ...25 ...
Page 26: ...26 ...
Page 28: ...Art No 414147 Edition 2 ...


