10
3
Getting Started
Make sure the tablet has sufficient power or is connected to an external power supply
(see
on page 5.)
NOTE
The images and illustrations depicted in this manual may differ slightly from those in the
most recent products.
3.1 Powering Up
Long press the
Power/Lock
button on the top-right side of the tablet to power on the unit.
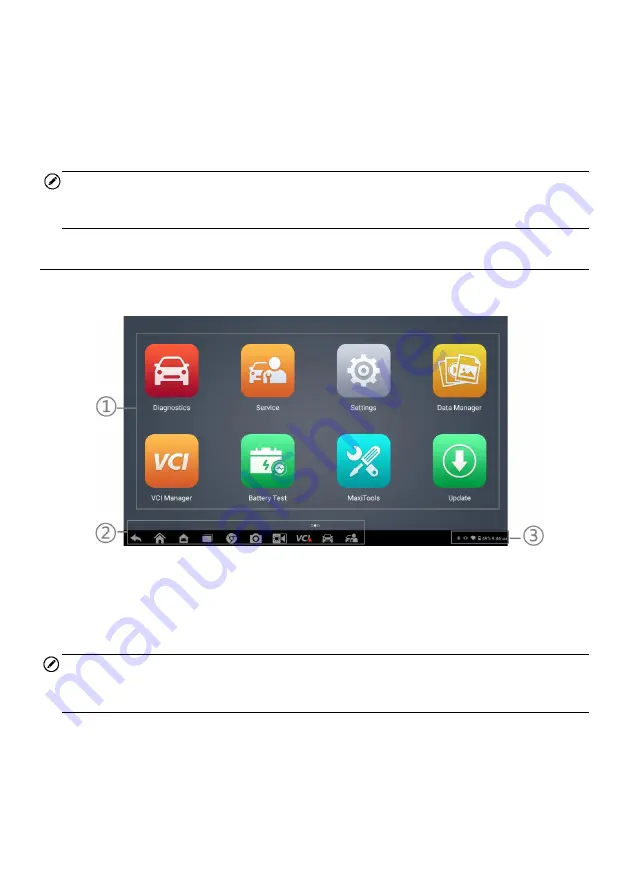
The system boots up and displays the OTOFIX Job Menu.
Figure 3-1 Sample OTOFIX Main Menu
①
Application Buttons
②
Locator and Navigation Buttons
③
System Status Icons
NOTE
We recommend you lock the screen when not in use to protect private information in the
system and conserve power.
Almost all operations on the tablet are controlled through the touchscreen. The
touchscreen navigation is menu-driven, allowing for quick access to test procedures and
data through a series of questions and options. Detailed descriptions of the menu items
are found in the chapters for each application.
Summary of Contents for OTOFIX D1 Pro
Page 9: ...2 1 1 5 Procedures An arrow icon indicates a procedure Example To use the camera ...
Page 66: ...59 Figure 7 5 Sample Vehicle Information Figure 7 4 Screen OBD Connect Screen ...
Page 90: ...83 Refer to the associated TeamViewer documents for additional information ...
Page 96: ...89 To search by functions Figure 16 2 Sample Function Viewer Screen 2 ...
Page 102: ...95 ...
Page 110: ...103 20 3CE Compliance RED Directive 2014 53 EU ...


