AURES TRP100 User Manual Download Page 10

TRP-100 User’s Manual

16

TRP-100 User’s Manual

17

3. Control panel and other functions.
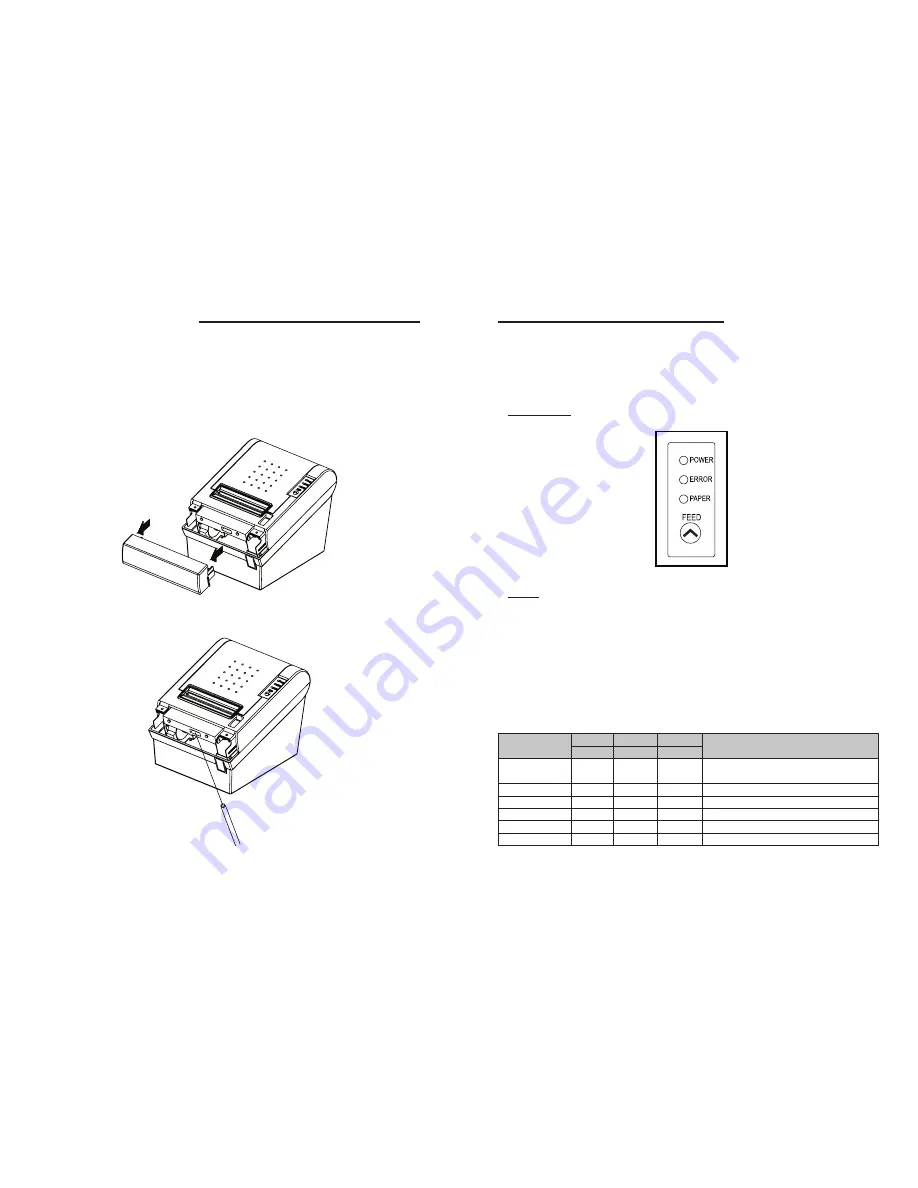
3-1. Control panel

You can control the basic paper feeding operations of the printer with the button on the control 

panel. The indicator lights help you to monitor the printer’s status.

Control Panel


Button

The button can be disabled by the ESC c 5 command.

Press the FEED button once to advance paper one line. You can also hold down the FEED button 

to feed paper continuously.

3-2. Error indicators

This section explains the different patterns signaled by the three LED indicators located on the 

top cover of the printer.

STATUS

PAPER ERROR POWER

REMARKS

RED

RED

GREEN

Power off

OFF

OFF

OFF

Normal power is not supplied to the 

printer

Power on

OFF

OFF

ON

Normal power is supplied to the printer

On line

OFF

OFF

ON

Normal error-free mode

Cover open

OFF

ON

ON

Close cover

Paper empty

OFF

ON

ON

Insert new paper roll

Test mode

OFF

OFF

ON

Ignored error led

♣CAUTION:

When the paper is jammed with cutter, the top cover might be stuck. In this case, repeat power 

on and off several times.

If the top cover is still stuck, please follow the steps to release the papers from jamming.

1. Make sure the printer is turned off.

2. Take out cutter cover as shown.

3. Turn screw with drivers to a direction until paper is released from the cutter.

Summary of Contents for TRP100

Page 1: ...All speci cations are subject to change without notice TRP 100 Receipt Printer User s Manual...

Page 2: ......

Page 3: ...p switch setting 11 3 Control panel and other functions 17 3 1 Control panel 17 3 2 Error Indicating 17 4 Self Test 18 5 Hexadecimal Dump 19 6 Speci cations 20 6 1 General Speci cations 20 6 2 Auto Cu...

Page 4: ...the back of the printer which is shown below Before connecting any of the cables make sure that both the printer and the computer are turned off 2 Setting Up the Printer 2 1 Unpacking Your printer bo...

Page 5: ...rinter error 33 GROUND System ground 34 NC 35 5V 5V 36 SELLECT IN Input Printer select signal Ethernet Interface PIN SIGNAL I O 1 Data Out Output Data 2 Data Out Output Data 3 GND Ground 4 Data IN Inp...

Page 6: ...down the cover open button 3 Remove the used paper roll core if there is one inside 4 Insert new paper roll as shown 2 2 2 Cash Drawer Connector The printer can operate two cash drawers with a 6 pin...

Page 7: ...of Dip Switch and change setting 2 4 1 Serial Interface Speci cation DIP Switch Set 1 Functions SW FUNCTION ON OFF DEFAULT 1 Data Receive Ignored Print OFF 2 Hexadecimal HEXDUMP NORMAL OFF 3 Hand Shak...

Page 8: ...int Density Print Density SW 9 SW 10 Low Power ON ON Normal OFF ON Normal ON OFF Dark OFF OFF 2 4 2 Parallel Interface Speci cation DIP Switch Set 1 Function SW FUNCTION ON OFF DEFAULT 2 Hexadecimal H...

Page 9: ...screw The new settings take effect when you turn on the printer 2 4 5 Wi Speci cation DIP Switch Set 1 Function SW FUNCTION ON OFF DEFAULT 2 Hexadecimal HEXDUMP NORMAL OFF Print Density Print Density...

Page 10: ...indicators located on the top cover of the printer STATUS PAPER ERROR POWER REMARKS RED RED GREEN Power off OFF OFF OFF Normal power is not supplied to the printer Power on OFF OFF ON Normal power is...

Page 11: ...46 47 48 ABCDEFGH A period is printed for each code that has no ASC equivalent 3 Turn off the printer and make sure that Dip sw 1 2 off 4 Turn on the printer 4 Self Test The self test lets you know if...

Page 12: ...c Approx 35 4LPS 3 Dot density 180 DPI Hor Ver 180 180 0 141mm 0 141mm dot 203 DPI Hor Ver 203 180 0 125mm 0 141mm dot 4 Printing Width 180 DPI Max 72mm 512 dots 203 DPI Max 72mm 576 dots 5 Number of...

Page 13: ...h paper thickness in the range of from 65 m 75 m 35 million lines based on an average printing rate of 12 5 with paper thickness in the range of from 76 m 150 m 2 Head Life 100 million pulses 100Km 3...

Page 14: ...device 20 ESC Cancel user de ned characters 21 ESC Initialize printer 22 ESC D Set horizontal tab positions 23 ESC E Turn emphasized mode on off 24 ESC G Turn double strike mode on off 25 ESC J Print...

Page 15: ...t mode and cut paper 54 GS W Set printing area width 55 GS Set relative vertical print position in page mode 56 GS a Enable disable Automatic Status Back ASB 57 GS f Select font for HRI characters 58...

Page 16: ...Rev 2 0...

Reviews: