


17
The System menu contains all interface and hardware related settings. Rotate the rotary
knob clockwise or counter-clockwise to highlight a destination, and press the rotary
knob to select it.
To exit the System menu, please rotate the rotary knob clockwise to the last and select
‘Back to Menu’.
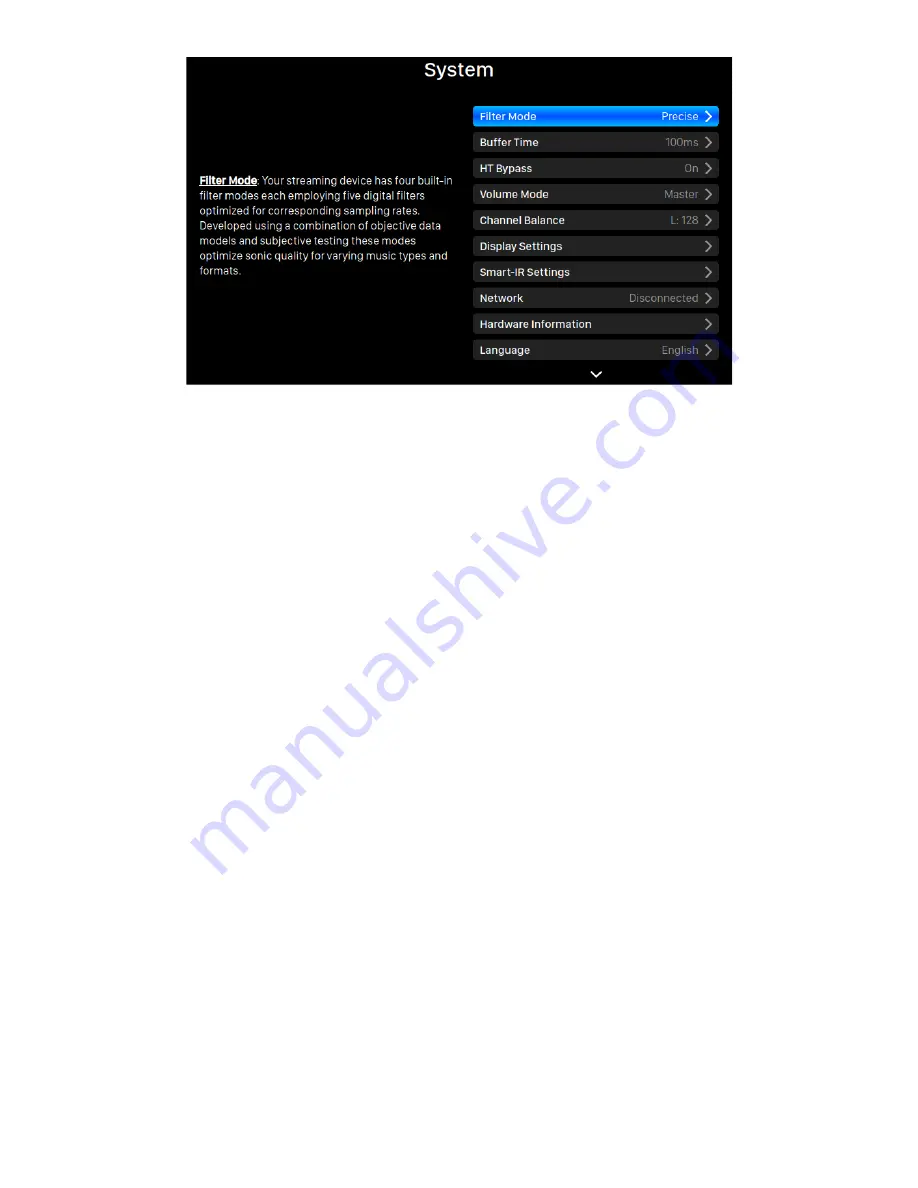
1.
‘Filter Mode’
: Your streaming device has four built-in filter modes each
employing five digital filters optimized for corresponding sampling rates.
Developed using a combination of objective data models and subjective testing
these modes optimize sonic quality for varying music types and formats.
2.
‘Buffer Time’
: The Lightning platform saves input signals to system memory to
remove jitter then send it to DAC. A larger buffer time will add more latency
between input and output, but may be more stable with various music sources.
3.
‘HT Bypass’
: Home Theatre bypass mode. When enabled, the analog input signal
will bypass the preamp’s gain controls letting you use your DAC purely as a unity
gain preamp without having to worry about adjusting volume when watching
movies — the receiver’s own volume control takes over that function.
4.
‘Volume Mode’
: Set up the DAC's volume control.
5.
‘Channel Balance’
: Adjust left and right channel balance of the DAC output.
6.
‘
Display Settings
’: Set preferences for the front panel display.
a.
Idle Status
: Select whether you’d like the display to always remain on, or
to turn off automatically.
b.
Display Brightness
: Select the brightness of your device's front display.
7.
‘
Smart-IR Settings
’: Use this feature to assign your device’s functions to any
buttons you choose on your IR remote control.
8.
‘
Network
’: Set up your device’s network connection.
a.
Connection Type
: Choose Ethernet or Wi-Fi to connect your device.