www.AURAFINA.com
PAGE
8
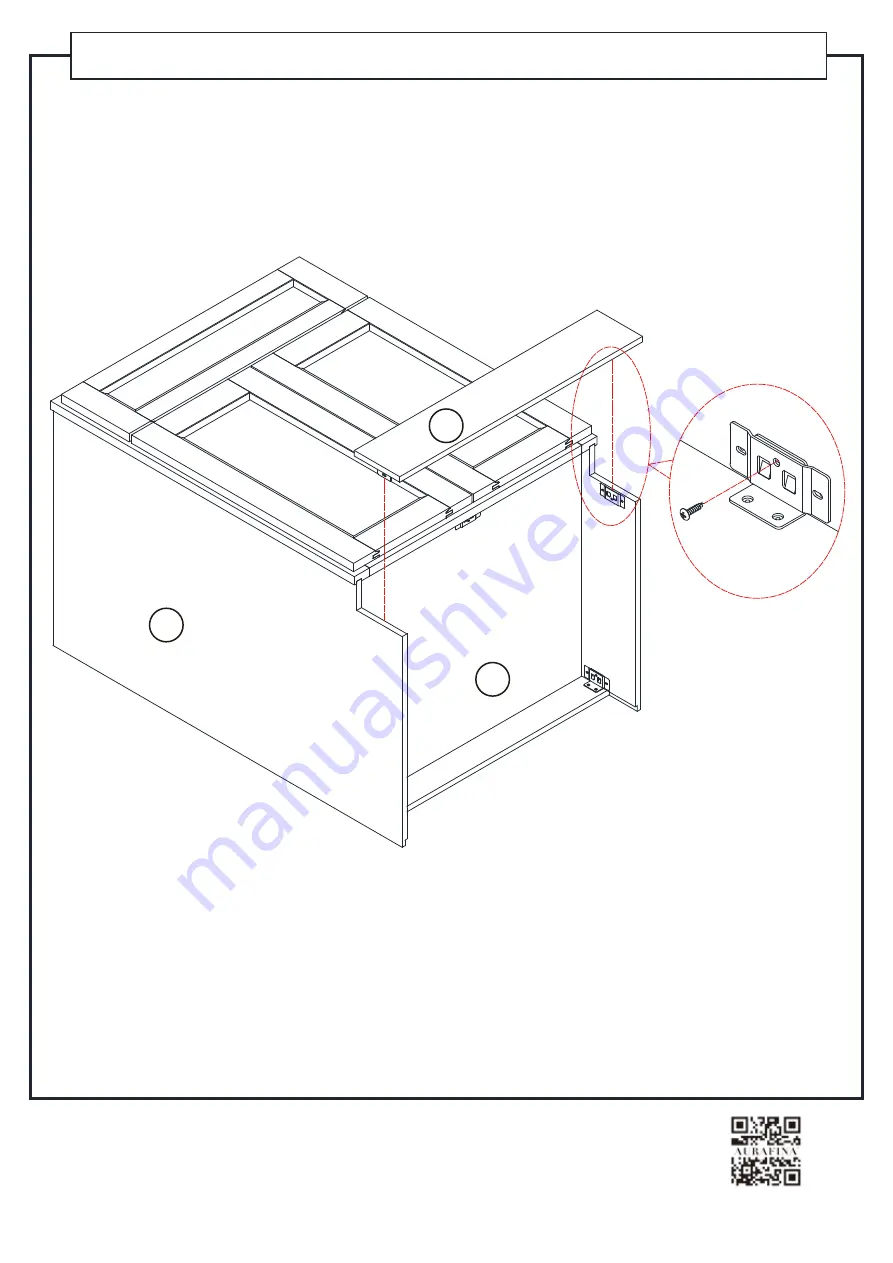
TOE KICK INSTALLATION
Line the toe kick (F) to the right side (B) and left side (C). Lock fasteners in place and
fasten with round head screw (4).
B
D
F
4
Page 1: ...head screw driver cordless electric drill with the flat and Phillips attachment bits not necessary but is a time saver and rubber mallet Prep Area A dirt free carpet or the foam sheets and cardboard f...
Page 2: ...pc Back Panel 1 pc Male Bracket 13 pcs Female Bracket 13 pcs Plastic Bracket 4 pcs 3 x 12mm 3 x 25mm Round Head Screw 73 pcs Round Head Screw 2 pcs Toe Tick 1 pc Right Side 1 pc Left Side 1 pc Bottom...
Page 3: ...urface to avoid any scratches Attach the male bracket 1 to front frame A and back panel E and toe tick F using round head screws 4 and screw driver not included to Fasten www AURAFINA com PAGE 3 PREPA...
Page 4: ...C and bottom panel D upside down on a smooth flat surface to avoid any scratches Attach the female bracket 2 to right side B and left side C and bottom panel D using round head screws 4 and screw dri...
Page 5: ...CH SIDES TO FRONT Place front frame A face down onto padded work surface Line up fasteners on the right side B and left side C of the vanity to the front frame A Lock fasteners in place and fasten wit...
Page 6: ...www AURAFINA com PAGE 6 SLIDE IN VANITY BOTTOM PANEL Slide bottom panel D into the grooves of right side B and left side C Lock fasteners in place and fasten with round head screw 4 4 B C D...
Page 7: ...NEL Line the back panel E to the right side B and left side C Lock fasteners in place and fasten with round head screw 4 Attach back panel E to the bottom panel D using round head screw 5 and screw dr...
Page 8: ...www AURAFINA com PAGE 8 TOE KICK INSTALLATION Line the toe kick F to the right side B and left side C Lock fasteners in place and fasten with round head screw 4 B D F 4...
Page 9: ...www AURAFINA com PAGE 9 BRACING Screw in vinyl corner braces and you are done Attach plastic bracket 3 to the vanity using round head screw 4 4 4 3...