


47
EN
3. Here it is possible to select which source (DAB/FM/Network/No update)
the unit uses to obtain and update the time and date. If "Update from
Network" selected, proceed to the next step to select time zone to
ensure that the time is displayed correctly. And then select the "Daylight
savings" is [ON] or [OFF].
4. In the next step you can specify whether the product should remain
connected to the Internet when on standby.
5. The network wizard then starts and you can set up an Internet
connection. Select the WLAN network you know and whether to use
WPS (Push Button/Pin) or Skip WPS to enter the password using the
displayed keyboard.
6. While you press "Skip WPS", the virtual keyboard is shown on the
display, you can press PRESET
∧
/
∨
buttons to move the highlight
upwards and downwards, the /- buttons move the highlight to
the right and left on the remote control. And then press ENTER button to
select the key.
7. After enter the password, select "OK" and then press ENTER on
the remote control to confirm. If the password entered is correct, a
connection to the network is now established. Press SCROLL / SELECT
Control on the unit or ENTER button on the remote control to exit.
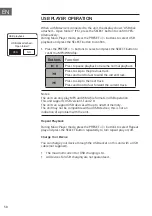
8. Settings can be changed at any time by press the MENU button to
display the menu. Press PRESET
∧
/
∨
buttons to select System settings
and then press the ENTER button to confirm. And press the PRESET
∧
/
∨
buttons to select Setup wizard and then press the ENTER button to
launch Setup wizard again.
This instruction manual explains the basic instruction for operating this
unit. Unless otherwise stated, all operations described are based on remote
control use
Summary of Contents for 10032753
Page 2: ......
Page 8: ...8 DE FERNBEDIENUNG...
Page 36: ......
Page 42: ...42 EN REMOTE CONTROL...
Page 70: ......
Page 76: ...76 FR TELECOMMANDE...
Page 104: ......
Page 110: ...110 ES CONTROL REMOTO...
Page 138: ......
Page 144: ...144 IT TELECOMANDO...
Page 172: ......
Page 173: ......
Page 174: ......
Page 175: ......
Page 176: ......