-7-
-6-
B
UTTON
& O
PERATION OF
AV S
YSTEM
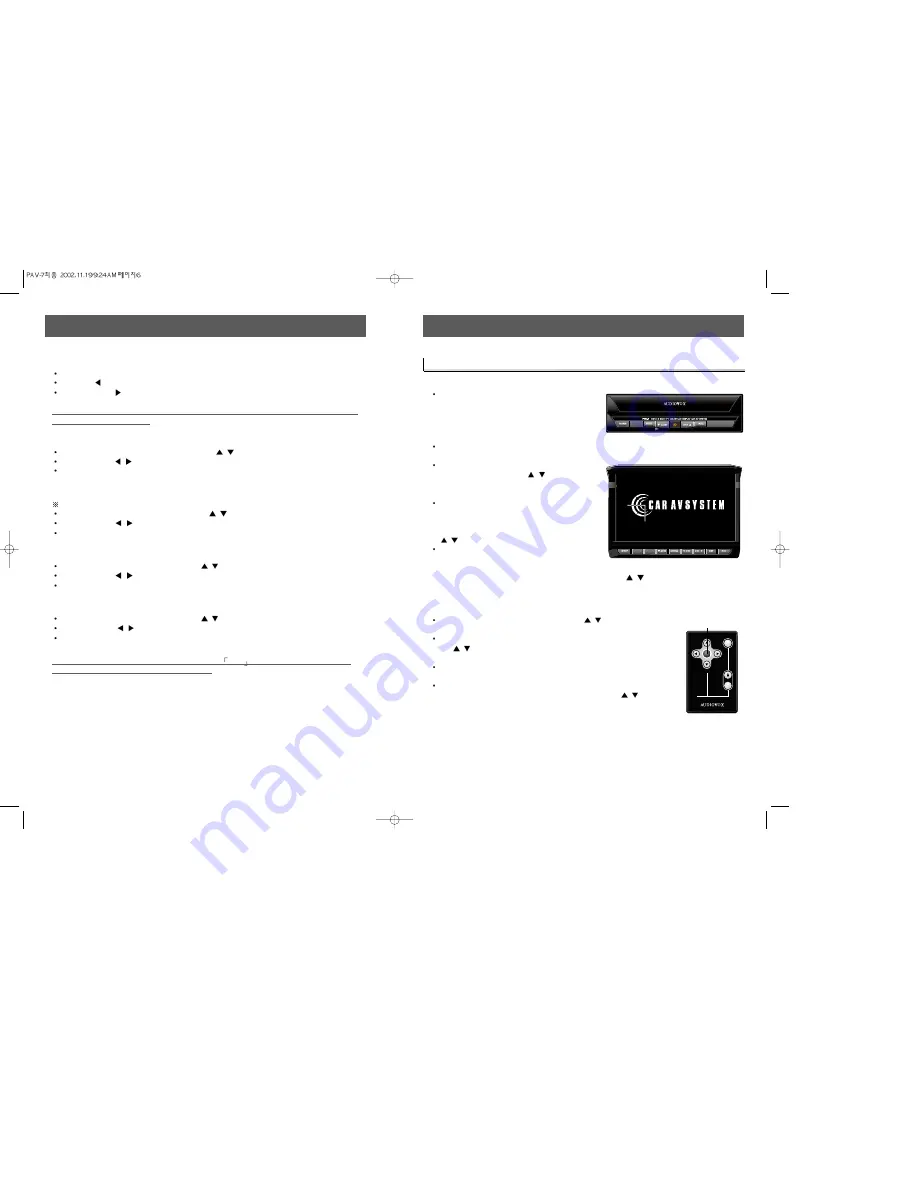
1. Close the monitor
To close the monitor when the power is on,
press the Close button on the main unit or
press the power button and the screen will
retract into the unit.
2. Open the monitor
Press the Power button and the unit will turn
on and the screen will slide out and up.
To open the monitor from the main unit,
press the Open button or
/
button. The
monitor will slide out and open to the
memorized angle.
If monitor is physically prevented from sliding
out for longer than 2 sec, the monitor will
slide back in automatically. Remove the
obstacle and repress the Open button or the
/
button again.
If monitor is physically prevented from
opening for longer than 2 sec, the monitor
will stop opening and stay at that angle.
Remove the obstacle and press the Open button or the
/
buttons again to open the
monitor to the memorized angle. Or, press the Close button to close monitor and slide into
the main unit.
3. Memorizing the Monitor Angle
Press the Open button momentarily or the
/
button to adjust
the monitor backward one step as a time.
After adjusting monitor angle, press and hold the Open button or
the
/
button longer than 2 sec to memorized the current
monitor angle.
Once the monitor angle is memorized, the monitor will always
open to the memorized angle.
To clear the memorized angle; When the monitor is closed (Power
On condition), keep pressing the Open button or the
/
button
on Remote controller longer than 2 sec will extend the screen to 75
degrees.
CONTROL
CONTROL
MENU
MENU
PWR
MODE
NAVI
MODE
Closing the
Closing the
Monitor When
Monitor When
the
the
Power is On
Power is On
B
UTTON
& O
PERATION OF
AV S
YSTEM
Each mode's level adjustment is controlled by the CTRL up & down buttons.
Press the
CTRL button to decrease the level of the selected mode.
Press the CTRL
button to increase the level of the selected mode.
If there is no button press within 5 sec or the DISP button is pressed, mode switched
back to the previous mode.
1. Adjust Brightness
Select Brightness mode by pressing the Menu
/
until "BRIGHT" is displayed.
Press the CTRL
/
button to adjust Brightness level.
Movement of the indicator level to the left will decrease the Brightness and to the right
will increase it.
2. Adjust Dimmer
Dimmer is to control the brightness of illumination in TFT LCD.
Select Dimmer mode by pressing the Menu
/
, until "DIMMER" is displayed.
Press the CTRL
/
button to adjust Dimmer level.
Movement of the indicator level to the left will decrease the Brightness of the LCD and to
the right will increase it.
3. Adjust Color
Select Color mode by pressing the menu
/
until "COLOR" is displayed.
Press the CTRL
/
button to adjust the Color level.
Movement of the indicator level to the left will decrease the intensity of the color and to
the right will increase it.
4. Adjust Tint (NTSC Only)
Select Color mode by pressing the Menu
/
until "TINT" is displayed.
Press, the CTRL
/
button to adjust the Tint level.
Movement of the indicator level to the left will emphasize green color and to the right will
emphasize red color.
If no button is pressed within 5 seconds or the DISP button is pressed, the mode
will be switched back to the previous mode.


