background image

14

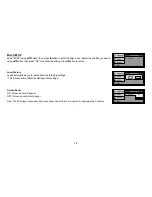
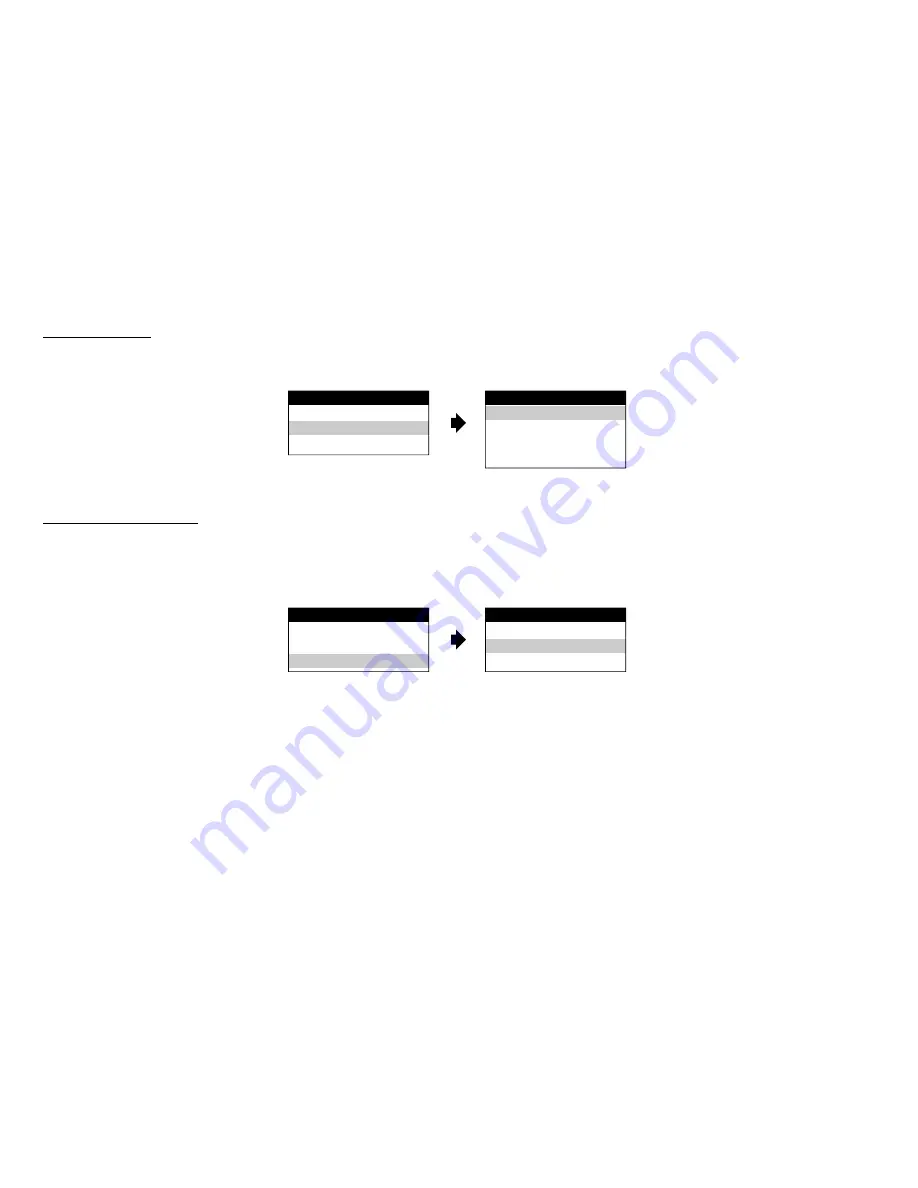
SYSTEM MENU

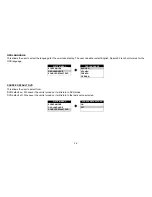
SCREEN MODE

OSD LANGUAGE

SOURCE DEFAULT DVD

OSD LANGUAGE

ENGLISH

SPANISH

FRENCH

GERMAN

OSD LANGUAGE

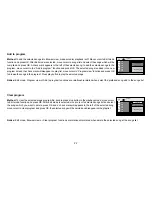
This allows the user to select the language for the on-screen display. The user can either select English, Spanish, French or German for the 
OSD language.

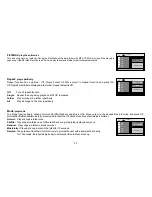
SYSTEM MENU

SCREEN MODE

OSD LANGUAGE

SOURCE DEFAULT DVD

SOURCE DEFAULT DVD

ON

OFF

SOURCE DEFAULT DVD

This allows the user to select from:
DVD default on-  Whenever the unit is turned on it will return to DVD mode.
DVD default off-  Whenever the unit is turned on it will return to the last source selected.

Summary of Contents for Mobile Video VOD128A

Page 1: ...VOD128A 12 1 OVERHEAD LCD MONITOR WITH DVD PLAYER OPERATION MANUAL 128 8353 ...

Page 2: ...e rear of the driver s seat where it will not be visible directly or indirectly to the operator of the motor vehicle Warnings Do not use any solvents or cleaning materials when cleaning the video monitor Do not use any abrasive cleaners they may scratch the screen Use only a lightly dampened lint free cloth to wipe the screen if it is dirty Lock the LCD screen in the fully closed position when not...

Page 3: ...ia or make any adjustments to the system System adjustments can be accomplished using the remote control while seat belts remain fastened Enjoy your Audiovox entertainment system but remember the safety of all passengers remains the number one priority 12 1 TFT Thin Film Transistor Active Matrix LCD Liquid Crystal Display Monitor Built in DVD Player Auto On with Disc insertion Selectable M1 and M2...

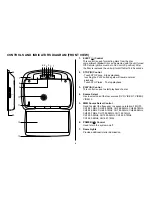
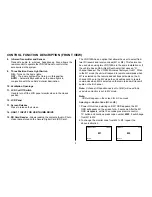
Page 4: ...ntrol This control is used to start playback of a disc 4 Source Select Use to select one of the four sources DVD VIDEO 1 VIDEO 2 VIDEO 3 5 FMM Source Select Control Used to select the frequency in sequence rotation FM OFF CH1 88 1MHz CH2 88 3MHz CH3 88 5MHz CH4 88 7MHz CH5 88 9MHz CH6 89 1MHz CH7 89 3MHz CH8 89 5MHz CH9 89 7MHz CH10 89 9MHz CH11 90 1MHz CH12 90 3MHz CH13 90 5MHz CH14 90 7MHz CH15 ...

Page 5: ...nsor Transmits audio to wireless headphones Also allows the remote control to operate the VOD128Aand to control other accessories in the system 9 Three Position Dome Light Switch ON Turns on the dome lights OFF The dome lights will not turn on in this position AUTO Automatically switches on the dome lights in conjunction with the vehicle s interior illumination 10 Ventilation Openings 11 LCD Cut O...

Page 6: ...lit when unit is turned Off for easy loading at night 1 Headphone Jack Allow the use of wired headphones with a 1 8 3 5mm plug for listening to the video program audio 2 Smart Port AUX Cable Connect Auxiliary AV Input Remark 3 PAUSE To Talk Button Allows the front seat passenger to pause the playback Pressing PAUSE again or touching the PLAY button will resume normal playback SMART PORT 1 3 2 When...

Page 7: ... remote control and slide the cover until it locks The remote control will operate the VOD128A It is not a universal remote control and will not control equipment from other manufacturers POWER SOURCE VOLUME AUTO MEMORY SKIP SEARCH ERASE WRITE FMM ON OFF RETURN DISPLAY IRT ON OFF MUTE CHANNEL SELECT DAY NIGHT PIX MONITOR SELECT M1 1 2 5 8 4 7 0 3 6 9 TV M2 DVD OK MENU RECALL REPEAT SETUP FAV ZOOM ...

Page 8: ... 1 VIDEO 2 VIDEO 3 AUTO MEMORY Button AUTO PROGRAM Button When the AUTO MEMORY button is pressed all channels are searched and channels that are detected with signals of sufficient levels are automatically stored in memory SKIP SEARCH Button This button selects between SKIP and SEARCH mode In SKIP mode the TV tuner will tune and stop on channels that are programmed into memory when the CHANNEL UP ...

Page 9: ...back DISPLAY Press to display current disc information while the disc is playing Press cursor pq buttons to select theTitle or Chapter ForTitle Chapter selection use the numeric buttons to enter the desiredTitle Chapter selection CURSOR CHANNELUPDOWN pqtu Use these buttons to navigate the menu selections on the screen Use the CHp to increase the channel number and use CHq to decrease the channel n...

Page 10: ...IOUS 9 Button Press to return to the previous chapter or track SCAN BACKWARD 7 Button Press to search in a backward direction Press repeatedly to change the search speed from 2 4 8 and 16 times the normal speed PAUSE II Button Allows the user to pause the playback Pressing pause again or pressing the Play Button will resume normal playback PLAY Button Press to activate the play mode when a disc is...

Page 11: ...FF will control the IR Transmitter for M1 Pressing M2 then IRT ON OFF will control the IR Transmitter for M2 MUTE Button Press this button to mute the audio for wireless FMM and wired headphones Pressing the button again restores the sound to the previously set level 29 30 Once Twice 3 times Repeat A Repeat A B AB Off Mark the beginning of the section to repeat Set point A Mark the end of the sect...

Page 12: ...justments are made within 6 seconds or is any other button is pressed VOLUME DOWN or UP Press to decrease or increase the level of the picture adjustments Press to decrease or increase the volume of the wired headphones NUMBER Buttons Allow the user to enter numbers 0 to 9 for selection of selection of CD tracks DVD chapters and password DVD Mode Select Button Switches certain function keys on the...

Page 13: ...e of the system menu will appear on screen Use the cursor buttons p or q to select the desired item in the main page and press the OK button to select The sub menu will appear on screen Use the cursor buttons p or q to select an item in the sub menu and then press the OK button to select Press the System Menu button to exit System Menu 1 To select the screen aspect ratio format highlight SCREEN MO...

Page 14: ...ay The user can either select English Spanish French or German for the OSD language SYSTEM MENU SCREEN MODE OSD LANGUAGE SOURCE DEFAULT DVD SOURCE DEFAULT DVD ON OFF SOURCE DEFAULT DVD This allows the user to select from DVD default on Whenever the unit is turned on it will return to DVD mode DVD default off Whenever the unit is turned on it will return to the last source selected ...

Page 15: ...Misc 2 In order to set the desired option move the highlight into the setup area using the cursor button u 3 After entering the setup area highlight the desired option using the cursor button p or q 4 Press u to move the highlight to the different options for the selected item Press p or q to select the desired options and then press OK button to confirm the selection 5 Repeat steps 3 4 to continu...

Page 16: ... AUDIO SETUP Select AUDIO using pqbutton then press ubutton to enter the Sub menu Select the audio you desire using pqbutton then press OK to confirm the setting Press tbutton to return Note The audio selection is only available for discs that are recorded in the above listed languages If the selected language is not available the player will play and display on the screen the original language co...

Page 17: ...e value the more strict the control 1 G 2 PG 3 PG 13 4 R 5 NC 17 6 Adult Parental 6 Adult Change password Enter Password Language Video Rating Misc Parental 6 Adult Change password Language Video Rating Misc Note The Default Password is 3308 This password is always effective even after you have selected your own password and changed it To avoid the possibility of others using the default password ...

Page 18: ...ng pqbutton then press OK to confirm the setting Press tbutton to return Load Factory Load Factory allows you to reset all options to factory settings This function will not affect the Rating control settings Screen Saver Off Load Factory On Language Video Rating Misc Screen Saver ON Screen saver will appear OFF Screen saver will not appear Note The DVD player will enable the Screen Saver mode if ...

Page 19: ... loops repeatedly until you turn it off Playing USB Memory Cards SD MMC MS 1 The System will detect the insertion of the USB or CARD SD MMC MS media automatically if no disc is loaded The system only auto detects the first media inserted card or USB drive the second media sourse can be manually selected by pressing the DVD sourse button on the remote control See button 36 on Remote Control 2 When ...

Page 20: ...e the highlight to the desired folder if present on the left side of the menu and press OK The songs in the folder will be displayed on screen 2 Press p or q to move the highlight to the desired track containing the song and press OK to begin track playback Skipping Songs Use the Next button on the remote control to move to the next song Use the Previous 9 button to move to the previous song The F...

Page 21: ...lay all songs on the disc repetitively 1 12 Mode Normal 002 003 004 005 006 Repeat off Music Playing 001 00 00 01 Flat Mode Mode play mode The Mode function has 4 options Normal Shuffle Random and Music Intro Move cursor to the desired Mode function and press OK Normal Shuffle Random Music Intro are selected in that order The Mode function default status is Normal Normal Play all songs in folder o...

Page 22: ...or Add to program functions are relationship related when select the preferred song add to the songs list 1 12 Add to program 002 003 004 005 006 Program view Music Playing 001 00 00 01 Edit mode Album Method To clear the selected songs program file double press stop button to the playback mode move cursor to Edit mode function and press OK After Edit mode is selected move cursor to selected songs...

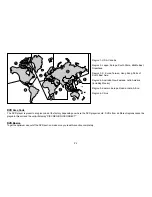
Page 23: ...re the DVD player is sold DVDs from a different regions cannot be played in this unit and the unit will display DISC REGION INCORRECT Region 1 USA Canada Region 2 Japan Europe South Africa Middle East Greenland Region 3 S Korea Taiwan Hong Kong Parts of South East Asia Region 4 Australia New Zealand Latin America including Mexico Region 5 Eastern Europe Russia India Africa Region 6 China ...

Page 24: ...riety of disc manufacturers and software playback cannot be guaranteed Loading and Playing Discs Before you load a disc make sure that it is compatible with the player Insert the disc with the label facing the driver Note the following Discs CANNOT be used with this player MiniDisc Laserdisc CD 1 CD ROM DVD ROM Super Audio CD SACD DVD Audio JPEG KODAK To load and Play a Disc Press the Power button...

Page 25: ...nit or the remote control will turn the system on and off When in use the internal backlighting will illuminate the controls on the unit 3 After the unit has been turned on and is displaying a picture adjust the viewing angle by pivoting the screen to optimize the picture quality 4 Remember to turn the unit off and pivot the LCD to the locked position when not in use Note Unit will turn On automat...

Page 26: ...or use with the supplied wireless headphones The headphone volume is adjusted using the controls on each headset Any number of wireless headphones may be used but they must be used within a line of sight from the transmitter as infrared transmissions like visible light travel only in a straight line See the documentation accompanying your wireless headphones Note If the monitor is set to M2 mode t...

Page 27: ...s theA V inputs turn the VOD128A on and press the S source button on the VOD128A or the source button on the remote control until VIDEO 2 is displayed on the screen Video Out The VOD128A provides a video output for optional video monitor s This output will provide a video signal that duplicates the signal displayed by the VOD128A to an additional monitor or video display Please see your installer ...

Page 28: ... Controller Observe the correct polarity 2 Use the ON OFF selector switch to turn on the Game Controller A list of ten games will be displayed 3 Use the A button page up or B button page down to display the three pages of games 1 10 11 20 21 30 Then use the direction buttons to move the arrow to the desired game Press Start to select the game 4 Press Start to begin the game Press Start again at an...

Page 29: ...If the regional codes don t match the disc can t be played This DVD player is set to Region Number 1 Make sure your DVD is connected properly Make sure all cables are securely inserted into the appropriate jacks If you are using the 2 channel IR headphones make sure you turn on the IR headphone power make sure the correct channel A B is selected Make sure the Modulator is ON and the proper Frequen...

Page 30: ...ware doesn t support the feature e g angles 3 The feature is not available at the moment 4 You ve requested a title or chapter number that is out of range No forward or reverse scan Some discs have sections that prohibit rapid scanning or title and chapter skip If you try to skip through the warning information and credits at the beginning of a movie you won t be able to This part of the movie is ...

Page 31: ...x 800 Operation Temperature 32 131º F 0 55º C Storage Temperature 4 158º F 20 70º C Backlit life 30 000 Hours Video Display System NTSC PAL Headphone Audio Output 0 03W 32 ohms Video Output 1 0Vp p 75 ohms Power Source 12V DC Dimension L x W x H 14 0 x 12 0 x 2 0 356mm x 305mm x 51mm Specifications subject to change without notice ...

Page 32: ... mishandling misuse neglect accident or by removal or defacement of the factory serial number bar code label s THE EXTENT OF THE COMPANY S LIABILITY UNDER THIS WARRANTY IS LIMITED TO THE REPAIR OR REPLACEMENT PROVIDED ABOVE AND IN NO EVENT SHALL THE COMPANY S LIABILITY EXCEED THE PURCHASE PRICE PAID BYPURCHASER FORTHE PRODUCT This Warranty is in lieu of all other express warranties or liabilities ...

Page 33: ......

Page 34: ......

Page 35: ......

Page 36: ...128 8353 2008 Audiovox Electronics Corp Hauppauge NY 11788 WWW ...

Reviews: