background image

16

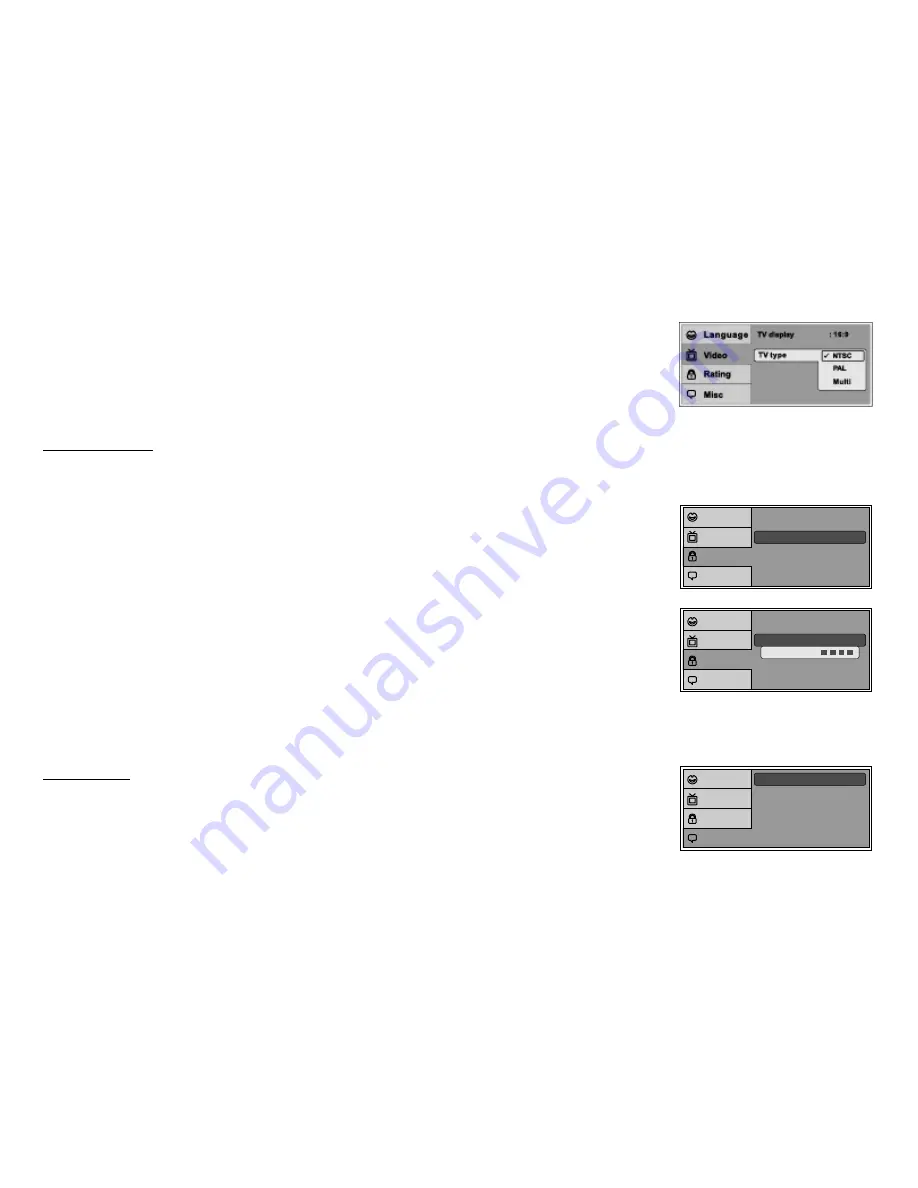
TV Type

The TV TYPE setup allows you to select the system to fit to the color system of the TV to be connected.
NTSC - Select this type for NTSC TV
PAL - Select this type for PAL TV
Multi - Select this type for multi-system TV

Screen Saver

: On

Load Factory

Language

Video

Rating

Misc

The rating level can only be changed when the displayed lock is open. For first time use, key in the 
default password (3308) and press Enter. To set a new password, key in a new four-digit password and 
press enter. 

Misc SETUP

select "MISC” using 

pq

 button, then press 

u

 button to enter the Misc menu. Select the subtitle you 

desire using 

pq

 button, then press "ENTER" to confirm the setting. Press 

t

 button to return.

RATING SETUP
Rating

This item allows you to limit the content of movie playback from G to Adult. The lower the value, the more strict the control.
G
PG
PG – 13
R
NC – 17
Adult

Parental

: 6.Adult

Password

Enter Password

Language

Video

Rating

Misc

Parental

: 6.Adult

Password

Language

Video

Rating

Misc

Note: 

The Default Password is 3308. This password is always effective even after you have selected your own password  and changed it. To avoid  the  possibility 

of others using the default password to set the parental level  and change the password, you can record this  default password in another area  and delete it from 
this manual. Some discs can be limited  depending on the age of users while some discs cannot.

Summary of Contents for MMD11 - Movies 2 Go

Page 1: ...OPERATION MANUAL 128 8290 MMD11 11 OVERHEAD LCD MONITOR WITH DVD PLAYER...

Page 2: ...ts If you have any questions regarding wire routing in a vehicle please contactAudiovoxTechnical Support at 1 800 225 6074 When connecting power and ground in a mobile video installation ensure that t...

Page 3: ...cle is not in motion and that you do not allow children to unfasten seat belts to change video media or make any adjustments to the system System adjustments can be accomplished using the remote contr...

Page 4: ...ect To increase the level of selected picture controls 5 Picture Select Button Allows the user to enter the picture adjustment mode 6 Picture Select To decrease the level of selected picture controls...

Page 5: ...in this position AUTO Automatically switches on the dome lights in conjunction with the vehicle s interior illumination 13 Ventilation Openings 14 LCD Cut Off Switch Used to turn off the LCD panel mon...

Page 6: ...erved 3 Align the cover tabs with the remote control and slide the cover until it locks The remote control will operate the MMD11 It is not a universal remote control and will not control equipment fr...

Page 7: ...UX AV1 AUTO MEMORY Button AUTO PROGRAM Button When the AUTO MEMORY button is pressed all channels are searched and channels that are detected with signals of sufficient levels are automatically stored...

Page 8: ...o movies playback DISPLAY Press to display current disc information while the disc is playing Press cursor pq buttons to select theTitle or Chapter ForTitle Chapter selection use the numeric buttons t...

Page 9: ...9 Button Press to return to the previous chapter or track SCAN BACKWARD 7 Button Press to search in a backward direction Press repeatedly to change the search speed from 2 4 8 and 16 times the normal...

Page 10: ...or OFF for IR Wireless Headphones Pressing M1 then IRT ON OFF will control the IR Transmitter for M1 MUTE Button Press this button to mute all the audio Pressing the button again restores the sound to...

Page 11: ...djustment displays the adjustment bar for BRIGHTNESS CONTRAST COLOR TINT or RESET Once the desired adjustment bar is displayed use the VOLUME VOLUME button to adjust the setting The display will autom...

Page 12: ...ge of the system menu will appear on screen Use the cursor buttons p or q to select the desired item in the main page and press the OK button to select The sub menu will appear on screen Use the curso...

Page 13: ...y The user can either select English Spanish French or German for the OSD language SYSTEM MENU SCREEN MODE OSD LANGUAGE SOURCE DEFAULT DVD SOURCE DEFAULT DVD ON OFF SOURCE DEFAULT DVD This allows the...

Page 14: ...up area using the cursor button u 3 After entering the setup area highlight the desired option using the cursor button p or q 4 Press u to move the highlight to the different options for the selected...

Page 15: ...AUDIO SETUP select AUDIO using pq button then press u button to enter the Submenu Select the audio you desire using pq button then press ENTER to confirm the setting Press t button to return Note The...

Page 16: ...you desire using pq button then press ENTER to confirm the setting Press t button to return RATING SETUP Rating This item allows you to limit the content of movie playback from G to Adult The lower t...

Page 17: ...election 2 Title Selection Press numeric 0 9 buttons to initiate a change of title selection Then press ENTER to implement the selection 3 Chapter selection Press numeric 0 9 buttons to initiate a cha...

Page 18: ...K The songs in the folder will be displayed on the screen 2 Press p or q to move the highlight to the desired track containing the song and press OK to begin track playback Skipping Songs Use the Next...

Page 19: ...ptions Normal Shuffle Random and Music Intro Move cursor to the desired Mode function and press OK Normal Shuffle Random Music Intro are selected in that order The Mode function default status is Norm...

Page 20: ...and press ENTER the following selections appear Edit Mode Browser View Clear Program Notice Edit Mode Program View Add to program functions are all related and can not be implemented during play mode...

Page 21: ...l or sound content only MP3 discs A disc that contains audio files for example a CD R with downloaded MP3 files This system is capable of playing most recordable DVD formats However due to the variety...

Page 22: ...off and pivot the LCD to the locked position when not in use Power ON OFF Button Remote Sensor Infrared Transmitter Screen Release OVERHEAD DOME LIGHTS The Dome Lights integrated into the MMD11 are co...

Page 23: ...e MMD11 on and press the source button on the MMD11 or the Source button on the remote control until AV1 is displayed on the screen Turn the audio video source component on with its power button or re...

Page 24: ...t be played This DVD player is set to Region Number 1 Make sure your DVD is connected properly Make sure all cables are securely inserted into the appropriate jacks If you are using the 2 channel IR h...

Page 25: ...are doesn t support the feature e g angles 3 The feature is not available at the moment 4 You ve requested a title or chapter number that is out of range No forward or reverse scan Some discs have sec...

Page 26: ...Pixels 1 152 000 Operation Temperature 32 131 F 0 55 C Storage Temperature 4 158 F 20 70 C Backlit life 15 000 Hours Video Display System NTSC PAL Video Output 1 0Vp p 75 ohms Power Source 12V DC Dime...

Page 27: ...neglect accident or by removal or defacement of the factory serial number bar code label s THE EXTENT OF THE COMPANY S LIABILITY UNDER THIS WARRANTY IS LIMITED TO THE REPAIR OR REPLACEMENT PROVIDED AB...

Page 28: ...2007 Audiovox Electronics Corp Hauppauge NY 11788 128 8291...

Reviews: