background image

Selecting a Play Mode

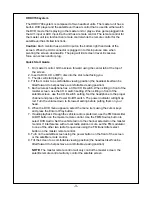
You can choose the order that the songs will play on a disc temporarily. The FOLDER play mode is
the default. To access the play mode options, press STOP if the disc is playing. Press the right arrow
button until the PLAY MODE option is highlighted. Use the up or down arrow to choose an option. The
play mode options are:

SINGLE: Play a selected song.

REP_ONE: Repeats the song that is playing.

FOLDER: Plays the folder in the order the songs were recorded.

FOLDER REP: Repeats the folder that is playing.


 •

    DISC SCAN : Plays the song for 10 second for each song in the disc.

DISC: Plays the entire disc.

•    DISC REP : Repeats the disc that is playing.

RANDOM: Plays the songs in the random order.

SHUFFLE ON: Plays the songs in random order (from within the selected folder)

PROG-PO: Plays the songs on the disc in the order you have programmed (you    must create a
playlist to set the order you want the tracks on the disc to play). When you are creating a playlist,
this option changes to PROGRAM END.

Program Play

To use the program play option, you must create a playlist of songs in the order you want them to play.

Note: Once you begin adding songs from a folder to create your play list, you cannot add songs from a
different folder.

1. Choose the PROG-PO option for the PLAY MODE.

2. Highlight and enter the folder you want to program.

3. Add songs to the program list by pressing ENTER once the song is highlighted. The song you have

chosen and the number of songs you have chosen appear at the top of the screen. For example,
if you choose the number five song within the folder and it is the first song you have chosen,
PROGRAM P01:05 appears.

4. You can continue to add songs to the list from within the same folder by using the up or down arrow

button and then pressing ENTER to add it to the list.

5. When you are done creating the list, press STOP to end the programming. Then press PLAY to

begin the program play mode.

Deleting the Playlist
To delete the entire playlist, press STOP while the disc is playing and change to another play mode.

-13-

Summary of Contents for HRDV700

Page 1: ...Monitors with Built in DVD player and Two Audio Video Input Capability Mounted in Vehicle Specific Headrests Operation Manual P OW E R S CRE E N M O DE AUX P OW E R S CRE E N M O DE AUX P LAY S TO P S OUR CE S OUR CE ...

Page 2: ...eo or DVD play the LCD panel or video monitor must be installed so that these features will only function when the vehicle is in park or when the vehicle s parking brake is applied An LCD panel or video monitor used for television reception video or DVD play that operates when the vehicle is in gear or when the parking brake is not applied must be installed to the rear of the driver s seat where i...

Page 3: ...phone has a CH A CH B switch When sitting in front of the master screen use the CH A switch setting When sitting in front of the satellite screen use the CH B switch setting Set the headphone to the proper channel and press the Power On Off switch The power indicator will light up red Turn the volume down to its lowest setting before putting them on your head 6 When the DVD menu appears select the...

Page 4: ...t ANGLE elapsed time 6 times A TO B Display A B current status elapsed time 7 times REPEAT Display REPEAT current status elapsed time 8 times Display is turn off Use cursor buttons for title chapter selection then press Enter button to implement the selection For Subtitle Audio Surround Angle A to B Repeat press Enter key repeatedly to change the options These options may vary from disc to disc Co...

Page 5: ... Button Press this button to return to the main page 11 PREVIOUS Button Press this button to return to the previous chapter or track 12 NEXT Button Press this button to skip to the next chapter or track 13 SCAN FORWARD Button Press this button to search in a forward direction at 2 4 6 and 8 times the normal speed 14 SCAN BACKWARD Button Press this button to search in a backward direction at 2 4 6 ...

Page 6: ... to point B 31 REPEAT Button Press this button to repeat various titles chapter or tracks of a DVD CD or MP3 32 SETUP Button Press this button to select the DVD player s options Display OSD Language Defaults Parental Control Password Exit Setup 33 ENTER Button Press this button to implement the setting s selected 34 MUTE Button Press this button to mute the audio headphones Pressing the button aga...

Page 7: ... the source will change in the following sequence DVD AV1 and AUX 4 PICTURE SELECT Button Each time this button is pressed the OSD will display the adjust ment bars for BRIGHTNESS CONTRAST COLOR or TINT Once the desired adjustment bar is displayed use the VOLUME UP DOWN buttons to adjust the setting The display will automati cally turn off if no adjustments are made within 6 seconds or if any othe...

Page 8: ...n DVD AV1 and AUX Button Functions HRDV700S Satellite Unit There are three 3 buttons on the front of the HRDV700S Satellite unit POWER SCREEN MODE SOURCE 1 POWER Pressing this button will turn the unit ON OFF 2 SCREEN MODE Pressing this button will select between 16 9 4 3 screen format or Screen OFF display OFF 3 SOURCE Pressing this button will select between DVD AV1 and AUX NOTE The AUX input is...

Page 9: ...e language for the on screen display Press K and then use the FG buttons to select the desired language then press ENTER to confirm your selection The user can select either English French or Spanish for the OSD language Setting the Display Press the SETUP button and select Display The DISPLAY SETUP allows you to adjust screen aspect ratio Press and then use the FG buttons to select the appropriat...

Page 10: ...put a 4 digit password in using the numeric buttons then press the Enter button The Default password is 3308 This password is always effective even after a new password has been set Setting Password Parental Control Password Press the SETUP button and select PASSWORD The PASSWORD SETUP allows you to change the parental control password Press and then press Enter OLD PASSWORD Input the old password...

Page 11: ...nt track playing and the time of that track Press DISPLAY 2x SINGLE REMAIN appears along with the current track playing the and the amount of time left Press DISPLAY 3x TOTAL ELAPSED appears along with the current track playing the total time playing on the CD Press DISPLAY 4x TOTAL REMAIN appears along with the current track playing and the amount of time left on the CD Press DISPLAY 5x Turns off...

Page 12: ... Selecting Folders and Songs When an MP3 disc is inserted in the player the Smart Nav screen appears automatically You can change folders and songs through Smart Nav The DVD player plays the songs in order they were burned on to the disc 1 If a disc is playing press STOP Press the up or down arrow button to go through the folder list on the right side of the Smart Nav screen 2 Once the folder you ...

Page 13: ...c to play When you are creating a playlist this option changes to PROGRAM END Program Play To use the program play option you must create a playlist of songs in the order you want them to play Note Once you begin adding songs from a folder to create your play list you cannot add songs from a different folder 1 Choose the PROG PO option for the PLAY MODE 2 Highlight and enter the folder you want to...

Page 14: ...priate jacks If you are using the IR headphones make sure you turn on the IRT power Make sure the FM Modulator is ON and the proper Frequency has been selected You can t advance through the opening credits and warning information that appears at the beginning of movies because the disc is programmed to prohibit that action The feature or action cannot be completed at this time because 1 The disc s...

Page 15: ... Resolution 1440 W x 234 H 3 Pixels 336 960 4 Back Light Cold Cathode Fluorescent Lamp 5 Power Source 12 VDC 6 Power Consumption 30W For 2 Monitors 1 DVD 7 Connection Terminals Power Input 12V Accessary Constant and Ground Audio Video Input Jacks RCA x3 IR Repeater 1 7pin JST connector x1 for FM Modulator 8 Operating Temperature 32 F 104 F 0 C 40 C 9 Storage Temperature 4 F 176 F 20 C 80 C 10 Vide...

Page 16: ... EXTENT OF THE COMPANY S LIABILITY UNDER THISWARRANTYISLIMITEDTOTHEREPAIRORREPLACEMENTPROVIDEDABOVEAND INNOEVENT SHALL THE COMPANY S LIABILITY EXCEED THE PURCHASE PRICE PAID BY PURCHASER FOR THE PRODUCT This Warranty is in lieu of all other express warranties or liabilities ANY IMPLIED WARRANTIES INCLUDING ANY IMPLIED WARRANTY OF MERCHANTABILITY SHALL BE LIMITED TO THE DURATION OF THIS WRITTEN WAR...

Page 17: ......

Page 18: ......

Page 19: ......

Page 20: ... Copyright 2004 Audiovox Electronics Corp 150 Marcus Blvd Hauppauge NY 11788 128 6913 999 audiovox com For Customer Service Visit Our Website At Product Information Photos FAQ s Owner s Manuals ...

Reviews: