background image

8

1.

Read Instructions - All the safety and operating instructions should be read before the
appliance is operated.

2.

Retain Instructions - The safety and operating instructions should be retained for future
reference.

3.

Heed Warnings - All warnings on the appliance and in the operating instructions should be
adhered to.

4.

Follow Instructions - All operating and use instructions should be followed.

5.

Water and Moisture - The appliance should not be used near water - for example, near a
bathtub, washbowl, kitchen sink, laundry tub, in a wet basement, or near a swimming pool,
and the like.

6.

Carts and Stands - The appliance should be used only
with a cart or stand that is recommended by the
manufacturer.

6A.

An appliance and cart combination should be moved with
care. Quick stops, excessive force, and uneven surfaces
may cause the appliance and cart combination to overturn.

7.

Wall or Ceiling Mounting - The appliance should be
mounted to a wall or ceiling only as recommended by the
manufacturer.

8.

Ventilation - The appliance should be situated so that its location or position does not
interfere with its proper ventilation. For example, the appliance should not be situated on a
bed, sofa, rug, or similar surface that may block the ventilation openings; or, placed in a
built-in installation, such as a book case or cabinet, that may impede the flow of air through
the ventilation openings.

9.

Heat - The appliance should be situated away from heat sources such as radiators, heat
registers, stoves, or other appliances (including amplifiers) that produce heat.

10.

Power Sources - The appliance should be connected to a power supply only of the type
described in the operating instructions or as marked on the appliance.

11.

Grounding or Polarization - Precautions should be taken so that the grounding or
polarization means of an appliance are not defeated.

12.

Power-Cord Protection - Power-supply cords should be routed so that they are not likely
to be walked on or pinched by items placed upon or against them, paying particular
attention to cords at plugs, convenience receptacles, and the point where they exit from
the appliance.

13.

Cleaning - The appliance should be cleaned only as recommended by the manufacturer.

14.

Power Lines - An outdoor antenna should be located away from power lines.

IMPORTANT SAFETY INSTRUCTIONS

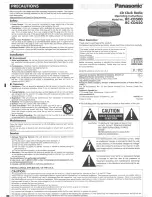
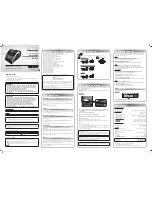
Summary of Contents for CE90

Page 1: ...BLE PARTS INSIDE REFER SERVICING TO QUALIFIEDSERVICEPERSONNEL The exclamation point within the triangle is a warning sign alerting you of important i n s t r u c t i o n s accompanying the product WAR...

Page 2: ...or chemical solvents WARNING FEATURES PRECAUTIONS To prevent fire or shock hazard do not expose the unit to rain or moisture To avoid electrical shock do not open the cabinet Refer servicing to qualif...

Page 3: ...button MIN 5 ALARM set button 6 SLEEP set button 7 SNOOZE SLEEP OFF button 8 Time display 9 Power back up battery compartment bottom 10 Radio dial scale 11 TUNING control 12 BAND selector 13 VOLUME co...

Page 4: ...ion If the AC power supply is interrupted the battery supplies power to keep the clock operating and holding the alarm time setting During power interruption the clock func tion is maintained although...

Page 5: ...hile pressing the CLOCK set button press the MIN button to the desired minute PM 12 00 NOON time and PM indicator will light up 1 Set to ON 2 Select a band 3 Tune in to a station 4 Adjust the volume 5...

Page 6: ...cel the alarm mode Press the ALARM button and it will resume after 24 hours 1 While pressing the ALARM button press the HR button to the desired hour 2 While pressing the ALARM button press the MIN bu...

Page 7: ...pprox 179x132 2x54 8mm W D H Weight Approx 560g not inculed battery Design and specifications subject to change without notice HOW TO SET THE SLEEP TIMER 1 While listening to the radio Set to OFF 2 Pr...

Page 8: ...ion or position does not interfere with its proper ventilation For example the appliance should not be situated on a bed sofa rug or similar surface that may block the ventilation openings or placed i...

Page 9: ...ld be unplugged from the outlet when left unused for a long period of time 17 Object and Liquid Entry Care should be taken so that objects do not fall and liquids are not spilled into the enclosure th...

Page 10: ...10 811 0R9691 011...

Page 11: ...EUR L INT RIEUR POUR R PARATION S ADRESSER UN R PARATEURQUALIFI Le point d exclamation l int rieur d un triangle a pour but d attirer votre attention sur des instruc tions importantes concernant ce pr...

Page 12: ...Pour viter tout risque de feu ou de choc lectrique ne pas exposer cet appareil la pluie ou l humidit Pour viter tout risque de choc lectrique ne pas ouvrir le coffret Pour toute r paration s adresser...

Page 13: ...OMMEIL SLEEP 7 Touche r p tition r veil interrupteur sommeil 8 Affichage de l heure9 Logement de la pile de secours fond 10 chelle de syntonisation de la radio 11 Molette de syntonisation TUNING 12 S...

Page 14: ...ssurera l alimentation de l horloge et maintiendra le r glage de l heure de r veil En cas d interruption de courant la fonction d horloge est maintenue bien que le t moin soit teint et que l avertisse...

Page 15: ...r la touche des minutes MIN pour effectuer le r glage appropri PM 12 00 MIDI le t moin de PM s allume 1 R gler le s lecteur de fonction la position de marche ON 2 Choisir la bande d sir e FM ou AM 3 S...

Page 16: ...era qu apr s 24 heures 1 Tout en appuyant sur la touche de r glage du r veil ALARM appuyer sur la touche des heures HR pour inscrire l heure du r veil 2 Tout en appuyant sur la touche de r glage du r...

Page 17: ...S ENDORMIR AVEC LA RADIO HOW TO SET THE SLEEP TIMER 1 Pendant l coute de la radio r gler le s lecteur de fonction sur arr t OFF 2 Appuyer sur la touche de sommeil SLEEP La radio se met en marche et s...

Page 18: ...8 811 0R9691 020...

Page 19: ...UBIERTA OTAPA NO HAYREPUESTOSUTILESPARAEL USUARIO EN SU INTERIOR SOLICITE MANTENCION AL PERSONALDELSERVICIOTECNICO CALIFICADO El punto de ex clamaci n dentro de un tri ngulo es un s gno de advertencia...

Page 20: ...Reloj desenchfe el aparato y hagalo revisar por personal calificado antes de hacerlo funcionar nuevamente ADVERTENCIS CARACTERISTICAS PRECAUCIONES Para evitar un incendio o un golpe de corriente no e...

Page 21: ...P 7 Tecla SNOOZE SLEEP OFF 8 Display de la Hora 9 Compartimiento para bater a de respaldo en la parte inferior 10 Escala del dial de la Radio 11 Control de Sinton a TUNING 12 Selector de Banda BAND 13...

Page 22: ...g a Si el suministro de energ a de Corriente Alterna es interrumpido la bater a le suministra energ a para mantener el reloj en funcionamiento y retener el ajuste de la hora de la alarma Durante la in...

Page 23: ...Mientras presiona la tecla CLOCK presione la tecla MIN hasta los minutos deseados 1 P ngalo en ON 2 Seleccione una Banda 3 Sinton cela en una emisora 4 Ajuste el volumen 5 Despu s de escuchar P ngalo...

Page 24: ...el modo de alarma Presione la tecla ALARM y au reanudar despu s de 24 houres 1 Mientras presiona la tecle ALARM presiona la tecla HR hasta la hora deseada 2 Mientras presiona la tecla ALARM presione...

Page 25: ...ntes de 59 minutos Presione la tecla SNOOZE ESPECIFICACTIONES Rango de frecuencia FM 88 108 MHz AM 530 1700 kHz Antenas FM 1 metro de cable de antena AM Antena de barra de ferrita incorporada Parlante...

Page 26: ...8 811 0R9691 061...

Reviews: