background image

3

IR TRanSMIT anD RECEIVE MoDES (M1 oR M2)

The AVXMTG12U has an option that allows the user to select from two IR transmit and receive modes (M1 or M2)�  This feature can be used when two 
AVXMTG12U units are installed in the same vehicle or if the vehicle has an RSA (Rear Seat Audio) that uses “A” channel headphones�  When in the M1 mode the 
unit will transmit audio on the A channel�  When in the M2 mode the unit will transmit audio on the B channel�  If two of these units are used in one vehicle 
it may help to mark one remote with M1 on the back and the other remote with M2 on the back�  A unit set to M2 mode will not work with a remote control 
programmed to the M1 mode�  Conversely a unit set to M1 mode will not work with a remote control programmed to the M2 mode�
To change from M1 to M2 mode, point the remote control towards the IR receiver on the AVXMTG12U� Press and hold the M2 button for 5 to 7 seconds�  The 
following screen will be displayed:


Note:  The OSD will appear on the screen for 4 – 5 seconds�
To change from M2 to M1 mode, point the remote control towards the IR receiver on the AVXMTG12U� Press and hold the M1 button for 5 to 7 seconds�  The 
following screen will be displayed:
 

Note:  The OSD will appear on the screen for 4 – 5 seconds
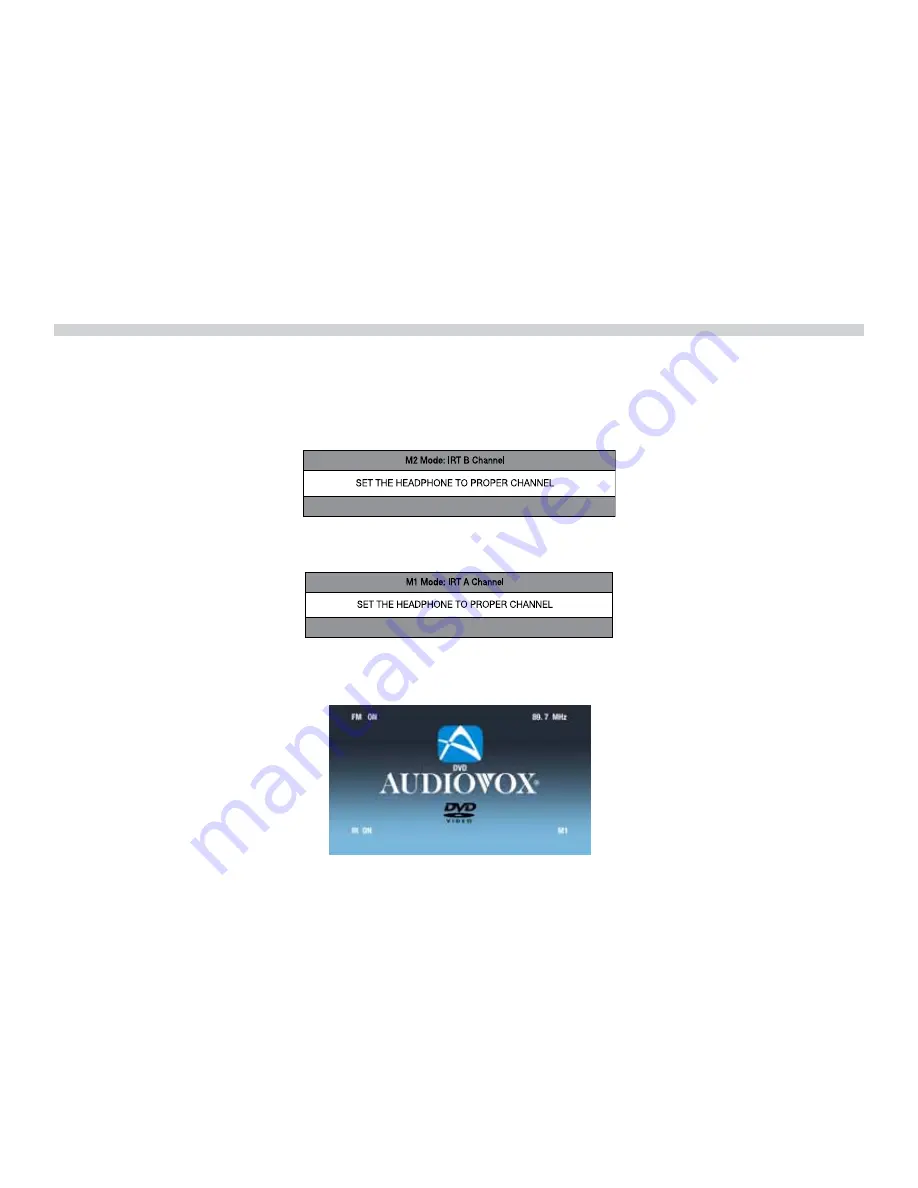
When the AVXMTG12U is powered up in DVD mode it will display the following screen showing FM Modulator status and FM channel selection as well as IR 
Transmitter status (IR ON or IR OFF) and which mode (M1 or M2) the unit is in�
 

Summary of Contents for AVXMTG12U

Page 1: ...12 1 Inch LED Backlit LCD Roof Mount DVD Player With DVD CD MP3 SYSTEM avxMTG12U Installation Guide...

Page 2: ......

Page 3: ...NTS Important Notices 2 IR Transmit and Receive Modes M1 or M2 3 Materials Included in this Package 4 Removing and Installing Snap On Covers 5 General Vehicle Installation Approach 8 Connecting the Do...

Page 4: ...e vehicle is in gear or when the parking brake is not applied must be installed to the rear of the driver seat where it will not be visible directly or indirectly to the operator of the motor vehicle...

Page 5: ...control programmed to the M1 mode Conversely a unit set to M1 mode will not work with a remote control programmed to the M2 mode To change from M1 to M2 mode point the remote control towards the IR r...

Page 6: ...e provided to facilitate installation Use extreme caution when using these screws to avoid damage to vehicle roof or other components wiring etc 5 Remote Control 1 pc 6 Mounting Bracket 1 pc 7 Snap on...

Page 7: ...ool Preparation Place the unit on a soft surface to avoid damaging the plastic Materials Required Disconnecting the Screen Cover 1 3 2 A B C C 1 Open the LCD screen 2 Insert the supplied pry tool betw...

Page 8: ...wo tabs D at the bottom edge of the screen cover into the notches on the bottom edge of the LCD screen 3 Snap the opposite side of the screen cover over the hinges 1 Open the LCD screen 2 Insert the s...

Page 9: ...7 1 2 F Installing the Shroud 1 Open the LCD screen 2 Slide the shroud over the unit The shroud will snap into place at locations F...

Page 10: ...loosely in the vehicle at their respective locations 7 Connect all components together and verify the proper operation of all system functions Note This is best done BEFORE components have been perma...

Page 11: ...crews Mounting Bracket Headliner Roof Support Roof Installing Unit to Roof CAUTION The 20mm and 40mm screws in the hardware kit are provided to facilitate installation Use extreme caution when using t...

Page 12: ...10 General Vehicle Installation Approach...

Page 13: ...n Ford vehicles On a negative switched system with all the doors closed and lights out both wires at the dome light will rest at 12 VDC When the light is activated one of these wires will switch to gr...

Page 14: ...nitor To constant 12 VDC To constant 12 VDC Factory Door Ajar Switch or Body Control Computer Red black Lamp on Black red Lamp common Purple brown Lamp Auto Positive Switched Dome Lighting To 12 pin C...

Page 15: ...constant Factory Door Ajar Switch or Body Control Computer Red black Lamp on Black red Lamp common Purple brown Lamp Auto To constant 12 VDC 12 VDC Negative Switched Dome Lighting 13 To 12 pin Connec...

Page 16: ...2010 AUDIOVOX 150 Marcus Blvd Hauppauge NY 11788 128 8991 www audiovoxproducts com 2012 AUDIOVOX 150 Marcus Blvd Hauppauge NY 11788...

Reviews: